
How to Stop Disk Check on Startup Windows 10?
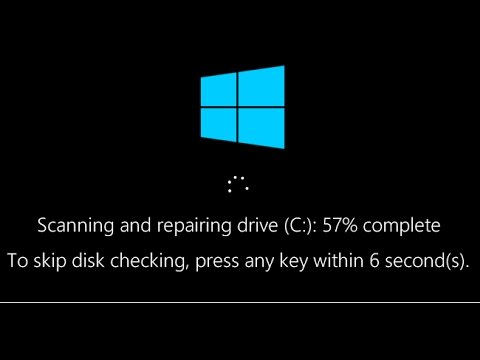
When you start your computer you will see on your monitor that saying – “To skip disk checking, press any key within 8 second(s)”. It is an annoying issue that you have to press any keys during startup every time and if you don’t click any keys within 8 seconds, then it will start disk checkup and you have to wait until it finishes.

It is normal if your computer runs a disk checkup during startup occasionally. But if you face an issue that whenever you start your computer, then it is a problem and needs to be fixed as soon as possible.
Why Does Disk Checkup Start During the Startup on Windows 10?
When a computer faces the error that the system did not shut down cleanly, then it assumes the system files or hard drive has problems and it needs a check-up. This is the main reason why your computer runs check-ups at every startup.
In most cases, this issue happens with the user if they have a faulty hard drive. So, you are recommended to back up the data on your hard disk for safety.
How to Stop Disk Check on Startup Windows 10 – Methods Showing
There are several methods to stop disk check on startup of your windows 10. The two easiest and most effective methods are mentioned in the article. Choose any of these two methods to fix the problem. If one of them fails to fix your problem, then you can try the other one.
Method-1: Stop Disk Check On Startup Via Command Prompt
Here is the instruction to help you stop CHKDSK on startup permanently:
- Click on the search bar and type cmd.
- Right-click on the Command Prompt and click the Run as Admin option.

- If your Operating System is on your C drive, then type the command and press enter after each of these commands
- below and press enter on the command prompt:
- DISM.exe /Online /Cleanup-image /Restorehealth
- SFC /scannow
- fsutil dirty query C:
- chkntfs /x C:

Note: You can type the Alphabet of the folder on which you want to disable the check-up during the startup. For example, chkntfs /x c: d: e:
Caution: Do not miss the spaces in the commands.
Method-2: Stop Disk Check On Startup Via Registry Editor
Another process of stopping check-ups during Windows startup is described in this method. Here is the instruction:
- Press the Windows key and R key simultaneously to open the Run dialogue box.
- Then, type Regedit in the Run box, and click OK to open Registry Editor.

- In Registry Editor, navigate to: HKEY_LOCAL_MACHINE\SYSTEM\CurrentControlSet\Control\Session Manager.
- After reaching the destination, double-click on the BootExecute key and delete all lines under Value data except autocheck autochk *.

After finishing these processes, close Registry Editor and restart your computer to check if it is still running disk check at startup. Hopefully, you will never face the issue this time.
Frequently Asked Questions
Why Is My Computer Running CHKDSK on Startup?
There can be many reasons of run CHKDSK automatically during startup. The possible reasons are – the computer hasn’t clean shutdown, hard drive failures, errors in the disk file system, malware or virus attack, etc. You can skip the CHKDSK process by pressing any keys within 8 seconds or let it continue which may cost you a few minutes.
How Do I Stop CHKDSK from Running Automatically at Startup in Windows 10?
You can easily stop CHKDSK at startup in Windows 10 in two different ways. You can either do it using the Command Prompt, or you can use the Registry Editor to stop it at startup.
As CHKDSK runs at startup due to hard drive failure, it is wise to check the hard drive manually on your computer. If you find any fault with your hard drive, then immediately fix it and CHKDSK won’t run at startup windows anymore.
Is It Safe to Stop CHKDSK at Startup Windows 10?
Yes, it is safe to stop CHKDSK at a startup. But as it happens due to hard drive failures, system files errors, malware or virus attack, etc. So, you have to ensure that your hard drive is normal and flawless and prevent malware or virus from your computer.
In another case, once the CHKDSK process starts, it is not safe to stop CHKDSK during its scanning. It may cause data loss, file corruption, or even system failure if you turn off your computer during the disk checking process.
How Do I Stop the Disk Checking Process in Progress on Windows 10?
Here is the process of how you can stop CHKDSK in progress:
- Open Task Manager by pressing Ctrl + Shift + Esc keys.
- Then, find the CHKDSK in the Manager window and right-click on it.
- On the Details of CHKDSK, find the PID.
- Next, open Command Prompt.
- Then type taskkill /F PID PID number in the Command Prompt.
Note: Replace “PID number” with the PID of CHKDSK.
It will force stop the CHKDSK. However, it is not a good idea to stop CHKDSK from scanning the drive. Your Windows can get stuck at repairing drive for this step. Also, it may cause data loss and damage to your hard disk.
Conclusion
There are several ways to stop disk checkups or CHKDSK at the startup of Windows 10. Here are described two easiest ways to stop it. Choose any of them wisely and you can solve this issue on your own.
Don’t forget to let us know if this guide has helped you fix the mentioned issue. Write about your experience in the comment section below and mention which method is best in your opinion. It may help us make this guide more accurate.


