During Windows installation, it is common to experience some issues. Windows cannot be installed on this drive is a common error. The big issue with this is that the Windows installation process is inhibited. The error comes with varying messages
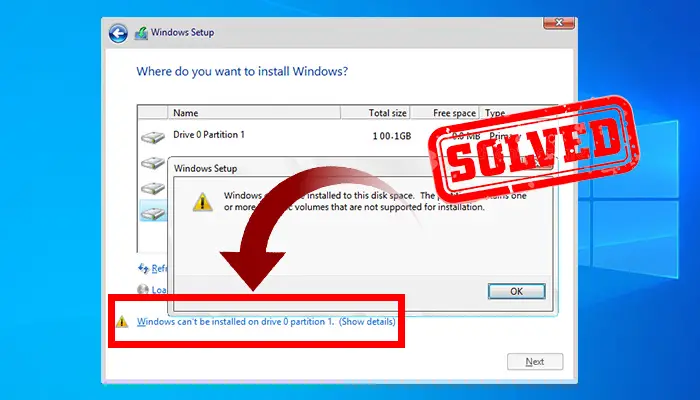
A Windows cannot be installed to Disk 0 Partition ‘n’ will show when you choose any of them. N indicates the partition. You get different messages on the three partitions and this can be quite annoying.
Reasons Behind the Error
An error message will appear when any Master File Table (MFT) is affected or if the SAS disk is experiencing problems. A notice stating that Windows cannot be installed on disk 0 partition 1 will appear on the screen. As a result of the modifications, the Windows XP partition manager (partmgr.sys) becomes no more in communication with the device driver.
Windows will not be able to install on the disk 0 partitions. While installation Of the new on your pc, you are likely to encounter one mistake. Even if this occurs and you click on the ‘Next’ button on the screen, the new error message will appear.
Well before installing process is completed, you will see a warning stating: Windows was unable to install to the selected location.
Troubleshooting ‘Windows Can’t Be Installed to Disk 0 Partition 1’
The very first step you need to do is rearrange the partitions on your computer’s hard disk. Windows includes a Disk Management system in which you have to rearrange the partitions on your hard drive. It is really simple and beneficial.
Another thing to consider is that if you use such pre-installed utility in Windows improperly, it could cause your partitions can become unusable. You may potentially lose access to critical files.
You must make a backup of your folders before beginning to alter the partitions. You don’t make a minor blunder and probably lose all of your data because of it. This is particularly true if you are already executing tasks on a computer running Windows.
Method 1: Delete the Partition with Windows Disk Management Tool
Most likely, you do not understand the use of keeping the partitions of your system. If it is the situation, you can remove them using the Windows CD Management utility that comes also with the installation disk. The following are the measures to take to do any of this.
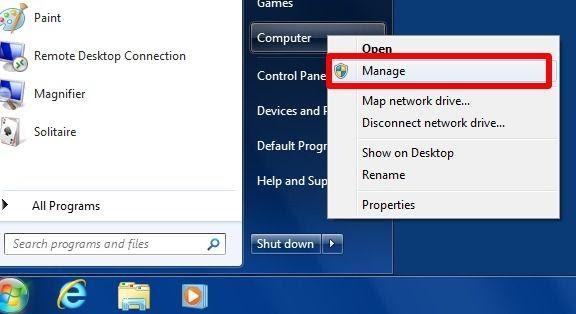
Step 1: First, you have to hit on the “Start” icon and then select “Computer” from the drop-down menu. Then choose “Manage” from the drop-down option. This will be the procedure for gaining access to the Disk Management tool. While using your Windows 10, it will be much simpler. The only thing you have to do is hit just on the “Start” option to bring menu options, and then choose “Disk Management.”
Step 2: You have to left-click on the partition to make it visible. You’ll see “Drive settings (advanced),” which is a blue link that you have to select from the dropdown menu. Then select the “Delete” button from the drop-down menu.
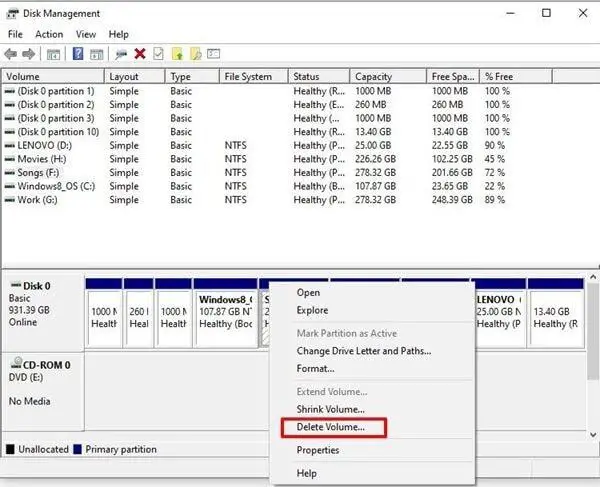
Please remember that this will be performed for every partition here on the listing. When this is properly done, the message “Disk 0 Unallocated Space” appears on the screen. This displays only a single entry.
Step 3: you will have to keep installing updated Windows. For doing so, continue to press the “Next” option on your computer’s clock.
By following step 3, you will avoid receiving the message “Windows cannot be installed on drive 0 partitions 1” when installing Windows 10.
It is critical to remember that when you install Windows 10, a private “System Reserved” disk will be formed on your computer. This partition has a total size of approximately 100MB. It includes the recovery framework as well as the boot media. Check that you have a backup file once you begin deleting anything.
Method 2: Run DiskPart
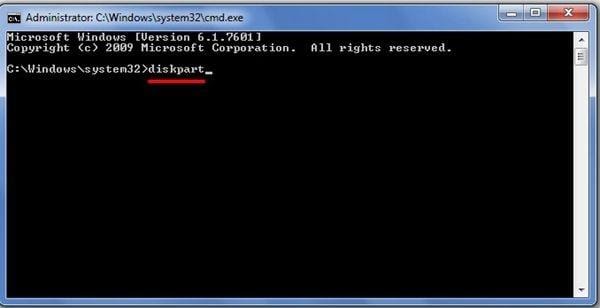
The second option makes use of the DiskPart component. The very first step that you will have to do is begin the Windows installation, which will take some time. Selecting the hard drive on which you would like to install Windows would be prompted by the computer system. Because you don’t have to do anything, it isn’t difficult to complete. To enter a DOS panel, hold down the “Shift+F10” key combination. They need both to be tapped at a time to be functional.
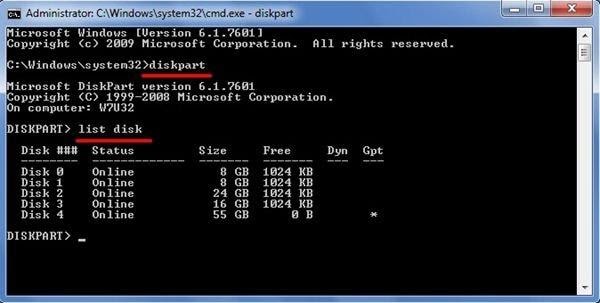
Step 1: You can alternatively follow the instructions in this section. To use the diskpart cmd, type it into the command prompt. DISKPART will be displayed as a result of clicking on this link. Again when the command is already typed, the DISKPART command line will be presented on the computer screen.
Step 2: using the diskpart command, then the “List Disk” command will be the next process you need to run. It provides a list of all of the disks which are currently linked to your computer. You would see Disk 0 once they are placed on the screen.
Step 3: After you have viewed Disk 0, the next step is to begin working with it. Selecting it is required in this process. This command “select disk 0” or the entire phrase “select disk 0” has to be typed to perform this. This entry will work as well as any of them.
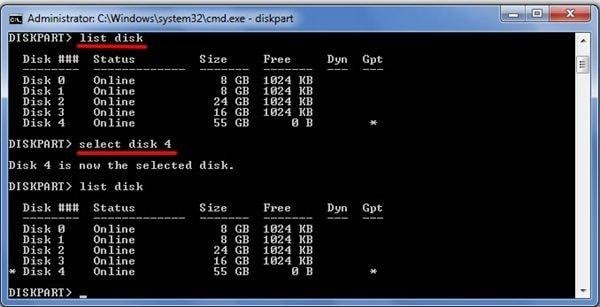
Step 4: This step is extremely important because it completely deletes the secured section along with everything else in drive 0. Before executing the command, double-check that Disk 0 has been selected. Then, as your last command, type “clean” to complete the process.
If you complete step 4 properly, all partitions on your hard drive will be deleted, and you’ll get a completely new disk. It just takes a few moments for this command to be completed. The next step is to shut down the DOS window completely. The assignment has not been done as of yet. Pick “Next” after clicking “Refresh,” now on the specified disk, and afterward select “Refresh.” You are to be able to continue with the Complete installation when you have completed this step.
Method 3: To Prevent Compatibility With Earlier Partitioning Frameworks, Delete Your Drive
One method of resolving the above-mentioned problem is to delete the partition on which Windows will be installed, thereby removing any incompatibility that might cause the process to be interrupted. To do so, follow the simple steps outlined below:
Step 1: Remove the partition
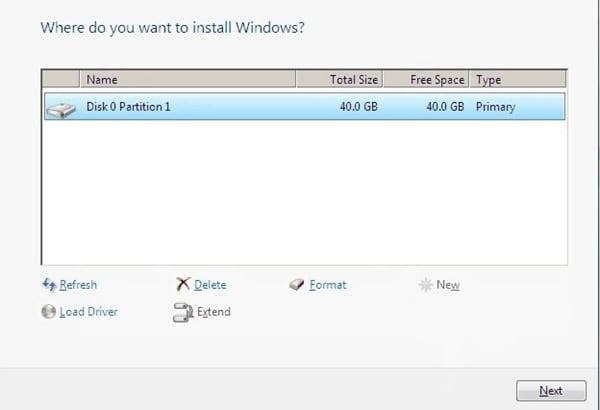
You can test the partitions when using a custom installation configuration. To completely remove Windows from the partition in which place you have to install, click on the “Delete.” A pop-up window appears asking you to confirm that you want to proceed with this task.
Step 2: Make a new partition on your hard drive.
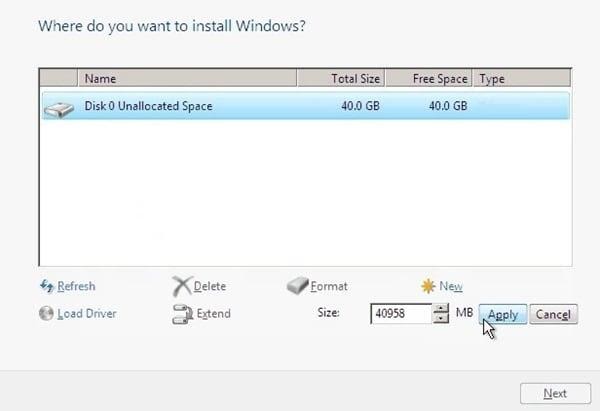
Select “New” from the drop-down menu, and then adjust the partition’s size if necessary. When you’re finished, click “Apply,” and your partition would be generated. You can proceed with the Windows installation by pressing the “Next” button.
Select the appropriate booting item, either Legacy BIOS (Basic Input Output Device) and otherwise UEFI, for your computer.
According to the configuration of your drive, you need to enable booting. GPT (GUID Partition Table) is suitable with UEFI, as well as for MBR, it would be preferable to boot via Legacy BIOS; however, when there is no suitable boot mode, a multitude of errors will be displayed on the screen. You only need to perform the following steps in terms of changing the booting setup:
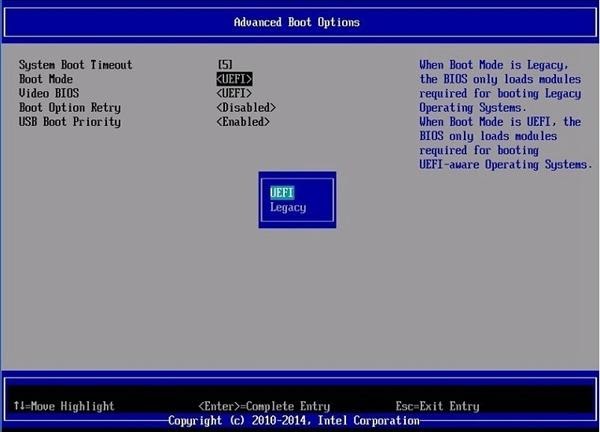
Press the F1, F2, F10, F11, or F12 keys while your desktop is going to start up. To access the firmware configurations, press F1. “Advanced Boot Options” should be selected first, followed by “Boot Mode,” which should be entered by pressing “Enter.” Change the settings to UEFI or Legacy, and then press “Enter” once more to complete the procedure. Simply restart your computer, and now the latest settings will also be applied automatically.
Method 4: Change the GPT Partitioning Table to Mbr
Changing the configuration from GPT to MBR will be necessary if you have a small hard drive and would like to install an earlier edition of Windows on it. To complete this procedure, you just need to complete the following steps:
Step 1: Navigate to Disk Management.
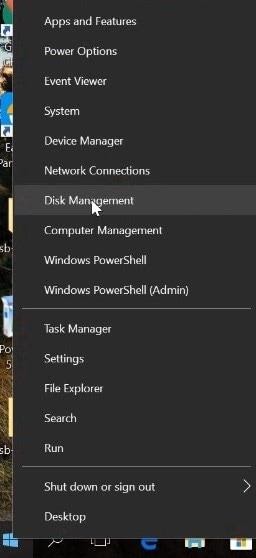
Select “Disk Management” from the context menu of the Windows button.
Step 2: Delete the entire volume
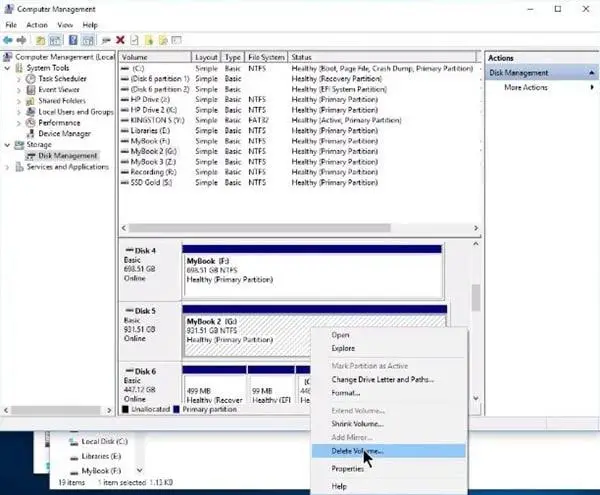
Locate the disk on which you would like to install Windows and insert it. Now, you have to right-click on just a blank spot and pick “Delete Volume…” from the context menu. It’s important to remember that if you choose this item, all of your data will indeed be deleted.
Step 3: Convert the GPT disk to an MBR disk.
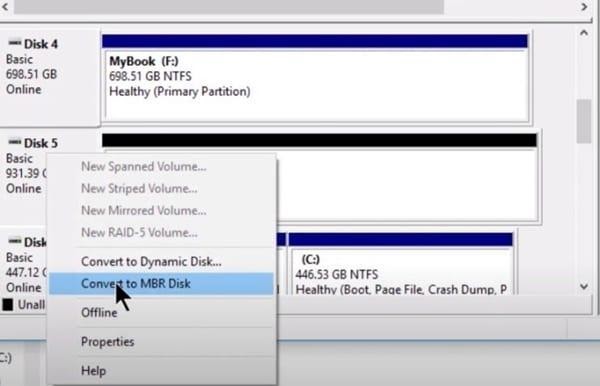
After deleting volume, right-click on the same blank space next to the disk title and click “Convert to MBR Disk.” The partition style will be updated and changed to MBR.
Step 4 : Assign volume
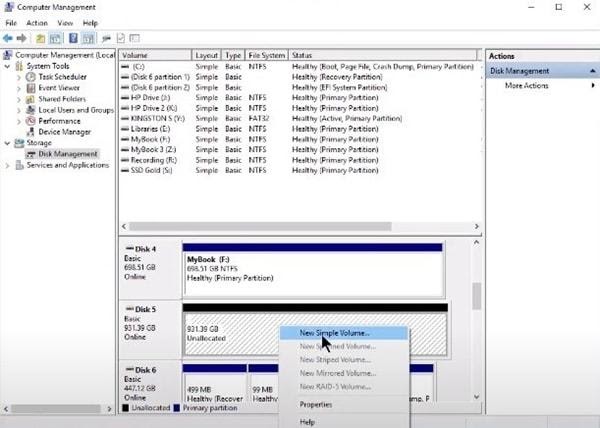
Step 5: Once you have deleted the volume, you will find the disk unallocated that you can’t use. Now, just right-click on a free space beside the title of the disk and choose ‘New Simple Volume….’.
Step 6: Afterwards, you’ll be prompted to enter the volume size as well as the drive letter, after which the disk will indeed be configured so that you can use it once more.
Conclusion
Windows cannot be installed on drive 0 partitions 1 and other similar errors are common. Particularly when the selected disk has such an invalid partition table format set inside the Firmware, this is the case. While installing, the partitioning process has to be compatible with windows and configured correctly.
![Read more about the article [Fix] PCR7 Binding Is Not Supported | Device Encryption Failures (100% Working)](https://wingeek.org/wp-content/uploads/2022/01/PCR7-Binding-Is-Not-Supported-300x171.jpg)
![Read more about the article [Fix] Another Installation Is in Progress (100% Working)](https://wingeek.org/wp-content/uploads/2021/11/Another-Installation-Is-in-Progress-1-300x171.jpg)
![Read more about the article [Fix] ‘TILEREPOSITORYS -1-5-18 | Error -1023 (0xfffffc01)’ in Windows 10 (100% Working)](https://wingeek.org/wp-content/uploads/2022/07/tilerepositorys-1-5-18-error-0xfffffc01-300x171.jpg)
