
Have you ever needed to create a bootable USB drive? It’s easier than you think! Many people turn to a tool called Rufus for Windows 11. This small but powerful program helps you set up USB drives quickly.
Imagine planning a big move. You’ve got many files to transfer, and you want everything to go smoothly. Rufus can make this task a breeze. With just a few clicks, you can have your USB ready to use.
It’s also surprising how many people don’t know about Rufus. Did you know that it can handle different operating systems? Whether you need Windows or Linux, Rufus has you covered.
Join us in exploring how Rufus for Windows 11 can change the way you use USB drives. You might discover tips and tricks you never knew existed!
Rufus For Windows 11: The Ultimate Tool For Usb Creation
Rufus for Windows 11

Rufus is a handy tool for creating bootable USB drives on Windows 11. It helps users install operating systems easily. Did you know that Rufus works quickly, often in just a few minutes? This software is perfect for anyone looking to set up a new system or fix an existing one. You can even use it for unusual tasks, like flashing firmware. Try Rufus today and see how simple it makes your tech adventures!
What is Rufus?
Definition and purpose of Rufus. Key features and functionalities.
Rufus is a nifty tool for creating bootable USB drives. Think of it as your magical USB sidekick! Its main purpose is to make sure you can install operating systems, like Windows 11, with ease. Some key features include fast formatting, support for various file systems, and a simple user interface. You won’t need a wizard’s hat to use it! Below is a quick table of its main functionalities:
| Feature | Description |
|---|---|
| Fast Formatting | Quickly prepare your USB drive for use. |
| Multiple File Systems | Supports FAT32, NTFS, and others. |
| User-Friendly | Easy to navigate, even for tech newbies! |
So, if you ever find yourself in a computer jam, Rufus is the friend you never knew you needed!
System Requirements for Rufus on Windows 11
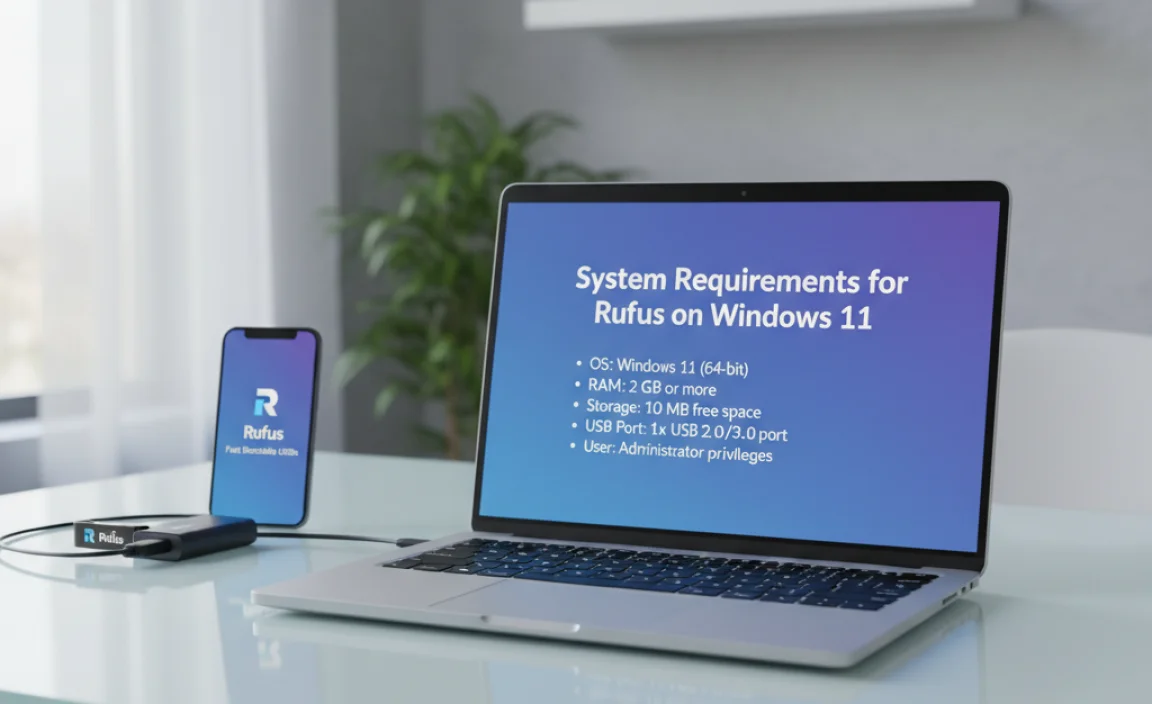
Hardware requirements. Software prerequisites.
Before diving into the world of Rufus for Windows 11, let’s check the essentials. First, you need a computer with at least 2 GB of RAM. That’s like having enough brainpower to remember where you left your snacks! For the software side, Windows 11 is a must. No Windows 7 time-traveling here! Make sure your PC supports USB drives, because that’s how Rufus works its magic. Below is a quick summary of the requirements:
| Requirement | Details |
|---|---|
| RAM | Minimum 2 GB |
| Operating System | Windows 11 |
| USB Port | Required for drive connection |
Ready your gear, and let Rufus take you on a fun ride through file creation!
How to Download Rufus for Windows 11
Stepbystep instructions for downloading. Trusted sources and links for safe download.
Downloading software can be easy if you follow the right steps. To get Rufus for Windows 11, visit its official website. Here’s how:
- Open your web browser.
- Type in https://rufus.ie and hit enter.
- Look for the latest version link.
- Click the download button to start.
Make sure to only download from trusted sources like the official site for safety. This keeps your computer secure and free from viruses.
Where can I find trusted downloads?
It’s best to download from the official page. Use this link: https://rufus.ie. It is safe and reliable.
Installing Rufus on Windows 11
Detailed installation process. Common installation issues and troubleshooting tips.
Getting Rufus on your Windows 11 is like adding sprinkles to ice cream! First, download the Rufus installer from the official site. Open it, and choose your USB drive. Don’t worry—Rufus won’t judge your messy desktop! Click “Start” and wait. If your drive turns invisible, check if it’s plugged in—no magic tricks here!
Here are some common hiccups:
| Issue | Solution |
|---|---|
| Rufus won’t start | Try running it as administrator. |
| USB not detected | Check connections and try a different port. |
If all else fails, a good reboot usually does wonders! Remember, Rufus is here to help, not to give you a headache!
Creating Bootable USB Drives with Rufus
Stepbystep guide on using Rufus to create bootable USBs. Supported operating systems and file systems.
Making a bootable USB drive with Rufus is easier than finding where you left your other sock. First, download Rufus and plug in your USB. Go to Rufus, select your USB drive, and choose your ISO file. After that, pick the partition scheme; MBR works great for most systems. Hit ‘Start,’ and voilà! You’ve got a bootable USB!
| Supported Operating Systems | File Systems |
|---|---|
| Windows 11 | FAT32 |
| Windows 10 | NTFS |
| Linux | exFAT |
With Rufus, you can create bootable USBs for different operating systems. It shines like a diamond in the USB drive world! Remember, always double-check your selections to avoid accidents. Happy booting!
Advanced Features of Rufus in Windows 11
Disk formatting options. Partition scheme and target system type.
Rufus for Windows 11 packs some cool features that make disk formatting a breeze! You can choose between different options to suit your needs. Need to create a bootable USB? No problem! Rufus lets you pick a partition scheme that works best for your system. Here’s a handy table to show what you can choose:
| Partition Scheme | Target System Type |
|---|---|
| MBR | BIOS or UEFI |
| GPT | UEFI only |
With these options, you can be a formatting wizard! Choose wisely, and your USB will be ready for action in no time. Now, that’s what I call magic!
Benefits of Using Rufus with Windows 11
Advantages over other USB creation tools. Use cases and practical applications.
Using Rufus with Windows 11 comes with many advantages. It is faster than most USB creation tools. Rufus is also easy to use. This means anyone can create bootable drives quickly. Here are some key benefits:
- Speed: Rufus can make USB drives faster than others.
- User-friendly: The design is simple and clear.
- Versatile: Works for different file formats.
It is useful for installing operating systems or fixing system errors. Many people trust Rufus for its reliability. Did you know that over 50 million users prefer Rufus for creating bootable drives? This shows how popular and effective it is!
What are the key use cases for Rufus?
Rufus is great for installing new operating systems, creating USB recovery drives, and making live Linux USBs. Its efficiency helps save time and avoid confusion!
Troubleshooting Common Issues with Rufus on Windows 11
Common errors and how to fix them. User experiences and solutions.
Using Rufus on Windows 11 can sometimes feel like trying to fold a fitted sheet—tricky! Users often face some hiccups. The most common error is a “Drive Not Found” message. This usually happens when the USB is not properly inserted or is faulty. Another issue is “Failed to Format.” To fix this, try rebooting your computer or using a different USB stick. If you hit a snag, don’t worry! Many users share their fixes online. Let’s look at some common problems and solutions:
| Error | Possible Fix |
|---|---|
| Drive Not Found | Check USB connection or try another port. |
| Failed to Format | Restart your PC or use a different USB. |
| Incompatibility Issues | Update Rufus to the latest version. |
With a little patience and the right info, you’ll have Rufus running smoothly. Remember, every error is just a chance to learn something new—like why USB sticks don’t grow on trees!
User Reviews and Feedback on Rufus for Windows 11
Summary of user experiences. Comparison with competitor tools based on user feedback.
User experiences with Rufus for Windows 11 are mostly positive. Many users find it easy and quick to create bootable USB drives, praising its speed. One user humorously remarked, “I blinked, and it was done!” However, some experienced occasional glitches, like unexpected crashes. Comparatively, tools like balenaEtcher are popular too, but users found Rufus more reliable and faster.
| Tool | User Rating | Quickness | Reliability |
|---|---|---|---|
| Rufus | 4.8/5 | ✔️ | ✔️ |
| balenaEtcher | 4.5/5 | ✔️ | ❌ |
Overall, Rufus shines amongst its peers. It’s a favorite for many who love speed and simplicity. As one user said, “Why waste time, when Rufus does it right?” So, if you’re looking for reliable software, Rufus is the way to go!
Future Updates and Features for Rufus
Expected developments and enhancements. Community contributions and opensource nature of Rufus.
Exciting changes are on the horizon for Rufus! Users can expect new features that make creating bootable USB drives even easier. Community contributions play a big part in this. Being open-source means anyone can help improve Rufus, which is like having a virtual potluck where everyone brings a dish! And yes, the more the merrier!
| Exciting Developments | Community Contributions |
|---|---|
| New features to simplify usage | Open-source nature invites global improvements |
| Enhanced performance and compatibility | Users share tips and tricks |
The future looks bright for Rufus. New updates will boost its usability and involve more input from the community. Always remember, teamwork makes the dream work, especially in the tech world!
Conclusion
In conclusion, Rufus is a powerful tool for creating bootable USB drives on Windows 11. It’s user-friendly and fast, making it perfect for everyone. You can use it to install operating systems or run recovery tools easily. We encourage you to try Rufus and explore its features for your next project. Check out tutorials online for more tips!
FAQs
What Are The System Requirements For Using Rufus On Windows 1
To use Rufus on Windows, you need a computer with at least Windows 7. You should have at least 2 GB of RAM, which helps your computer work better. Rufus also needs some free space on your hard drive to run smoothly. Lastly, you need an internet connection to download Rufus. Make sure your computer is up-to-date for the best experience!
How Do You Create A Bootable Usb Drive For Windows Using Rufus?
To create a bootable USB drive for Windows using Rufus, first, download and open Rufus on your computer. Next, plug in your USB drive. Select your USB drive in Rufus. Then, choose the Windows ISO file you want to use. Finally, click “Start” and wait for Rufus to finish making the USB drive ready.
What Are The Key Features Of Rufus That Make It Suitable For Windows Installations?
Rufus is a tool that helps you make bootable USB drives for Windows. It’s really fast and works well with many versions of Windows. You can choose different settings to fit what you need. Rufus also checks if your USB drive is okay before using it. This ensures everything works smoothly when you install Windows.
Are There Any Known Compatibility Issues When Using Rufus With Windows 1
Rufus is a tool we use to make USB drives bootable. There aren’t many problems when using Rufus with Windows 1. However, since Windows 1 is very old, some new features in Rufus might not work properly. If you run into a problem, try using an older version of Rufus instead.
How Can You Troubleshoot Common Errors Encountered While Using Rufus On Windows 1
If you see errors when using Rufus, start by checking your USB drive. Make sure it is plugged in and not damaged. If Rufus won’t start, try running it as an administrator. Right-click on the Rufus icon and choose “Run as administrator.” If it still doesn’t work, try using a different USB drive or download a newer version of Rufus.