
How to Remove Green Check Marks on Desktop Icons?
Green check marks on desktop icons point out that the file is backed up to the OneDrive cloud successfully.
However, you want to remove the check marks. Many other OneDrive users also want to uncheck them as well. But, the removing process is rarely found indeed.
Empathized with your situation, I write this article. Conceivably, it will help to remove the green mark from your desktop icon.
Six Methods to Remove Green Check Marks on Desktop Icons
Here I compile six possible methods to remove the green check marks. Before diving into the details, let’s have a glimpse at the list first.
- Method 1: Close OneDrive
- Method 2: Pause Syncing
- Method 3: Stop Backup
- Method 4: Unmark ‘Always keep on this device’
- Method 5: Utilize ‘Free up space’
- Method 6: Rebuild Icon Cache
Method 1: Close OneDrive
Simply stopping OneDrive can be a method. While trying it, OneDrive will not backup files from your device anymore until you open OneDrive again. And in response, the green check marks won’t be visible.
Step 1
Check the ‘System Tray‘ to find OneDrive icon.
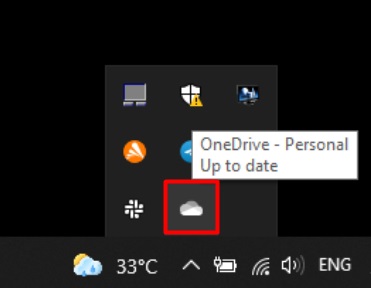
Step 2
Right-click on the icon.
Step 3
Consequently, the ‘Close OneDrive‘ option will become evident on the screen with other settings options. You have to click on it.

After closing OneDrive, check the green mark. Hopefully, it will be gone.
Method 2: Pause Syncing
You can pause the syncing operation instead of closing OneDrive. The method is temporary and can apply for a couple of hours (e.g, 2 hours, 8 hours, or 24 hours).
I will describe the method step by step below.
Step 1
Go to ‘System Tray‘ again. You have to click on the OneDrive icon.

Step 2
Next, select ‘Help & Settings‘ option.

Step 3
Consequently, you will see the ‘Pause syncing‘ option in the new interface among some other options. You have to select hours then.

According to your selection, the desktop file data syncing will stop. There will be no more green mark on the desktop icon for the certain hours you selected.
Method 3: Stop Desktop Backup
OneDrive keeps backup your desktop as an individual folder. While the desktop is fully backup, the green mark appears on the icon.
You can stop the desktop backup process by following the below steps to remove the green check marks.
Step 1
Firstly, you have to work with ‘Help & Settings’ section again. To do so, open ‘OneDrive’ from ‘System Tray’ as you do previously. While clicking on the ‘OneDrive’ icon, you will see the ‘Help & Settings’ section. You have to select it.
Consequently, the ‘settings‘ option will appear on the screen with other options. Select it.

Step 2
Then, you have to tap the ‘Backup‘ tab.

Step 3
Next, you will see the ‘Manage backup‘ option. Click on it.

Step 4
After that, you have to look at the ‘Desktop‘ portion. You will find the ‘Stop backup‘ option here.

By clicking on it, the backup process will resume. Then check the desktop icon. Will it hold the green mark still? The possible answer will be no. In case, if it exists, you try the next one.
Method 4: Unmark ‘Always keep on this device’
OneDrive-synced file contains an ‘Always keep on this device’ option. By which, OneDrive keeps a backup of the file for offline access. The green mark may appear for the reason too.
You can unmark the option to remove unwanted green marks. But you have to keep in mind that once you unmark it, you need an internet connection each time to use the file from your device.
To conduct the unmark process, you need to right-click on the green mark desktop icon. While a new interface with some actionable options will appear, click on the ‘Always keep on this device‘ option to unmark it.

You can do the same for the other green marked desktop icon too. As a result, there will be no green mark anymore.
Method 5: Utilize ‘Free up space’
You will get another option for OneDrive-synced file by which you can remove the green check marks. It will be ‘Free up space’. Once you try it for any file, OneDrive will keep the backup of the entire file data and clean them from the device storage. In the meantime, the green check mark won’t appear on the icon.
Here you also right-click on the green marked desktop icon one by one. You have to select ‘Free up space’ from the newly appeared interface. Consequently, the green mark won’t exist on the desktop icon anymore.

Method 6: Rebuild Icon Cache
Somehow, if the green check mark still exists, the probable cause may hide behind the icon cache corruption. In that case, you can rebuild the icon cache. To do that, you need to apply the following steps.
Step 1
Right-click on the ‘Start’ menu and select ‘Windows PowerShell (admin)‘ to open the command window.

Step 2
You have to copy the following commands one by one and paste them into the command window. Press ‘enter‘ each time you paste a command.
‘taskkill /IM explorer.exe /F’
‘del /a /q “%LOCALAPPDATA%\IconCache.db”’
‘Del /a /f /q “%LOCALAPPDATA%\Microsoft\Windows\Explorer\iconcache”’

Step 3
After completing the process, you have to restart the computer. Then check the desktop icon. I assume that no green mark will exist.

Final Words
In addition, green check marks on desktop icons don’t represent any errors. Moreover, these are OneDrive signs to indicate that the icon’s files are fully syncing with OneDrive. It means that check marks may not harm your file, but you can remove them by applying the described method.


