
A factory reset for Windows 10 restores your PC to its original settings, like when you first bought it. It’s a powerful fix for stubborn problems, performance slowdowns, or before selling your device. This guide walks you through the simple steps to safely reset your Windows 10 PC yourself.
Is your Windows 10 computer acting up? Maybe it’s running super slow, showing strange errors, or just not behaving like it used to. It’s frustrating when your trusty PC lets you down, isn’t it? Don’t worry, though! There’s a powerful solution that can often fix a ton of these issues: a factory reset.
Think of it like giving your computer a fresh start. This guide will show you, step-by-step, exactly how to perform a factory reset on your Windows 10 machine. We’ll cover what it is, why you might need it, and what you absolutely must do before you begin. Let’s get your PC running smoothly again!
Why a Factory Reset Might Be Your Best Option

Sometimes, even with the best care, Windows 10 can become bogged down. Over time, software installations, updates, driver conflicts, and persistent malware can leave your system in a messy state. When all the usual tricks – like restarting, running troubleshooters, or deleting old programs – don’t work, a factory reset is a fantastic tool in your arsenal. It’s like hitting the refresh button on your entire operating system.
A factory reset can help with:
- Performance Issues: Speeding up a sluggish computer.
- Persistent Errors: Fixing recurring software glitches or blue screen errors that won’t go away.
- Malware Removal: Getting rid of stubborn viruses or malware that antivirus software can’t fully eliminate.
- Software Conflicts: Resolving issues caused by incompatible or poorly installed programs.
- Preparing to Sell or Give Away: Wiping your personal data securely before passing your PC on.
Before You Hit the Reset Button: Essential Preparations
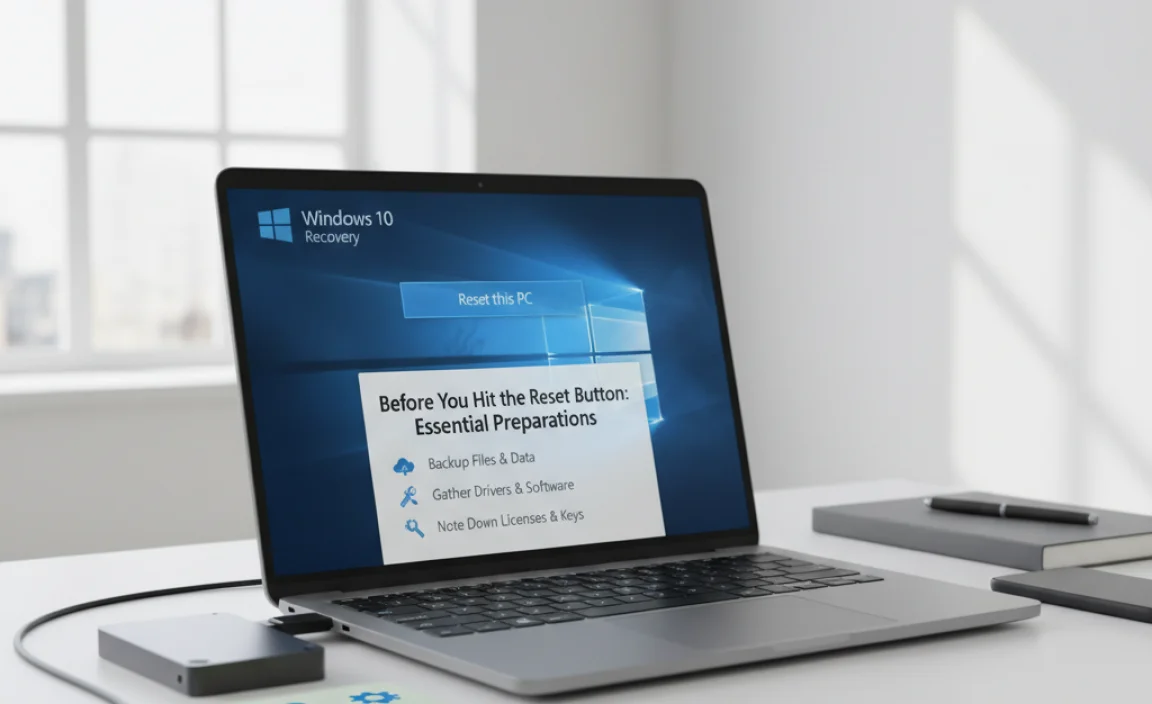
This is the most crucial part! A factory reset essentially reinstates Windows to its like-new condition. This means it will remove your installed applications and settings. If you have files you want to keep, you absolutely must back them up first. Skipping this step is the quickest way to lose precious photos, documents, and other important data. Mike’s golden rule: Always back up first!
1. Back Up Your Important Files
This can’t be stressed enough. Before you do anything else, save copies of your essential files. Consider the following methods:
- External Hard Drive or USB Drive: Copy your documents, pictures, videos, and any other files you want to keep onto an external storage device.
- Cloud Storage: Services like OneDrive (which is built into Windows 10), Google Drive, Dropbox, or others are excellent for backing up important documents and photos. Make sure everything you need is synced and uploaded.
- Network Attached Storage (NAS): If you have a NAS device on your home network, you can back files up there.
Think about what truly matters: family photos, work documents, important projects, creative files, game saves, and anything else you can’t easily replace. It’s better to back up too much than too little!
2. Gather Your Software Installation Media and Product Keys
After a factory reset, all your installed applications will be gone. You’ll need to reinstall them. If you have software that required a product key or license, make sure you have those readily available. This is especially important for older versions of Microsoft Office or other paid software.
For many modern applications, especially those you’ve downloaded from the Microsoft Store, you can simply sign in with your account to reinstall them. But for specialized software, having the installer files and license keys is a lifesaver.
3. Ensure Your PC is Plugged In
The reset process can take some time, often an hour or more. You absolutely do not want your laptop to run out of battery halfway through, or your desktop PC to lose power. Plug your laptop into its power adapter, and ensure your desktop has a stable power source.
4. Note Down Your Wi-Fi Password
Once the reset is complete, Windows will guide you through the initial setup, and one of the first things it will ask for is your Wi-Fi or internet connection. Having your network password ready means you can get back online quickly without searching for it.
5. Understand Your Reset Options
Windows 10 offers two main options when you reset: “Keep my files” and “Remove everything.” It’s vital to understand the difference to avoid accidental data loss.
Here’s a quick breakdown:
| Option | What It Does | Best For |
|---|---|---|
| Keep my files | Removes apps and settings, but keeps your personal files (documents, pictures, etc.). It reinstalls Windows. | When you’re experiencing minor issues like slowdowns or app glitches, and you want to keep your data without a full manual backup. Still recommended to back up important files as a precaution. |
| Remove everything | Removes all personal files, apps, and settings. Reinstalls Windows and brings your PC back to its original factory state, like brand new off the shelf. | When selling or giving away your PC, or when dealing with severe malware or deep system issues where you want a completely clean slate. This option ensures no personal data is left behind. |
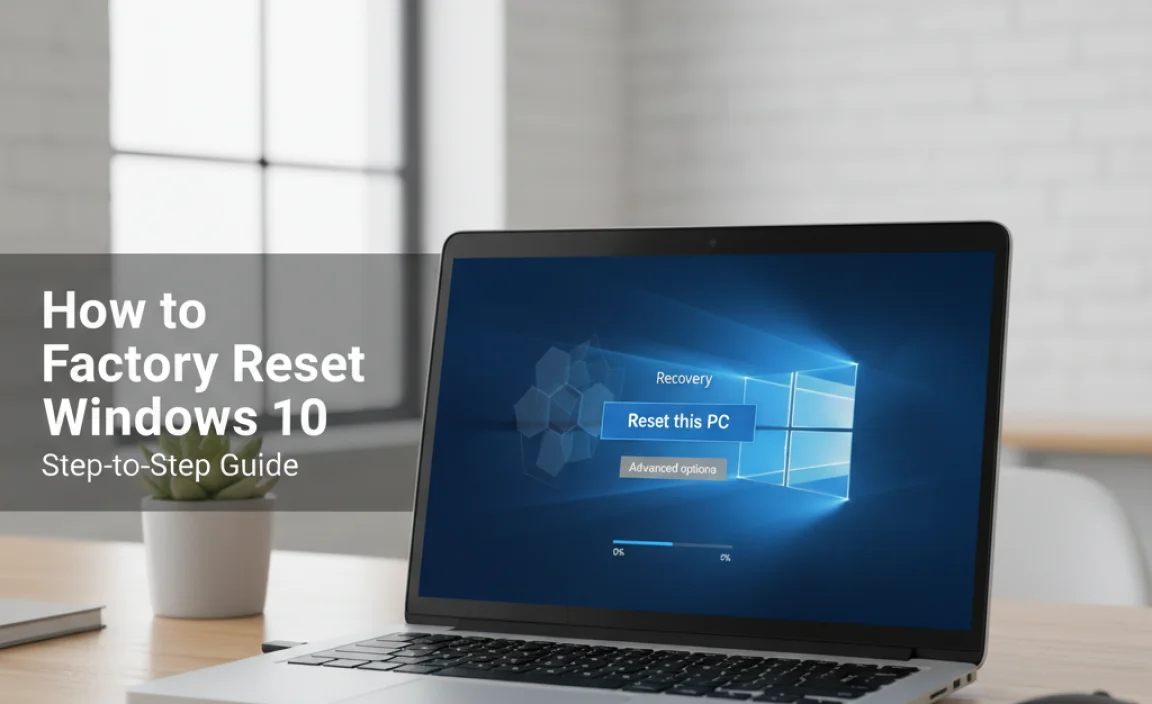
How to Factory Reset Windows 10: Step-by-Step Guide
Now that you’ve backed up your data and gathered your essentials, let’s dive into the actual reset process. This is straightforward, and Windows guides you through each step.
Method 1: Using the Settings App (Recommended for Most Users)
This is the easiest and most common way to perform a factory reset. Make sure your PC is connected to power.
-
- Open Settings: Click the Windows Start button (the Windows logo in the bottom-left corner of your screen), then click on the gear icon to open the Settings app.
- Go to Update & Security: In the Settings window, click on “Update & Security.”
- Select Recovery: On the left-hand menu, click on “Recovery.”
- Choose “Get started” under Reset this PC: You’ll see an option that says “Reset this PC.” Click the “Get started” button below it.
- Choose Your Reset Option: This is where you select either “Keep my files” or “Remove everything.” Based on our explanation above, choose the option that best suits your needs. Remember, “Remove everything” will delete all your personal files.
- “Cloud download” or “Local reinstall”: Windows 10 might give you a choice between reinstalling Windows using a cloud download or a local reinstall.
- Cloud download: Downloads a fresh copy of Windows from Microsoft’s servers. This is often best if you suspect your current Windows files might be corrupted. It requires a stable internet connection.
- Local reinstall: Uses the files already on your PC to perform the reset. This is faster if your internet connection is slow or unreliable.
For the best results, especially if you’re trying to fix persistent problems, the “Cloud download” is often recommended. If you choose “Local reinstall” and it fails, you might have to try again with “Cloud download.”
- Review Additional Settings (if applicable): If you chose “Remove everything,” you might see a screen asking about cleaning the drive.
- Just remove my files: This is faster and is fine if you’re keeping the PC.
- Remove files and clean the drive: This makes it much harder for someone to recover your files later. It’s more thorough and takes longer. Choose this if you’re selling or donating your PC.
- Confirm and Reset: You’ll see a summary of what will happen. Read it carefully. Once you’re ready, click “Reset.”
Your PC will now restart and begin the reset process. This can take a significant amount of time, so be patient. You’ll see progress indicators on your screen.
Method 2: Advanced Startup Options (If Windows Won’t Boot Properly)
What if your Windows 10 is so broken that you can’t even get into the Settings app? Don’t despair! You can access the reset option through the Advanced Startup environment.
Here’s how to get there:
- Force Shutdown and Reboot:
- Turn on your PC. As soon as you see the Windows logo or the spinning dots, press and hold the power button until the PC shuts down completely.
- Repeat this process two more times.
- On the third startup attempt, Windows should automatically enter the Windows Recovery Environment (WinRE).
- Access Troubleshoot: Once in the Windows Recovery Environment, you’ll see a blue screen with options. Click on “Troubleshoot.”
- Select Reset this PC: On the Troubleshoot screen, click on “Reset this PC.”
- Choose Your Reset Option: You will then be presented with the same two options as in Method 1: “Keep my files” or “Remove everything.” Follow the remaining steps as outlined from Method 1, step 5 onwards.
This method is a lifesaver when your operating system is too unstable to navigate normally.
After the Reset: Setting Up Your Fresh Windows 10
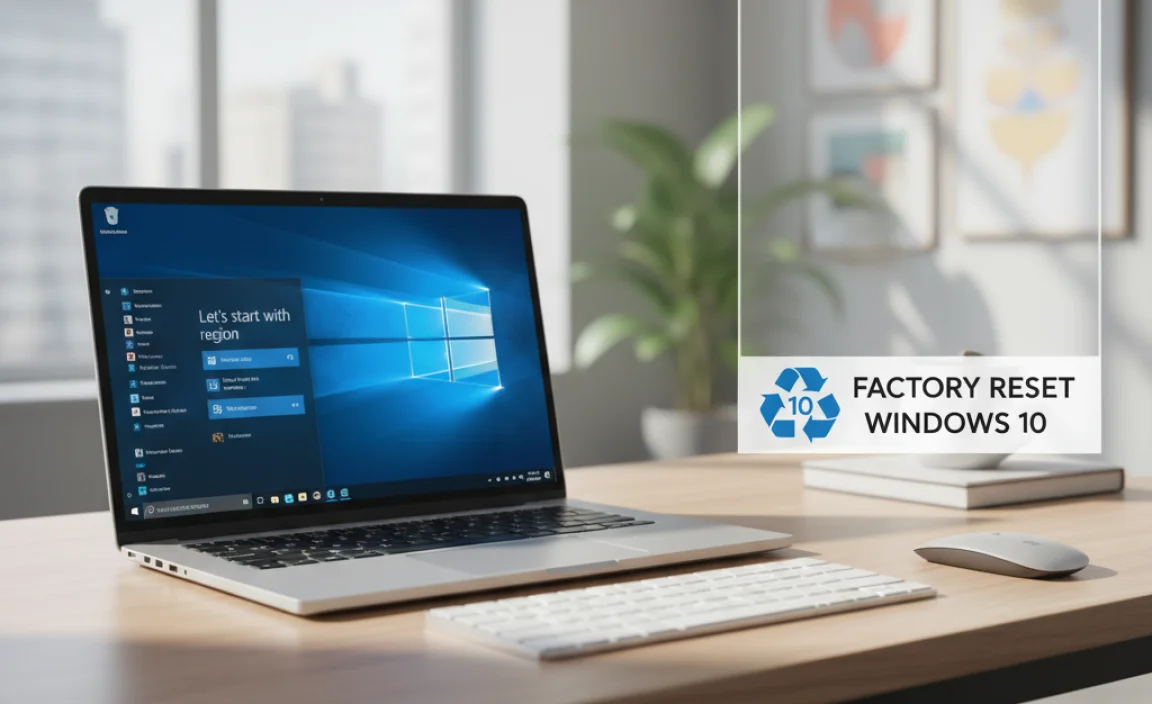
Once the reset is complete, your PC will restart, and you’ll be greeted with the familiar Windows setup screens. It will feel like setting up a brand new computer.
- Welcome and Region: Select your region and language.
- Keyboard Layout: Choose your keyboard layout.
- Connect to a Network: Connect to your Wi-Fi network using the password you prepared.
- License Agreement: Accept the Microsoft license terms.
- Sign in with your Microsoft Account: You’ll be prompted to sign in with your Microsoft account. This is important for syncing settings and accessing the Microsoft Store. If you prefer a local account, you might need to click “Offline account” or “Limited experience” (this option can sometimes be a bit hidden depending on the Windows version).
- Create a PIN: Set up a PIN for faster sign-in.
- Privacy Settings: Review and adjust your privacy settings.
- Cortana (Optional): You may be asked if you want to set up Cortana.
After these initial steps, Windows will finalize your setup, and you’ll arrive at your shiny, clean desktop. Congratulations, you’ve successfully reset your PC!
Reinstalling Your Applications and Restoring Files
Now it’s time to get your computer back to being your computer:
- Reinstall Apps: Go to the Microsoft Store or the websites of your favorite software and reinstall your essential applications.
- Restore Files: Copy your backed-up files from your external drive or cloud storage back onto your PC. Place them in their original or preferred locations (Documents, Pictures, etc.).
- Check for Updates: Immediately go to Settings > Update & Security > Windows Update and check for new updates. Your system will likely have a lot of updates to download and install to bring it up to the latest patch. This is crucial for security and performance.
- Update Drivers: While Windows Update handles many drivers, it’s a good idea to visit your computer manufacturer’s website (e.g., Dell, HP, Lenovo) and download the latest drivers for your specific model, especially for graphics, network, and audio.
Tips for Keeping Your Windows 10 PC Running Smoothly
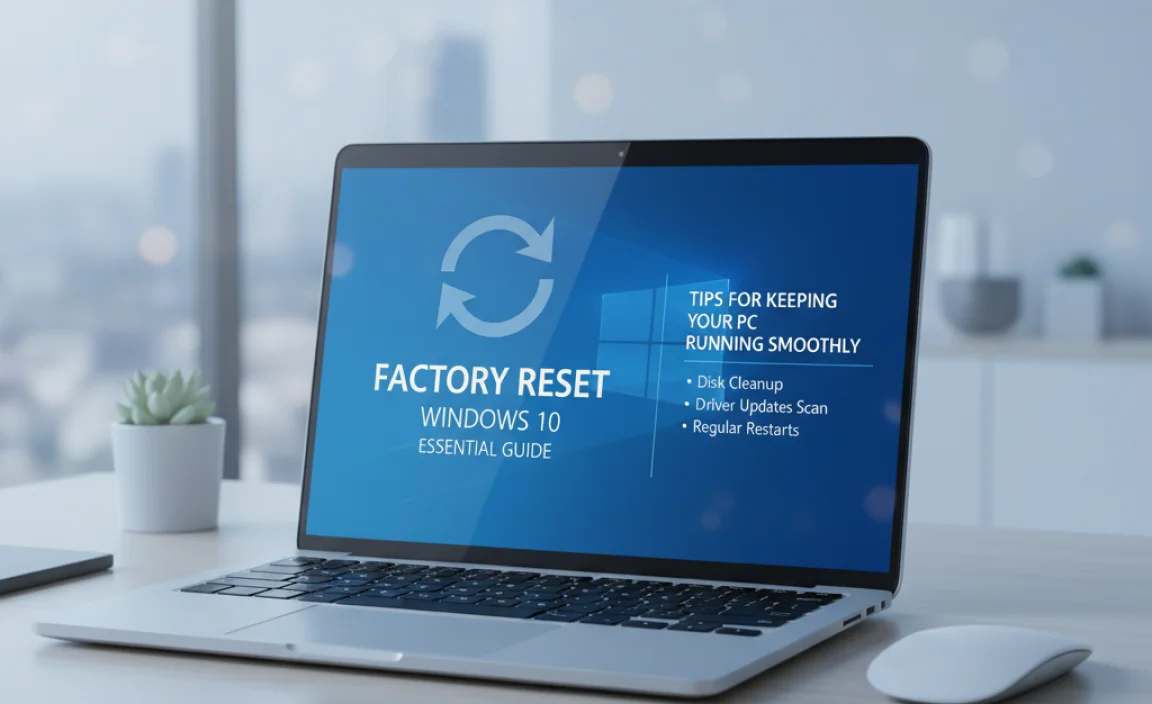
A factory reset is great, but ongoing maintenance is key to preventing future slowdowns. Here are some tips:
- Regularly Update Windows: Don’t ignore Windows updates. They contain vital security patches and performance improvements. Enable automatic updates.
- Use Reliable Antivirus Software: Keep your antivirus software up to date and run regular scans. For added protection, consider Windows Security (Microsoft Defender Antivirus), which is built into Windows 10. You can find more information on keeping your PC secure from official sources like the Cybersecurity & Infrastructure Security Agency (CISA) at cisa.gov.
- Be Mindful of Software Installations: Only download software from trusted sources. Be cautious during installations and uncheck any bundled extra software you don’t want.
- Disk Cleanup and Defragmentation: Periodically run Disk Cleanup (search for it in the Start Menu) to remove temporary files. For traditional Hard Disk Drives (HDDs), run Disk Defragmenter. SSDs don’t need defragmentation.
- Manage Startup Programs: Too many programs starting with Windows can slow down boot times. Open Task Manager (Ctrl+Shift+Esc), go to the “Startup” tab, and disable programs you don’t need to run immediately upon startup.
Frequently Asked Questions About Factory Resetting Windows 10
Q1: Will a factory reset delete my personal files?
A: It depends on the option you choose. The “Keep my files” option will preserve your personal files, while “Remove everything” will delete them. Always back up your important files first, just to be safe!
Q2: How long does a factory reset take?
A: The process can vary greatly, but typically it takes anywhere from 30 minutes to a couple of hours, depending on your PC’s speed, whether you choose a quick or deep clean of the drive, and if you opt for a cloud download.
Q3: Can I cancel a factory reset once it starts?
A: Once the reset process has begun, it’s generally not recommended or easy to cancel. It’s best to ensure you’ve completed all preparation steps before clicking “Reset.”
Q4: What’s the difference between “Keep my files” and “Remove everything”?
A: “Keep my files” removes apps and settings but keeps your personal documents, photos, etc. “Remove everything” wipes your PC clean, removing personal files, apps, and settings – essentially returning it to its original state.
Q5: Do I need an internet connection to factory reset Windows 10?
A: You don’t strictly need an internet connection for the “Local reinstall” option. However, if you choose “Cloud download” (which is often recommended for cleaning a problematic system), a stable internet connection is necessary.
Q6: My PC is infected with malware. Will a factory reset remove it?
A: A factory reset, especially the “Remove everything” option with drive cleaning, is highly effective at removing most malware. It essentially reinstalls Windows from scratch, which usually gets rid of persistent infections. However, it’s always wise to run a reputable antivirus scan after the reset.
Conclusion
Performing a factory reset on your Windows 10 PC might seem like a drastic step, but it’s an incredibly effective way to resolve many persistent issues and bring your system back to optimal performance. By carefully preparing, backing up your important data, and following the straightforward steps outlined in this guide, you can confidently reset your PC and enjoy a fresh, clean experience.
Remember, a factory reset is a powerful tool for troubleshooting and maintaining your computer. Don’t be afraid to use it when needed. With a little preparation, you can tackle common PC problems yourself, saving time and hassle. Keep your Windows updated, stay vigilant about security, and you’ll be well on your way to a reliably running computer. You’ve got this!