
[6 Fixes] Display 1 isn’t active
On Windows 10, it’s possible that your older display 1 isn’t active if you’re having problems with the connected drivers as well as hardware. But if your pc is functioning correctly, there are a number of troubleshooting measures you can take on including installing updated drivers) that may have your problem resolved in no time.
In this article, I’ll show you three methods to detect and resolve problems that may be preventing your computer from activating display 1.

How to Solve Display 1 Isn’t Active on Windows 10 Issue
There are some proposed methods that you can try to fix this problem. These methods are the following:
Method 1: Install the Previous Video Driver
There are times when the most recent drivers do not function correctly on Windows 10. By restoring your video driver (also known as the “display driver”) to an earlier version will allow you to fix your issue.
Step 1: To open the Run dialog box, tap the “ Windows key +R ” altogether from your keyboard. This will bring up the menu.
Step 2: In the text box, enter devmgmt.msc and hit the Enter key.

Step 3: Now, go to the Display adapters panel. Then, find the display device software option and right-click on it, and choose Properties.

Step 4: Navigate to the Driver section, then choose Roll Back Driver, and afterward follow the procedures that appear on the screen.

Remember: Whether the Roll Back Driver choice is unavailable, you can either try to download an older version of the video driver for your DVD drive again from the official site of its company and install the software.
Step 5: When the process is finished, restart your pc and check to see whether Windows is able to activate your monitor after the restart.
Method 2: Update Your Current Video Driver
Even the rolling back your DVD driver doesn’t somehow make Windows 10 active on your display, then you need to update the video driver to fix the issue.
Step 1: Navigate to Device Manager and right-click on your video driver.

Step 2: Select Update Driver and then click Update Automatically.

Step 3: Follow on-screen prompts to update the video driver.
If these don’t work, then you can use any third-party software to update the Automatically updating driver. A third-party software named Driver Easy will instantly detect your computer and search for the appropriate driver for your specific video card as well as the version of Windows 10 that you are using.
Here are the steps to follow for updating drivers using the third-party app –
Step 1: Simply download the Driver Easy installation program.
Step 2: Start Driver Easy and afterward select the Scan Now option on the main menu.
Step 3: After that, Driver Easy will do a scan of your pc to look for any problematic drivers.
Step 4: Select the Update All option from the drop-down menu to have your system immediately set up the most recent and up-to-date version including all drivers which are absent or not functioning properly.
Step 5: You will need to reboot your pc before checking to see whether your display is active or not.
Method 3: Ensure the Same Refresh Rates for Both Displays
When the screen refresh rates of both of your displays are mismatched, there is a high possibility that display 1 will not be active. Ensure your display is set to the same refresh rate by following these steps:
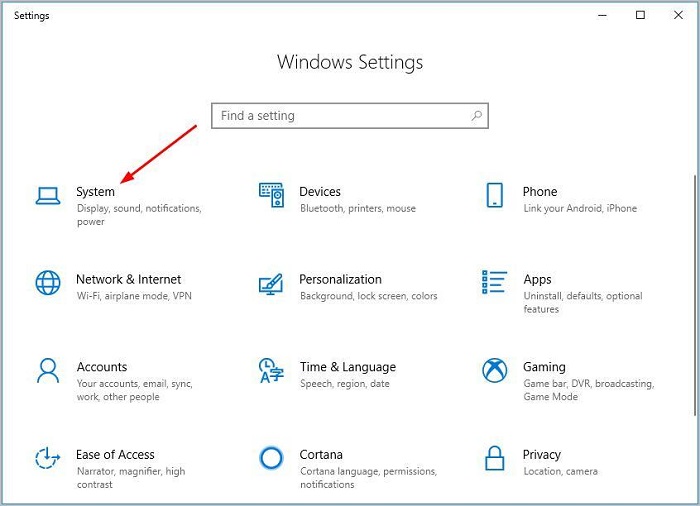
Step 1: First, you need to press Windows key+ I altogether to open Settings.
Step 2: Inside the pop-up panel for Settings, select the System option.
Step 3: From the Display section, select the button labeled Advanced display options.

Step 4: After that, hit the Display adapter properties for Display 1, following which you should hit the Display adapter properties on Display 2.

Step 5: Within the Monitor area, check the refresh rates of the screen for both displays.
5a) If indeed the rates are not the same, you must adjust either one of them so that they are both the same. The next step is to make sure that your other monitor is successfully detected after you have done saving your modification by selecting Apply and then OK.
5b) Proceed to another fix after determining whether or not the rates have already been fixed at the very same level.

Method 4: Alter Your Project Mood
The improperly set project mode is probably the reason why your display 1 can’t be identified at times. By following these two simple procedures, you can change the mode of the project in a display:
Step 1: On your keypad, press the Windows key + P altogether to open the Project menu.
Step 2: Pick the Duplicate option if you really want the very same screen to appear on both of your displays simultaneously time.
Step 3: Finally, choose the Extend option when you want to increase your revenue in the workplace. Restart your pc to check if it works or not.

Method 5: Update the Graphics Driver
If the graphics driver is not updated, you may face this error. Follow these procedures in order to bring your graphics card drivers updated using Windows Update:
Step 1: First, open Settings.
Step 2: Then, Select “Update & Security” from the menu. Now, simply select the Windows Update option.
Step 3: Next, select the option to View optional updates. if the selection is not present, Windows Update may not have a more recent driver version available for download.
Step 4: After that, choose the option to update the driver software. Windows 10 may have an outdated graphics driver; check for updates.
Step 5: After you have finished the procedures, Windows Update automatically installs the GPU driver on its own, which will resolve the problem with detecting display 1.
Step 6: If the Software does not provide a more latest driver edition, you should visit the computer manufacturer’s official website to locate, download, as well as install the most recent available edition of the driver (if available).
Method 6: Reinstall the graphics driver
Sometimes reinstalling the graphics card can solve this issue. Follow these instructions to replace damaged video drivers on a computer running Windows 10:
Step 1: First, go to Start. Simply search for “Device Manager,” and when you find it, click on the first result to launch the application.
Step 2: Then, double-click on the Display adapters section to expand it.
Step 3: Now, right-click here on the adapter, and then choose the Uninstall device option from the context menu. Remove the checkmark from the box labeled Delete the driver software from this device.
Step 4: Next, hit the button labeled “Uninstall.” Then, you need to restart the pc.
Step 5: After that, open up the Device Manager on your computer. The software will have to recognize the display once more on its own automatically. If it can’t find automatically, you are able to restore the display by manually searching for modifications.
Step 6: Choose the option to “Scan for hardware changes” by using the right mouse button on the device’s name.
Step 7: When you’re done, Windows 10 will auto-reinstall this driver. To ensure successful driver installation, however, it’s necessary to follow the steps properly.
Conclusion
Display 1 isn’t active is a very common error for many windows users. If you facing such issues, consider the above methods to fix the error. If you know the reason why this error occurs, then follow the corresponding steps to solve it. Before applying any method, first, check your operating system.


