
[Fix] Critical System Driver Is Missing or Contains Errors Windows 10 (100% Working)
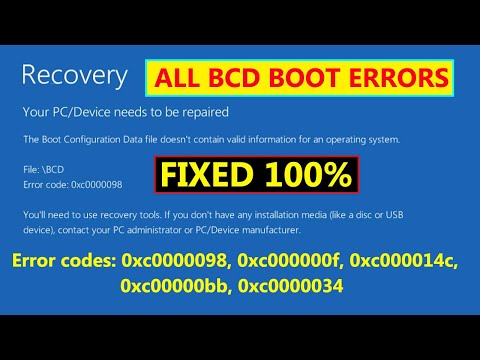
Usually when Windows OS is loaded when switching a computer on. But sometimes, if a system file is corrupted or missing, the OS won’t boot properly and show an error. The error message can vary depending on the type of driver or file that is missing. Some of the most common error codes are 0xc0000098, 0xc0000221, 0xc0000225, 0xc000000f, 0xc000014C, 0xc0000034 etc.

However, the error codes and the errors themselves are very similar. Therefore, the solutions are very simple to follow as well. But before that, you should know what causes these errors to happen.
What Causes the Error to Show Up?

Simply put, if a system file or driver is corrupted or missing, that’s when this error message shows up. For example, if a Boot Configuration Data (BCD) file is missing, or if the Windows OS was not installed properly, some drivers or files may be missing or corrupted. And the qevbda.sys file is also sometimes responsible for the error to happen.
How to Fix the “Critical System Driver Is Missing or Contains Errors” Issue?

The error messages could be different, but some common solutions work for most of the error codes. Here are some of the solutions that will help you fix the error in question:
1. Check for Faulty External Drivers
You might face a boot-time error if one or more external devices is being problematic. Your hard disk, USB, keyboard, or mouse could be the culprit behind the issue. Try unplugging all of them and then boot the computer. If it boots normally then plug the devices in one by one to see which one is responsible for the issue.
2. Check System Drivers for Issues
For your Windows to run properly, device drivers play an important role. But the drivers need to stay updated at all times. Otherwise, you’ll run into many different issues including your PC not booting correctly.
Because your PC is having trouble booting, you can try updating your existing drivers or installing new ones through safe mode. Follow these steps to boot into Safe Mode on Windows 10:
- When your PC is booting, hold down the power button when the Windows logo appears. This will force the shutdown of the PC.
- Repeat the process three times and let the PC boot normally on the fourth time. From here you’ll enter winRE.
- From the Choose an option screen, select Troubleshoot.
- Select Advanced Options and then select Startup Settings.
- Click on the Restart button and from the list that shows up after, press 5 or F5 to boot the computer in Safe Mode with Networking.
- After the computer boots in safe mode, open the Device Manager and try updating the drivers manually.
- If a driver icon has a yellow exclamation mark or a red X, then that means it needs to get updated.
- Right-click on the driver with such marks and select Update driver.
- If there is no Update available, right-click on that driver and select Uninstall device.
After you uninstall the drivers, restart the PC. Windows will now detect and reinstall all the missing devices and drivers.
3. Delete qevbda.sys File and Faulty Drivers
If you know exactly which driver is causing the error, you can delete it from safe mode using the command prompt. Follow the simple steps below:
- Boot the PC in Safe Mode using the process shown above.
- Open the Run window, type cmd in the search bar, and hit Enter to open the command prompt.
- Enter the following command:
cd…
cd windows\system32
del netqevbda.inf
Once completed, delete the qevbda.inf file or any other faulty driver as well.
4. Repair Corrupt System Files
Windows 10 is equipped with various tools to defend against itself and fix or repair corrupted system files. System File Checker (SFC) can remove any unwanted files that are harming your PC. Follow the simple method below to execute a few commands using SFC:
- Boot your PC in Safe Mode as shown above.
- Open the Run window and type cmd.
- But instead of pressing Enter, hit Ctrl + Shift + Enter to open the command prompt as an administrator.
- Click Yes to allow the command prompt to open as administrator.
- Now type sfc /scannow and press Enter.
It will take some time to process and once completed, the error should be resolved.
5. Perform a System Restore
You can try and restore the system to a state where everything was working properly. But you will need to have an idea of when the error took place. Do the following to perform a system restore:
- Boot your PC in Safe Mode as shown above.
- Type Create a restore point in the taskbar’s search option.
- Click on System Restore. This might take a while. Wait for it to prepare the automatic system restore process. Click Next when done.
- Now you can select a restore point and click on Next when done.
- Click Finish.
Windows will now start the restore process. Once completed, you should be able to boot into your PC normally.
Frequently Asked Questions (FAQs)
What is a BCD file?
Boot Configuration Data (BCD) files provide a store. It is used to describe the boot application and its settings. BCDEdit is a command-line tool used for managing BCD. It can also be used for creating and modifying stores, adding boot menu options, etc.
Does reinstalling Windows fix registry errors?
Yes, reinstalling Windows completely resets the computer and reinstalls all the drivers and system files. As a result, the registry errors caused by faulty drivers or corrupted files are fixed.
Conclusion
Lastly, we hope that the above-mentioned solutions were able to help you fix the issue. Every error can be fixed but it is possible that not every solution might work. But don’t worry as there is always a last resort. Try backing up all your data and then reinstalling Windows 10. Reinstalling Windows will fix all issues you are facing and also lowers the possibility of facing them again.


