It has been reported by many Windows 10 users that they can use only 8 GB of 16 GB RAM. It is really an unacceptable matter that half of the RAM remains unused.
Usually, a small amount of RAM is reserved in the system, and it remains unusable. If you can use 14 or 15 GB out of 16 GB RAM, then it’s normal. But if you see only 8 GB out of 16 GB is usable then it is not a normal case, and it needs to be fixed.
So, if you are looking for a solution to get rid of this problem, then you are in the right place. We have the perfect solution to this problem here in this article.
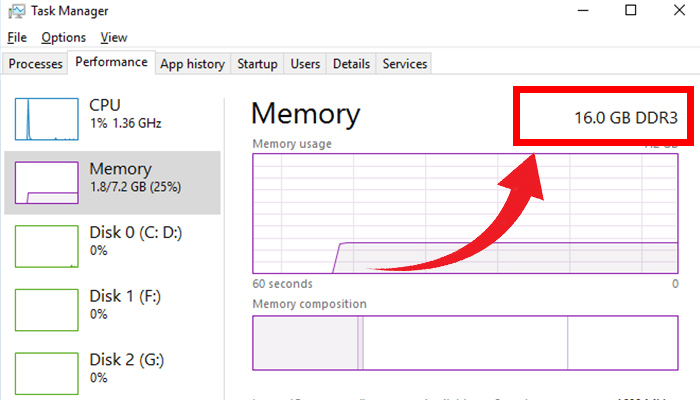
Why Only 8GB Is Usable Out of 16GB Ram?
There are several reasons why you can use only half the amount of your RAM. One of the major culprits is your motherboard’s BIOS. It reserves a specific amount of RAM and makes it unusable. However, the hard disk also causes this issue on Windows 10.
Remember, you can use only 3.5 GB RAM (no matter how much RAM you have installed physically on your motherboard) if you use the 32-bit Windows 10 operating system.
How to Fix ’16GB RAM Installed Only 8GB Usable on Windows 10′ Issue
Here are the best solutions to fix 16GB RAM installed and only 8GB usable on Windows 10.
- Disable Maximum Allocated Memory.
- Customize the BIOS.
- Check RAM Physically.
- Run Memory Diagnostic.
Try these solutions one by one until you find out that your computer can use nearly 16 GB of RAM.
Method 1: Check the Maximum Allocated Memory
First, you need to check how much RAM is reserved for boot on your system. For that, you need to follow the steps below.
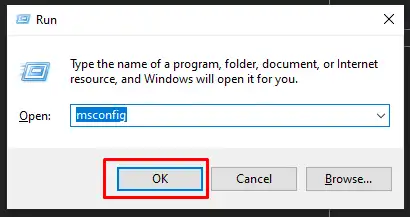
Step 1: Press Windows + R to open the Run dialogue box. Type MSConfig and then press Enter key. It will take you to the System Configuration.
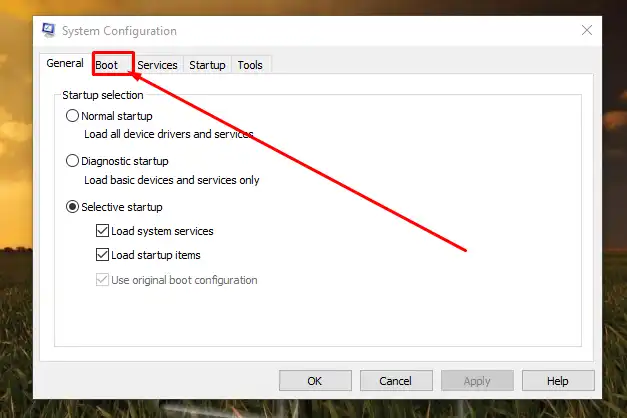
Step 2: Select the Boot tab on the System Configuration.
Step 3: Now, select your OS from the list and go to the Advanced Option.
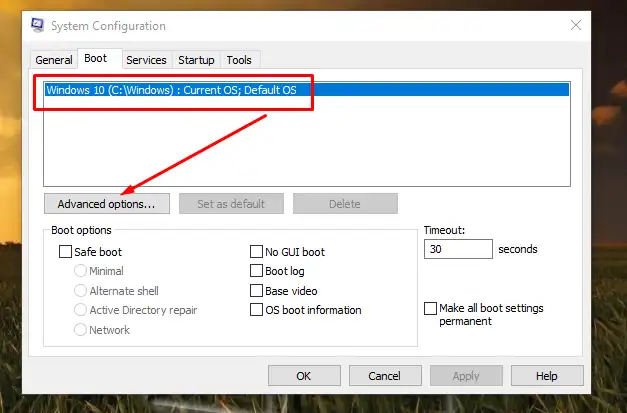
Step 4: Here, uncheck the checkbox of Maximum memory and click OK.
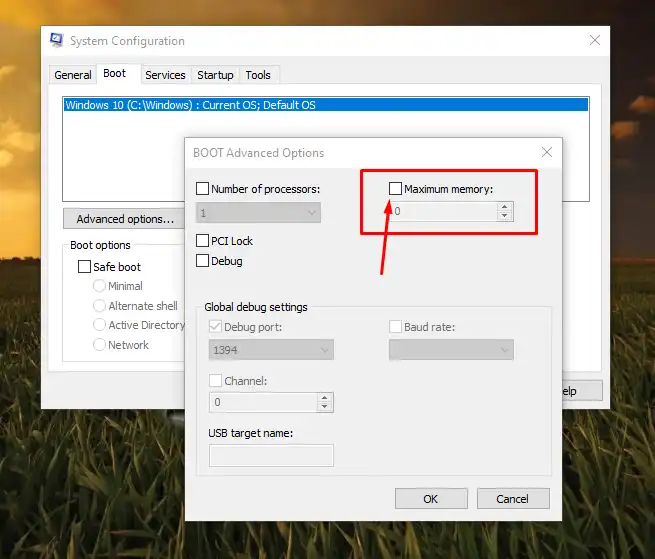
After finishing the process restart your computer and check if the problem remains or not. If you find the issue still remains, follow the next solution.
Method 2: Customize the BIOS Settings
There are possibilities that the BIOS of your computer can limit the amount of usable RAM. For this, you need to configure the BIOS settings.
Here are the steps to follow –
Step 1: Restart your computer and press a certain key during the boot to go to your BIOS setup. The key is normally F1, F2, F12, or Del.

Step 2: Now, find the internal GPU named Internal Graphics or Onboard Graphics and Disable it.
Note: Ensure you have the dedicated graphics installed on your computer before disabling the internal or onboard graphics.
Step 3: After that, enable the Memory Map Feature. It will give Windows full access to your installed RAM.
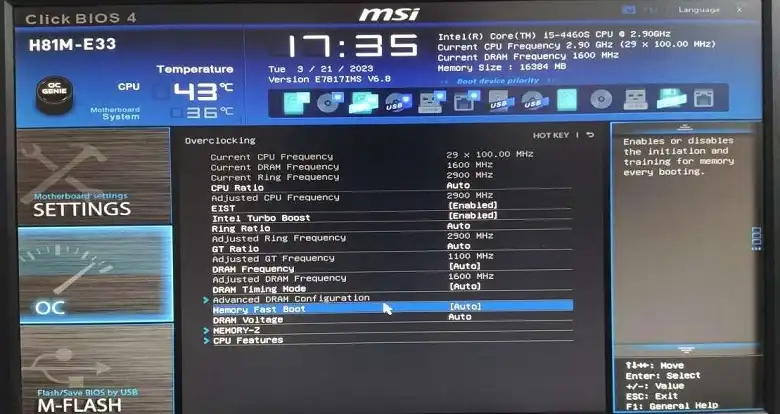
Step 4: Finally, save the changes and restart your computer again.
Now check for the issue. If it still remains, then try the next solution.
Note: If you have accidentally changed the BIOS settings incorrectly, then press ESC and select YES to exit without saving the settings or you can click “Load the optimized defaults” to change the BIOS to its default settings.

Method 3: Check Your RAM Physically
You also may need to check the RAM and DIIM slots because this issue can also happen because of a faulty slot or if your RAM isn’t installed physically.
Follow the process below for checking RAM physically:
Step 1: Unplug the cables from your computer and open the cover of your CPU.
Step 2: Then, toggle both clips of the RAM slots and unplug the RAM.
Step 3: Clean the contact points of the RAM and also clean dust from the slots.
Step 4: If you are using multiple RAM sticks, then connect each of those RAMs one by one and start your computer to identify the faulty one.
Step 5: Again, try putting the RAM into a different RAM slot to identify the faulty slot.
If it solves the problem, then leave the RAMs and slots as it is now. But, if it doesn’t fix the problem, then put your RAMs in the previous state, turn on your computer, and try the next solution.
Method 4: Run Memory Diagnostic
If none of the above methods can fix the issue, then run the Memory Diagnostic on your computer to check if there is any problem with the memory. Here are the steps to follow –
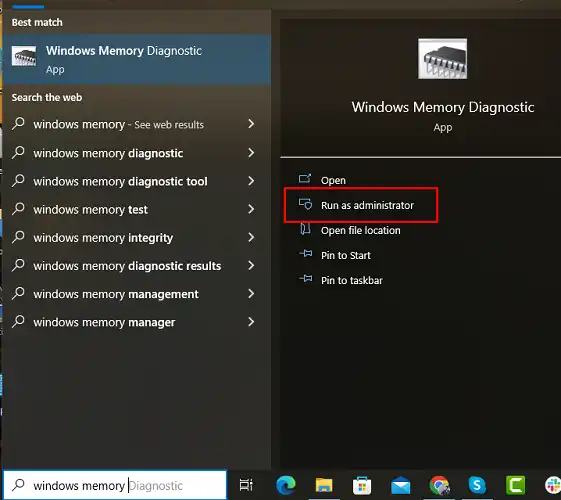
Step 1: Press the Window key, type “Windows Memory Diagnostic”, and open the app as administrator.
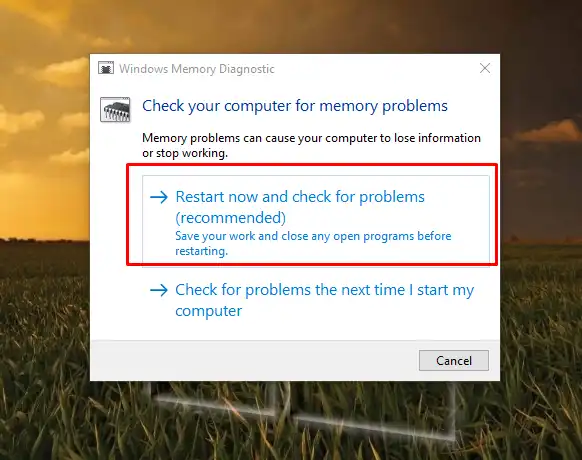
Step 2: Select “Restart now and check for problems”.
Step 3: Once the computer restarted, it will take you to the Windows Memory Diagnostic tool and diagnostic the memory automatically.
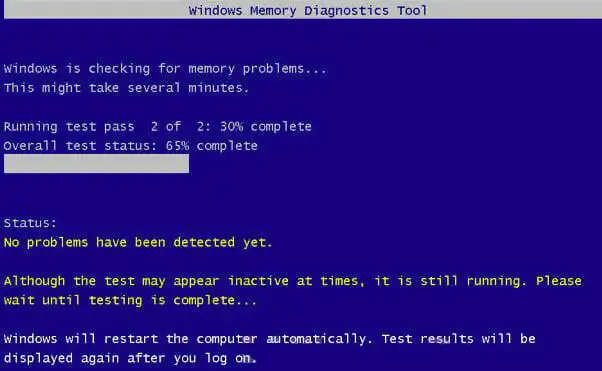
After this, check if you can now use nearly 16 GB RAM out of 16 GB or not. Hopefully, the 8 GB usable only issue will be resolved by this method.
Frequently Asked Questions
Why Is My RAM Not Running at Full Speed?
The speed of RAM depends on the motherboard. It will run at a limited speed that your motherboard supports. If your RAM has an XMP profile and the CPU doesn’t support the frequencies, then your RAM will run at only the allocated speed that is set by your CPU.
How Do I Enable RAM in BIOS?
To enable RAM in BIOS, you need to navigate Advanced Settings > Memory Settings on your BIOS and ensure Row is enabled from the options of DIIM slots. Finally, you have to click on the Save button and restart your computer.
Conclusion
All the best and most reliable solutions to fix only 8 GB RAM usable out of the 16 GB RAM issue are given above in this article. So, we hope you will be able to fix this problem by the end of this article. If you still facing the above-mentioned issue after implementing all the fixes, then you are recommended to visit the nearest service center.
![Read more about the article [6 Fixes] Video Scheduler Internal Error Windows 11](https://wingeek.org/wp-content/uploads/2023/04/Video-Scheduler-Internal-Error-Windows-11-1-300x161.webp)
![Read more about the article [Fix] The Amount of System Memory Has Changed Error (100% Working)](https://wingeek.org/wp-content/uploads/2022/01/the-amount-of-system-memory-has-changed-300x171.jpg)
![Read more about the article [Fix] An Update Is Being Prepared for Your Device (100% Working)](https://wingeek.org/wp-content/uploads/2022/07/an-update-is-being-prepared-for-your-device-300x171.jpg)