
[Solved] The Itunes Could Not Connect to This iPhone 0xe80000a Error (100% Working)
As you know, iTunes is one kind of software for connecting your iPhone to a Windows PC. You can listen, organize, and manage thousands of songs, audiobooks, and podcasts as well as visit the apple store for downloading content through the use of iTunes. However, this seems like nice software often shows technical error and you might see the message ‘iTunes could not connect to this iPhone Oxe80000a’ when you try to connect the software with your iPhone. The error is more common on Windows 10 and iPhone X, iPhone XS, iPhone 5, iPhone 6, iPhone 7, iPad, and some of the latest versions as well. I am guessing you are here trying to find some fixes for this irritating error. We will explore the possible reasons behind this 0xe80000a error and find appropriate solutions in this very post.

The Itunes Could Not Connect to This iPhone 0xe80000a Error: Reasons
Generally, iPhones are connected to Windows 10 via USB cable to operate the iTunes app. Hence, the error can easily be on the side of the USB cable or either of the hardware of the devices. Your USB port on the Windows 10 may be problematic or your iPhone’s port may be broken.
Again, the error can come down to the software side on either of the devices. The operating system of your PC and iPhone might be outdated- both or one of them. Even outdated iTunes can instigate the issue. Settings changes, permission denial, manual location saves, etc. internal preferences on your iPhone are other reasons for the error.
Why did you see 0xe80000a Error? It can be due to any of the mentioned reasons or a combination of multiple reasons. Hence, you have to adopt multiple solutions as you do not clearly know the very fact. That’s why I have provided 6 different fixes; once your problem is solved, you do not need to go to the following fix.
How to Fix the Error?
Wherever the problem might be iPhone, Windows, or iTunes software itself- you have to try different fixes for resolving the issue. Here 6 different methods are compiled for your convenience. Follow the instructions carefully.
Method 1: Deleting Lockdown Folder
Step 1: Open ‘This PC’ or popularly known as ‘My Computer’ from the previous versions of Windows.

Step 2: Open the local disk (C).

Step 3: Click on the ‘View’ that can be found on the top of the screen.

Step 4: Now, right-check the ‘Hidden items’ found under the view pan. There is a good chance that the folder we are looking for might be remained hidden and that’s why we need to get access to all the hidden files. If you had already right-checked this item earlier, then you could have skipped this step.

Step 5: Next, click on the ‘ProgramData’ folder of PC’s C drive.

Step 6: Open the ‘Apple’ folder. This system folder was created as soon as you installed the iTunes app on this PC.

Step 7: Delete the ‘Lockdown’ folder. Why would we want to delete the folder? As the system settings changes are stored on this lockdown folder, any associated errors can be removed along with the folder.

Step 8: You have to delete the lockdown folder completely from the computer. Thus, remove the folder from the recycle been as well. Then restart the computer. When you open iTunes again, a brand new lockdown folder will be created on the drive (C) with zero system error on the software files.

Method 2: Updating Itunes, Windows 10, and iPhone
Updating all the concerned parties i.e. iTunes, Windows 10, iPhone, or updating any of them may resolve your issue. Sometimes, an outdated iPhone is unable to connect to Windows 10 or vice-versa due to the changes that occurred on the system centrally.
First of all, update the iTunes software. Open the software and right-click on the ‘Help’ option that can be found on top of the screen. Then, click on the ‘Check for Updates’ option; the system looks for available updates on the web.

The update will automatically start; wait for a few minutes; once the updating is done, restart the PC and then open the updated software. Try and reconnect with the iPhone and hopefully, there is no error message this time.

You might also want to update the Windows. To do it, click on the Windows icon remaining on the bottom-left corner of your screen and then hit the gear icon to enter the settings page of the Windows 10 version.

Tap on the ‘Update & Security’ option.

Click on the ‘Update’ or the ‘Download’ button- whatever you see in front of you. The computer will look for the available updates, restart several times during the process automatically, and after waiting for a few minutes, the Windows will be updated.

Lastly, you might want to update the IOS of your iPhone as well. Go to the ‘Settings’ of your iPhone and update the system if any is available.
Method 3: Disabling Anti-virus Software
Anti-virus software may prevent the connection between iPhone and Windows. You should consider disabling the current anti-virus running on the system and then restart iTunes. If the error is fixed, always disable the anti-virus software before running iTunes.
Method 4: Checking the USB Cable
There is a good chance that the USB (Universal Serial Bus) cable which you are using to connect iPhone and PC is damaged. You can test this possibility by connecting the devices with another USB cable and check out whether the 0xe80000a Error message is again shown or not.
Method 5: Resetting Location and Network Settings
Sometimes having the wrong location, date and time, privacy and network settings on your iPhone can create lots of trouble including the connection error of our post. Make sure that you have turned on the automatic date and time setting and to do this, navigate to Settings> General> Date & Time.

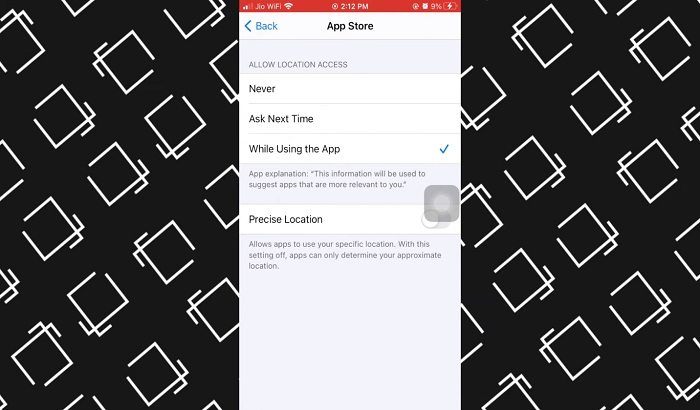
Also, provide access to the location for using the app store and always turn on the location service.
You would want to reset the network settings so that the connection can be built afresh. Besides, resetting privacy is another option to consider. You may choose the ‘Reset All Settings’ option in order to make the iPhone’s setting go back to the default condition. This is one of the last things to carry out to fix the error.

Method 6: Re-installing the iTunes
If any of the above mentioned methods do not work, try reinstalling the iTunes software. Before that, uninstall everything about Apple on your Windows, restart the computer, and search for iTunes on your Windows store. Install the software and connect it with your iPhone. The issue must be gone.
Conclusion
The 0xe80000a error occurring when connecting the iPhone with iTunes is an irritating pain and one of the common issues of Windows 10. The method of solutions provided in this post should be good enough to resolve the problem. Always keep your systems updated to lessen this kind of error in the future. Apple should also be responsible for not repeating the connection error in their future projects. That’s all for today!


