
Bolded Quick Summary:
An outdated or corrupt Ethernet driver is often the culprit when your Windows 10 PC won’t connect to the internet. This guide provides simple, step-by-step fixes to update or reinstall your Ethernet driver, restoring your network connection quickly and confidently. We’ll cover finding the right driver and troubleshooting common issues safely.
Hey there! Mike Bentley here, your friendly guide to making tech less puzzling. Ever find yourself staring at that little network icon, the one with the red ‘X’, and wondering what’s going on? It can be really frustrating when your Windows 10 computer refuses to get online, especially when you know everything else is working fine. Often, the culprit is something called an Ethernet driver. Think of it as the translator between your computer’s hardware and Windows, helping it understand how to connect to the internet. When this translator gets a bit fuzzy or outdated, you lose that connection. Don’t worry, though! This guide is here to walk you through fixing that Ethernet driver, step-by-step, so you can get back online without a hitch. We’ll make it easy, clear, and stress-free.
Why Your Ethernet Connection Needs a Healthy Driver
Your Ethernet port, that little rectangular slot on the back or side of your computer, is usually the most stable way to connect to the internet. When it stops working, it’s a real bummer. The Ethernet driver is a small piece of software that tells Windows 10 how to talk to your network adapter – the actual hardware that handles the internet connection. Without the right driver, or if it gets corrupted, your computer simply doesn’t “see” or “understand” how to use the Ethernet cable.
This can happen for a few reasons:
- Windows Updates: Sometimes, a Windows update can install a generic driver that isn’t quite right for your specific hardware, or it might accidentally overwrite a perfectly good driver.
- Software Conflicts: Other installed programs can sometimes interfere with driver functions.
- Malware: Though less common, viruses or malware can corrupt system files, including drivers.
- Hardware Changes: If you’ve recently made changes to your computer’s hardware, it might require driver adjustments.
- Simply Aging: Drivers, like any software, can become outdated and less compatible with newer operating system features.
The good news is that fixing a problematic Ethernet driver is usually straightforward. We’ll look at the easiest ways to get your connection back. This guide is designed for everyone, whether you’re new to PC troubleshooting or have been around the block a few times. We’ll focus on safe, reliable methods to get your Ethernet driver sorted.
How to Identify if Your Ethernet Driver is the Problem

Before we dive into fixing things, let’s confirm that the Ethernet driver is indeed the likely cause of your internet woes. If you’re experiencing any of these symptoms, it’s a strong indicator:
- No Network Connection: The most obvious sign. Your PC shows no internet access, despite being plugged into a working router or modem with a known good Ethernet cable.
- “Network Cable Unplugged” Error: Even though the cable is securely connected, Windows insists it’s not.
- Slow Internet Speeds: Sometimes, a driver issue can cause your Ethernet connection to perform poorly, even if it’s technically connected.
- Limited or No Connectivity: You might connect to the network but can’t access websites or other internet resources.
- Error Messages in Device Manager: Windows might flag your network adapter with a yellow exclamation mark or a red ‘X’.
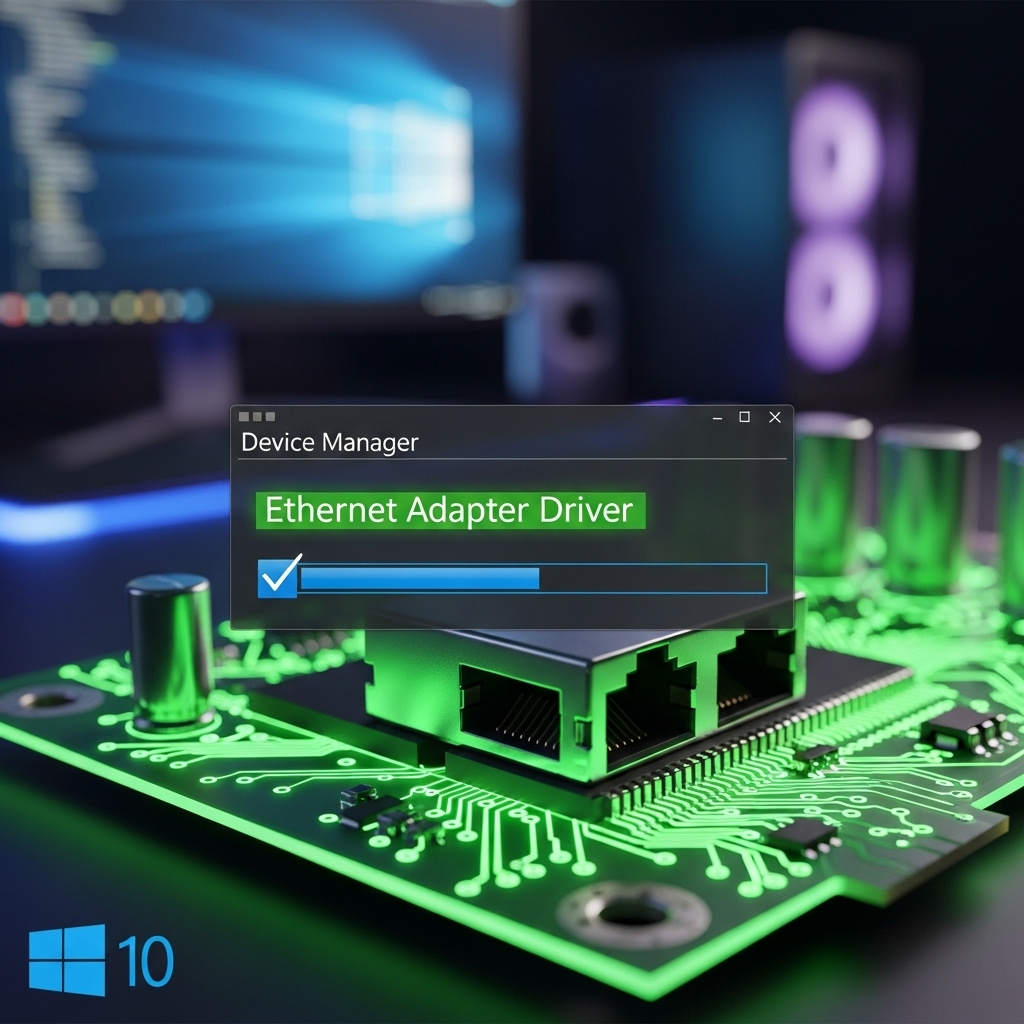
To check this directly, we can use Windows’ built-in Device Manager. It’s like a central hub for all your computer’s hardware. Here’s how to access it:
- Right-click on the Start button (the Windows logo in the bottom-left corner).
- Select Device Manager from the menu that pops up.
- In the Device Manager window, look for a category named “Network adapters”. Click the small arrow next to it to expand the list.
- You should see your Ethernet adapter listed here. It might have a name like “Realtek PCIe GbE Family Controller,” “Intel(R) Ethernet Connection,” or something similar, depending on your computer’s manufacturer.
If you see a yellow exclamation mark (!), an upward-pointing arrow (indicating it’s disabled), or a red ‘X’ next to your Ethernet adapter, it strongly suggests a driver problem. If it looks normal, we might need to explore other solutions, but for now, let’s assume the driver is the issue.
Essential Fix 1: Updating Your Ethernet Driver via Device Manager
This is often the quickest and easiest way to resolve driver issues. Windows has a built-in tool that can search for updated drivers automatically. Let’s give it a shot!
Steps to Update Driver Automatically:
- Open Device Manager: If you closed it, right-click the Start button and select Device Manager.
- Locate Your Ethernet Adapter: Expand the “Network adapters” section.
- Right-click the Ethernet Adapter: Select the adapter associated with your Ethernet connection.
- Choose “Update driver”: From the context menu, select this option.
- Select “Search automatically for drivers”: This will prompt Windows to look on your computer and online for a newer driver.
If Windows finds a new driver, it will download and install it for you. You might need to restart your computer for the changes to take effect. If this method doesn’t find a suitable driver, or if the problem persists, don’t worry. Onwards to the next fix!
As a helpful resource, Microsoft provides guidance on troubleshooting network issues, which can sometimes include driver checks. You can find more information on their support site, for example, regarding Windows network troubleshooter. [Microsoft Support]
Essential Fix 2: Reinstalling Your Ethernet Driver
Sometimes, a driver isn’t just outdated; it might be corrupted or improperly installed. Uninstalling and then letting Windows reinstall it can fix these underlying issues. Think of it like giving the driver a fresh start.
Steps to Reinstall Driver:
- Open Device Manager: Right-click the Start button and select Device Manager.
- Locate Your Ethernet Adapter: Expand the “Network adapters” section.
- Right-click the Ethernet Adapter: Select the adapter you’re working with.
- Choose “Uninstall device”: A confirmation window will appear.
- Important: Check the box (if available): If prompted, check the box that says “Delete the driver software for this device.” This ensures a clean removal. If the box isn’t there, that’s okay too.
- Click “Uninstall”: Confirm the uninstallation.
After uninstalling, your Ethernet adapter will disappear from the list for a moment. Now, you need to tell Windows to re-scan for hardware so it can detect the adapter and attempt to reinstall a driver for it.
- Scan for Hardware Changes: In Device Manager, click on the “Action” menu at the top.
- Select “Scan for hardware changes”: Windows will look for devices that have been added or removed.
Windows should now detect your Ethernet adapter and attempt to install a driver automatically. Once done, check your network connection. If it works, great! If not, it might be time to take matters into our own hands.
Essential Fix 3: Manually Downloading and Installing the Correct Driver
When automatic methods fail, the most reliable solution is to download the latest driver directly from the manufacturer of your network adapter or your computer. This ensures you get the most compatible and up-to-date software.
Finding Your Network Adapter’s Manufacturer and Model:
This is the crucial first step. You need to know who made your Ethernet hardware.
- Check Device Manager: As we did before, open Device Manager, expand “Network adapters.” The name listed there, like “Realtek,” “Intel,” “Killer,” or “Marvell,” is your vendor. The rest of the name often includes the model or series.
- Look at Your Computer’s Documentation: If you still have the manual or box for your laptop or motherboard, it will list the network card details.
- System Information Tool: Press Windows Key + R, type
msinfo32, and press Enter. In the System Information window, navigate to Components > Network > Adapter. Find your Ethernet adapter there for details.
Downloading the Driver:
Once you know your network adapter’s manufacturer and model, head to their official website. Here are some common places to look:
- For Laptops: Go to the support or downloads section of your laptop manufacturer’s website (e.g., Dell, HP, Lenovo, ASUS, Acer). You’ll usually need to enter your laptop’s model number or service tag.
- For Desktop Motherboards: Visit the motherboard manufacturer’s website (e.g., ASUS, Gigabyte, MSI, ASRock). Find your specific motherboard model and look for drivers.
- For Standalone Network Cards: If you have a separate Ethernet card, go to the website of that card’s manufacturer (e.g., TP-Link, StarTech).
- For Network Chipset Manufacturers: If you can’t find it via your PC/motherboard manufacturer, you might need to go to the chipset maker’s site:
- Realtek: Realtek Official Drivers
- Intel: Intel Download Center
- Qualcomm Atheros: May be listed under Qualcomm Support.
Important Tip: Always download drivers from the official manufacturer’s website. Avoid third-party driver download sites, as they can sometimes bundle unwanted software or malware.
Installing the Downloaded Driver:
After downloading the driver file (it’s usually a .exe or a zip file containing an installer), follow these steps:
- Locate the Downloaded File: Find the driver file you just downloaded. If it’s a .zip file, right-click it and select “Extract All” to unpack its contents.
- Run the Installer: Double-click the setup file (often named
setup.exe,install.exe, or something similar). - Follow On-Screen Instructions: The installer will guide you through the process. It’s usually a series of “Next” clicks. You might be prompted to restart your computer at the end.
- If No Installer (.exe): If you just have a folder of files (often ending in .sys, .inf, .cat, .dll), you’ll need to use Device Manager to point Windows to these files:
- Open Device Manager.
- Right-click your Ethernet adapter.
- Select “Update driver.”
- Choose “Browse my computer for drivers.”
- Click “Browse” again and navigate to the folder where you extracted the driver files. Make sure “Include subfolders” is checked.
- Click “Next.” Windows will try to find and install the best driver from the files you provided.
Once installed and after a potential restart, test your Ethernet connection. This manual method is usually the most effective for resolving persistent driver issues.
Other Potential Ethernet Issues & Quick Checks

Sometimes, the problem isn’t the driver itself, but something else preventing your Ethernet connection from working. Let’s run through a few quick checks:
1. Check Your Ethernet Cable
It sounds simple, but a damaged or loose Ethernet cable is a common culprit. Try these quick checks:
- Reseat the Cable: Unplug the Ethernet cable from both your computer and your router/modem. Plug them back in firmly until you hear or feel a click.
- Try a Different Cable: If you have a spare Ethernet cable, swap it out. Cables can fail internally without showing visible damage.
- Test the Cable Elsewhere: If possible, test the cable on another device to see if it works.
2. Check the Router/Modem
Your internet source might be the problem.
- Restart Your Router and Modem: Unplug the power from both devices. Wait about 30-60 seconds. Plug the modem back in first, wait for its lights to stabilize (usually a minute or two), then plug in your router. Wait for both to fully boot up before testing your connection.
- Check Other Devices: Can other devices (phones, tablets, other computers) connect to the internet via Ethernet or Wi-Fi from your network? If not, the issue is likely with your internet service or your router/modem.
3. Windows Network Troubleshooter
Windows has a built-in tool that can sometimes automatically detect and fix network problems.
- Go to Settings (Windows Key + I).
- Click on “Network & Internet.”
- Scroll down and click on “Network troubleshooter.”
- Follow the on-screen prompts.
4. Check Network Adapter Status in Windows Settings
Ensure your Ethernet adapter isn’t accidentally disabled.
- Go to Settings (Windows Key + I).
- Click on “Network & Internet.”
- Select “Status” on the left pane.
- Scroll down and click on “Change adapter options.”
- Find your Ethernet connection. If it says “Disabled” below its name, right-click on it and select “Enable.”
Understanding Driver Versions and Why They Matter
When you download drivers, you might notice version numbers. These help you and the manufacturer track updates and compatibility. For example, you might see a driver version like `2.3.1.0` or `v17.2.5.1`. Each number often represents a different level of update: major, minor, build, and revision.
Why are versions important?
- Compatibility: Newer versions are generally designed to work better with the latest operating system updates and hardware.
- Bug Fixes: Older versions might have known issues that have been resolved in updated versions.
- Performance Improvements: Sometimes, new driver versions come with optimizations that can improve speed or stability.
- Security Patches: Drivers, like any software, can have security vulnerabilities. Keeping them updated helps protect your system.
Here’s a simple table showing what a driver update might offer:
| Driver Version | Release Date | Key Changes |
|---|---|---|
| 1.0.0.0 (Initial Release) | Jan 15, 2020 | Basic functionality for adapter model XYZ. |
| 1.1.0.0 (Maintenance Update) | Mar 10, 2020 | Fixed occasional connection drops under heavy load. |
| 1.2.0.5 (Feature Update) | Aug 22, 2021 | Improved compatibility with Windows 10 version 21H1. Added lower power consumption mode. |
| 1.3.0.0 (Security Patch) | Apr 05, 2023 | Addressed a minor security vulnerability related to network packet handling. |
When you manually download a driver, always try to get the latest version available for your specific hardware. If you’re unsure which version to pick, the one listed as “latest” or “recommended” on the manufacturer’s site is usually the safest bet.
When to Seek Professional Help

While most Ethernet driver issues can be resolved with the steps above, there are times when you might need a little extra help. If you’ve tried all the methods here