
Have you ever needed to manage a network but felt overwhelmed? You’re not alone! Many people face this challenge. One handy tool that can make your life easier is Remote Server Administration Tools, or RSAT. This powerful tool lets you manage computers, servers, and other devices right from your own machine.
If you are using Windows 10, you may wonder how to download RSAT. This task isn’t as hard as it sounds. In fact, it’s quite easy! You will discover that having RSAT can simplify many tasks.
Did you know that RSAT can save you time? Imagine being able to control your network without leaving your desk. Pretty cool, right? In this article, we will guide you through the steps to download RSAT for Windows 10. You’ll soon be on your way to becoming a super user!
How To Download Rsat For Windows 10: A Complete Guide
Are you looking to manage Windows 10 systems efficiently? Downloading the Remote Server Administration Tools (RSAT) is your answer. With RSAT, you can handle tasks like Active Directory management and DNS server administration directly from your Windows 10 device. It’s like having a portable IT toolkit at your fingertips. Installing RSAT is easy. Simply head to the Settings, find Optional Features, and add RSAT tools. Imagine managing your networks without heavy equipment. Why wait? Elevate your administrative skills today!

Understanding RSAT
Definition and purpose of Remote Server Administration Tools (RSAT). Importance of RSAT for IT professionals and system administrators.
Remote Server Administration Tools, or RSAT, make managing servers a breeze. They allow IT professionals and system admins to handle servers from their comfy desks, free from the chaos of server rooms. Think of RSAT as a superhero cape for those working in tech—it helps to save the day! Without it, system management might feel like trying to juggle flaming torches. In short, RSAT is vital for keeping systems running smoothly.
| Definition | Importance |
|---|---|
| Tools for managing servers remotely | Essential for IT pros and admins |
| Streamlines server management | Increases efficiency and saves time |
With RSAT, you’re not just clicking buttons; you’re unleashing your inner tech wizard!
System Requirements for RSAT
Minimum and recommended hardware specifications for Windows 10. Compatibility considerations with different Windows 10 versions.
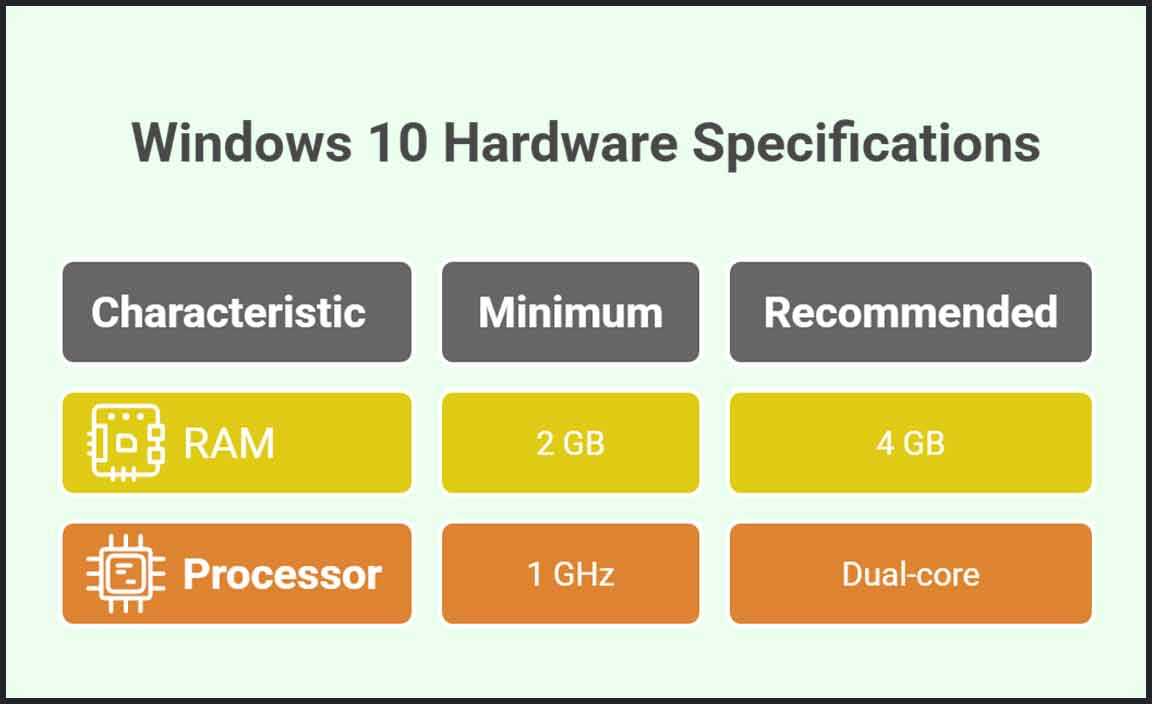
Getting ready to download RSAT for Windows 10? Before you do, let’s talk about the hardware you’ll need—think of it as the “snack” for your PC. For basic use, your computer should have at least 2 GB of RAM and a 1 GHz processor. For the fancy stuff, aim for 4 GB of RAM and a dual-core CPU. It’s like choosing between a snack and a feast!
| Requirements | Minimum | Recommended |
|---|---|---|
| RAM | 2 GB | 4 GB |
| Processor | 1 GHz | Dual-core |
Also, make sure your Windows 10 version is up to date. Some older versions might throw a tantrum and refuse to let you download RSAT. So, remember, updated and upgraded is the name of the game!
Steps to Download RSAT on Windows 10
Navigating to the official Microsoft download page. Selecting the appropriate version based on Windows 10 build.
First, open your favorite web browser and visit the official Microsoft download page. It’s like searching for a treasure map, except this one leads to priceless tools! Next, be sure to choose the right version according to your Windows 10 build. Using the wrong one is like wearing socks with sandals—just a big no-no. Here’s a fun table to help you pick the right version:
| Windows 10 Build | RSAT Version |
|---|---|
| 1809 or later | RSAT for Windows 10 |
| 1803 or earlier | RSAT for Windows Server |
Remember, the correct version makes all the difference. Select wisely and you’ll be on your way to downloading RSAT like a pro! Oh, and don’t forget to have fun while doing it!
Installing RSAT on Windows 10

Detailed instructions for installation process. Common installation issues and troubleshooting tips.
To install RSAT (Remote Server Administration Tools) on Windows 10, follow these steps:
- Click on the Start menu.
- Go to Settings, then select Apps.
- Choose Optional features.
- Click Add a feature.
- Find RSAT tools, select them, and hit Install.
Sometimes, installation issues arise. Here’s how to troubleshoot:
- Ensure your Windows 10 version supports RSAT.
- Make sure you have administrator rights on the computer.
- Check your internet connection to avoid download errors.
With these steps, you can successfully install RSAT on Windows 10!
Common Questions
What if RSAT doesn’t appear in features? RSAT might not be available in all editions of Windows 10. Ensure you’re using a Professional or Enterprise version.
Can I use RSAT offline? No, RSAT requires an internet connection during installation to download necessary components.
Verifying RSAT Installation
Steps to check if RSAT is installed correctly. How to troubleshoot if RSAT features are not appearing.
To make sure RSAT is set up right, start by checking the installed features. Go to Settings, click on Apps, and then on Optional features. There, you’ll see if RSAT is listed. If it’s missing, don’t panic! You might have to reinstall it. Here’s how:
| Step | Action |
|---|---|
| 1 | Go to Settings > Apps. |
| 2 | Click on Optional features. |
| 3 | If RSAT isn’t there, click Add a feature. |
If you still can’t find your RSAT tools, try rebooting your computer. It’s like giving it a coffee break! If all else fails, a quick online search can be your superhero. Remember, technology has its own quirks, like a cat that suddenly decides the keyboard is its new bed!
Best Practices for Using RSAT
Tips for efficient use of RSAT tools in managing remote servers. Security considerations when using RSAT for system administration.
Using RSAT tools wisely can make managing remote servers easier. Here are some best practices:
- Always keep your RSAT tools updated. This helps protect against security issues.
- Use strong passwords for all accounts. Good passwords keep your data safe.
- Limit access to only those who need it. This reduces risk.
- Regularly review permissions. Make sure only authorized users have access.
Following these steps helps you use RSAT effectively while keeping your system secure.
What is the importance of security in using RSAT?
Security is vital. Without it, hackers can gain control. Keeping systems secure protects important information. Regular updates and strong passwords make a big difference!
Additional Resources and Support

Links to official Microsoft documentation and community forums. Recommendations for further reading and tutorials on RSAT.
If you want to explore more about RSAT, several great resources are available. Visit the official Microsoft documentation for detailed instructions. You can also find answers in community forums. Here are some useful links:
For further reading, consider tutorials that guide you through RSAT installation and use. These resources make learning easier and more fun!
What is RSAT?
RSAT stands for Remote Server Administration Tools. It allows you to manage Windows Server roles and features from a Windows 10 computer. This makes system management easy and remote!
Where can I find reliable RSAT tutorials?
- Microsoft Official Blog: Offers tips and updates.
- YouTube Channels: Look for tech tutorials on RSAT.
- Online Learning Platforms: Check sites like Coursera or Udemy.
Conclusion
In conclusion, downloading RSAT for Windows 10 helps you manage remote servers effectively. It’s easy to install and improves productivity. We recommend checking Microsoft’s official site for the latest version and clear instructions. Remember to follow the steps carefully to get everything set up. Now, you’re ready to explore and manage your servers like a pro!
FAQs
What Is Rsat And What Are Its Main Components For Windows 1
RSAT stands for Remote Server Administration Tools. It’s a set of tools we use on Windows to manage servers. With RSAT, you can control things like user accounts and computers from a distance. The main parts include the Server Manager, Active Directory, and other helpful tools. These make it easier for us to keep everything running smoothly.
How Do I Download And Install Rsat On Windows 1
To download and install RSAT, which stands for Remote Server Administration Tools, follow these steps. First, open your Windows Settings by clicking the Start menu. Next, click on “Apps,” then “Optional features.” Look for “Add a feature” and click it. Search for “RSAT” and select the tools you need. Finally, click “Install” and wait for it to finish.
Are There Specific Windows Editions That Support Rsat Installation?
Yes, some Windows editions let you install RSAT, which stands for Remote Server Administration Tools. You can use RSAT on Windows 10 Professional, Enterprise, or Education editions. In Windows 11, it’s available on the same editions. So, check your version to see if you can get it!
How Can I Enable And Access Rsat Features After Installation On Windows 1
To enable Remote Server Administration Tools (RSAT) after you install it on Windows 11, you start by going to your Settings. Click on “Apps,” then choose “Optional features.” Look for the RSAT options you want, and click “Install.” Once installed, you can find them by searching in the Start menu. Just type the name of the tool you want to use, and it should pop up.
What Troubleshooting Steps Should I Take If Rsat Tools Are Not Appearing After Installation On Windows 10?
If Remote Server Administration Tools (RSAT) aren’t showing up, first check if they are installed. You can go to “Settings,” then “Apps,” and look for RSAT. If you don’t see them, try restarting your computer. Sometimes, a simple restart helps. If they still don’t appear, you may need to reinstall them from Windows Features.
Resource:
-
Windows IT Pro Blog: https://techcommunity.microsoft.com/t5/windows-it-pro-blog/bg-p/Windows-ITPro-Blog
-
How-To Geek Windows Tips: https://www.howtogeek.com/windows/
-
Windows Administration Discussions: https://stackoverflow.com/questions/tagged/windows-administration
-
IT Management Tools Resources: https://www.techrepublic.com/topic/it-management/