
Have you ever wanted to play your favorite mobile games on a bigger screen? Imagine the excitement of running Android apps right on your Windows 11 device. Sounds fun, right? That’s where the BlueStacks Android emulator comes in.
BlueStacks allows you to enjoy Android games and apps smoothly on your PC. It acts like a bridge between your favorite mobile apps and your computer. With just a few clicks, you can dive into a world of endless games and useful tools.
Did you know that millions of users trust BlueStacks? This amazing software makes it easy for anyone to experience mobile apps without needing a phone. It’s a popular choice among gamers and app lovers alike.
In this article, we will explore why BlueStacks is ideal for Windows 11. We’ll cover its features, how to set it up, and some tips for getting the best experience. Are you ready to discover a new way to use Android apps? Let’s jump in!
Bluestacks Android Emulator For Windows 11: A Comprehensive Guide
BlueStacks Android Emulator for Windows 11
BlueStacks is a powerful tool that lets you run Android apps on Windows 11. Imagine playing your favorite mobile games on a big screen! It’s easy to set up and use, making it fun for everyone. Users can enjoy seamless gameplay and better performance. Did you know BlueStacks supports many apps and games? This feature keeps you connected to your favorite mobile experiences right from your PC. Explore what BlueStacks can do and transform your gaming adventures!
What is BlueStacks?

Definition and purpose of BlueStacks. Brief history and evolution of the emulator.
BlueStacks is a program that lets you run Android apps on your computer. It helps you play mobile games and use apps in a bigger way. BlueStacks was created in 2011 and has changed a lot since then. It started out simple and became powerful. Today, it’s more useful and easy to use, helping millions connect their phone apps with their computers.
What are some features of BlueStacks?
- Supports many games and apps.
- Easy controls with keyboard and mouse.
- Fast installation and updates.
Key Features of BlueStacks on Windows 11

Enhanced performance capabilities. Compatibility with Android apps and games.
The bluestacks emulator brings fantastic features to Windows 11 users. Firstly, it offers enhanced performance capabilities, allowing your PC to handle heavy Android games without breaking a sweat. That’s like a superhero in a tech suit! Additionally, it is compatible with various Android apps and games. Want to play Candy Crush on your big screen? No problem! BlueStacks makes it super easy and fun.
| Feature | Description |
|---|---|
| Performance | Runs Android games smoothly. |
| Compatibility | Supports wide range of Android apps. |
So, upgrade your gaming experience on Windows 11. Dive into your favorite apps with bluestacks!
System Requirements for BlueStacks on Windows 11
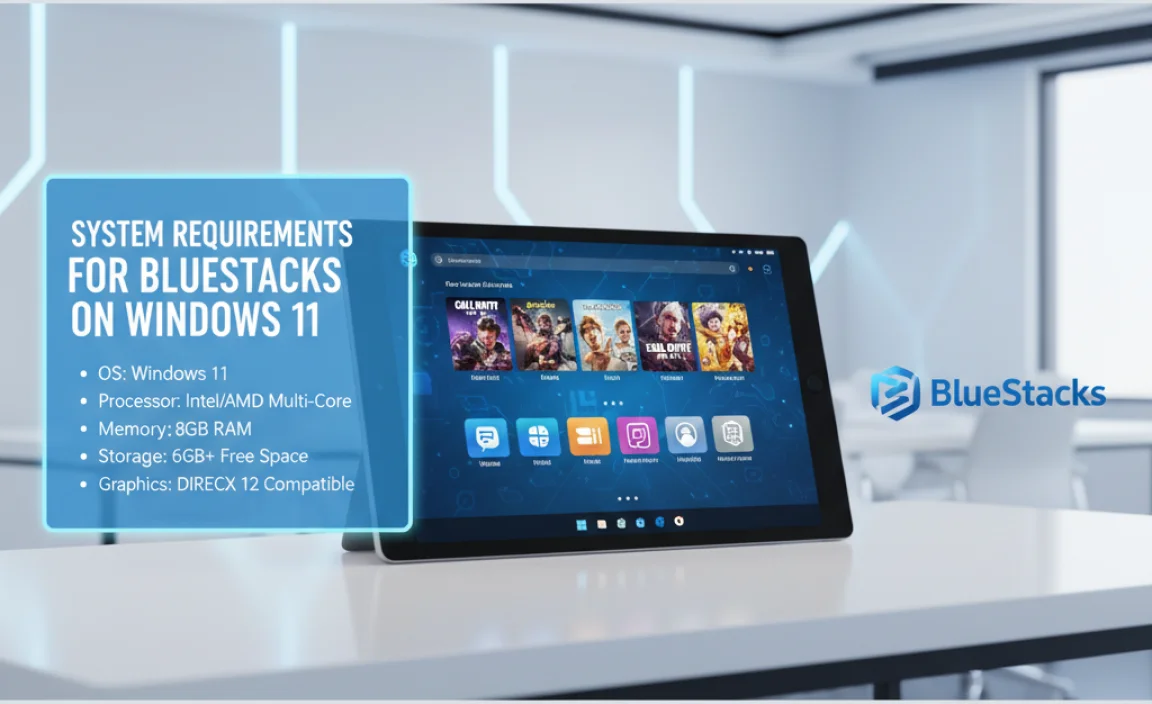
Minimum hardware specifications needed. Recommended specifications for optimal performance.
Before diving into the world of mobile apps on your computer, it’s smart to check if your system is up to the task! For the Bluestacks Android emulator on Windows 11, you’ll need at least 4GB of RAM and a decent graphics card, but a little extra never hurts!
| Minimum Specifications | Recommended Specifications |
|---|---|
| 4GB RAM | 8GB RAM |
| Windows 11 | Windows 11 (64-bit) |
| Intel or AMD Processor | Intel i5 or better |
If you want things to go smoother than a buttered slide, aim for those recommended specs! The right setup makes gaming and app use feel as easy as pie—minus the calories.
How to Install BlueStacks on Windows 11
Stepbystep installation process. Troubleshooting common installation issues.
To install an emulator on Windows 11, follow these simple steps. First, download the installation file from the official site. Next, double-click it to start the setup. Click “Install” and wait for it to complete. If you face any problems, check if your system meets the requirements. You may also try turning off your antivirus temporarily. Lastly, if you see any errors, restart your computer and try again.
What if I encounter problems during installation?
Common issues can often be fixed easily. If you can’t install, try disabling antivirus software or checking your internet connection.
- Make sure your Windows 11 is updated.
- Check for enough storage space on your device.
- Restart your Windows system if things don’t work.
Setting Up BlueStacks for First Use
Initial configuration settings. Linking Google account and app store access.
Getting started with BlueStacks is as easy as pie—especially if that pie is a chocolate chip one! First, you’ll want to adjust the initial settings. This means picking your preferred language and adjusting the performance settings so BlueStacks runs smoothly on your Windows 11. Next, you need to link your Google account. This gives you access to the app store, letting you download all those fun Android games and apps. Remember, without the Google connection, it’s like having a phone with no signal!
| Initial Settings | Action |
|---|---|
| Language Selection | Select your preferred language |
| Performance Settings | Adjust for best performance |
| Google Account | Link your Google account for app store access |
Once you’ve set everything up, you’ll be ready to dive into your favorite Android apps. Happy gaming!
Top Games and Apps to Run on BlueStacks
List of popular Android games compatible with Windows 11. Useful productivity apps available on BlueStacks.
If you’re diving into the world of emulators, BlueStacks brings a treasure chest of games and apps to Windows 11. Want to play the latest battle royale or crush candy? Look no further! Here’s a quick peek at some of the top contenders.
| Popular Games | Productivity Apps |
|---|---|
| Free Fire | Trello |
| League of Legends: Wild Rift | Slack |
| Among Us | Google Keep |
These games pack fun, while apps like Trello and Slack help you stay organized. Talk about multitasking! So whether you’re shooting aliens or sorting tasks, BlueStacks has got your back, and hey, who knew work could be this entertaining?
Optimizing BlueStacks Performance
Tips for improving speed and efficiency. Customization options to enhance user experience.
To boost the speed and efficiency of Bluestacks, try these tips. First, allocate more RAM. This helps the emulator run smoother. Next, adjust the graphics settings. Lowering the resolution can increase performance. You can also enable virtualization in your computer’s BIOS, which allows better processing speed.
Customization options add fun too. Personalize your controls for easier gameplay. Organize apps by creating folders. This helps you find what you want quickly.
- Increase RAM in settings
- Lower graphics resolution
- Enable virtualization
How to improve Bluestacks performance?
To improve Bluestacks performance, consider adjusting RAM settings, lowering graphics, and enabling virtualization. These steps make the emulator run faster and smoother, enhancing your gaming experience!
Common Issues and Fixes with BlueStacks on Windows 11
Troubleshooting common problems faced by users. Best practices for maintaining emulator performance.
Many users face issues with their emulator. Here are some common problems and how to fix them:
- Slow performance: Make sure your PC meets the system requirements.
- Game crashes: Update your Bluestacks and graphics drivers regularly.
- Connection issues: Check your internet connection and try restarting the emulator.
To keep Bluestacks running smoothly, consider these best practices:
- Allocate enough RAM for the emulator.
- Limit background apps while using Bluestacks.
- Keep your Windows 11 updated.
Following these tips can help you enjoy a better experience with your emulator.
What should I do if Bluestacks won’t start?
If Bluestacks won’t start, try restarting your computer and reinstalling the app. This often solves the problem.
How can I improve Bluestacks performance?
To improve performance, increase allocated RAM and ensure you have the latest updates. This improves speed and stability.
Future of BlueStacks on Windows 11
Upcoming features and updates to look forward to. The role of BlueStacks in the evolution of gaming and app usage.
BlueStacks has exciting features on the way for Windows 11 users. Expect faster performance and smoother graphics in upcoming updates. This will enhance gaming and app use, making it more fun and enjoyable. BlueStacks has played a major role in gaming’s growth. It allows people to enjoy mobile games on larger screens, opening new possibilities for gamers everywhere.
- Improved speed and graphics
- New games and apps added regularly
- Better user experience with new updates
What new features can we expect from BlueStacks?
New performance updates and game support are on the way. You’ll see faster load times and enhanced graphics that allow for a more immersive experience.
Conclusion
In conclusion, BlueStacks is a powerful Android emulator for Windows 11. It lets you run Android apps and games smoothly on your computer. You can enjoy a larger screen, better controls, and faster performance. If you want to try it out, visit the BlueStacks website for easy download. Explore your favorite apps today and enhance your gaming experience!
FAQs
Sure! Here Are Five Related Questions On The Topic Of Bluestacks Android Emulator For Windows 11:
Bluestacks is a program that lets you play Android games on your Windows 11 computer. You can download it from the Bluestacks website. Once it’s set up, you can use the Google Play Store to get games and apps just like on a phone. It makes playing mobile games easier and more fun on a bigger screen. Have fun gaming!
Sure! Please provide me with the question you’d like answered.
What Are The System Requirements For Installing Bluestacks On Windows 11?
To install BlueStacks on Windows 11, your computer needs to have at least 4 GB of RAM (Random Access Memory). You should also have at least 5 GB of free space on your hard drive. Make sure your computer uses an Intel or AMD processor. Lastly, you need to turn on Virtualization in your computer’s settings.
How Does Bluestacks Improve The Gaming Experience For Android Games On Windows 11?
Bluestacks helps you play Android games on your Windows 11 computer. It makes games run faster and look better. You can use a mouse and keyboard, which makes playing easier. Bluestacks also lets you play multiple games at once, so you can have more fun!
Are There Any Compatibility Issues When Running Bluestacks On Windows Compared To Previous Versions Of Windows?
Yes, there can be some issues when running Bluestacks on Windows. Sometimes, it might not work well on older versions of Windows. You may notice it is slower or some apps don’t run right. If you have the latest version of Windows, Bluestacks usually works better. So, it’s a good idea to keep your Windows updated!
What Features Does Bluestacks Offer For Productivity Applications On Windows 11?
Bluestacks lets you use Android apps on your Windows 11 computer. You can run apps side by side, like chatting while working. It also saves your work, so you don’t lose anything. Plus, you can easily install many apps from the Google Play Store. This helps you get more done in a fun way!
How Can Users Optimize Bluestacks Performance On Their Windows Machines?
You can make Bluestacks run better on your Windows computer by following a few steps. First, close other programs that use a lot of memory. Next, make sure your computer’s graphics drivers are up to date. You can also adjust the Bluestacks settings to use more CPU (central processing unit) power. Finally, make sure you have enough free space on your hard drive.