The Advanced Technology Attachment Packet Interface, often known as ATAPI, serves as a connection point for a variety of hardware, including CD-ROM and DVD-ROM drives, floppy drives, tape drives et cetera among others. Compared to ATA, it offers more connectivity (IDE and SATA).
Generally, the issue with ATAPI is that while working the external hardware suddenly gets stopped and shows the error that ATAPI device is missing. Even, the device manager counts them as Unknown Device.
Let’s find out more about this issue and see how to deal with it.
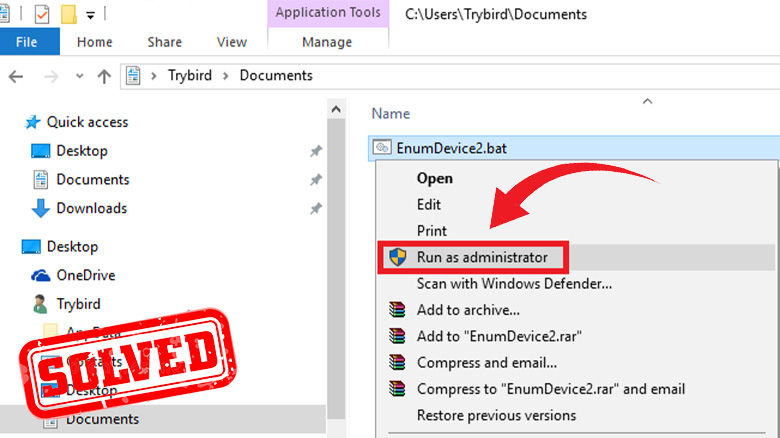
Valid ATAPI Device Cannot Be Found – Symptoms of The Error
CD-ROM and DVD-ROM drives are no longer visible in file explorer or device manager. Only the Intel(r) X Series Chipset Family controller is listed under the IDE ATA or ATAPI section. Despite this, it still appears in BIOS as a boot device, showing a CD/DVD/BRD drive with no further information. Additionally, it is not listed as a SATA device. Windows do not recognize or locate drives after updating and counts them as unknown devices.
Why the Valid ATAPI Device Is Missing?
There are some particular reasons behind occurring this issue. It can vary from user to user. Have a look at them –
- Windows Registry entries are corrupted.
- Hardware or software is faulty.
- DVD/CD-ROM drives or USB Ports are disabled.
- Faulty Windows update.
Regardless of the reasons, applying the following tips will help you to solve this issue with ease.
How to Fix ATAPI device is missing Error – Step-by-Step Guidelines
There are some efficient tips to get recover from this issue. Here are them one by one –
Tips 1: Check Your BIOS
First and foremost, you need to make sure that the ATAPI is actually missing in the system. That is why you should check it from your BIOS
To open BIOS,
Step 1: Go to Start menu.
Step 2: Click the Power section.
Step 3: Now, Press and hold the Shift key and choose Restart.
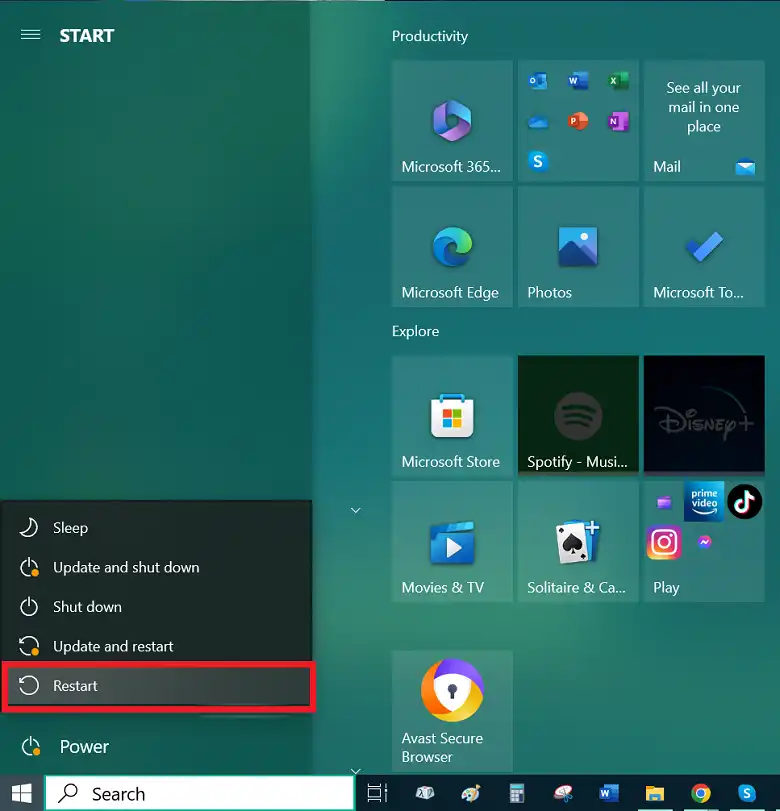
Step 4: Next, press the BIOS key set by your manufacturer which could be any of F10, F2, F12, F1, or DEL.
If you still cannot find your ATAPI device, go for the other following tips.
Tips 2: Add the Absent Registry Entries
This method is considered the most useful method for the users of this problem. The process is basically adding the missing entries (Controller0, EnumDevice1) with proper values to their appropriate place. This will help your system to recognize the ATAPI devices.
First, ensure that you have logged in as an Administrator on Windows. To check,
Step 1: Open Control Panel.
Step 2: Next, Choose User Accounts.
Step 3: Now, Click on Manage User Accounts.
Now,
Step 4: Use Windows + R.
Step 5: Then type regedit and go for it.
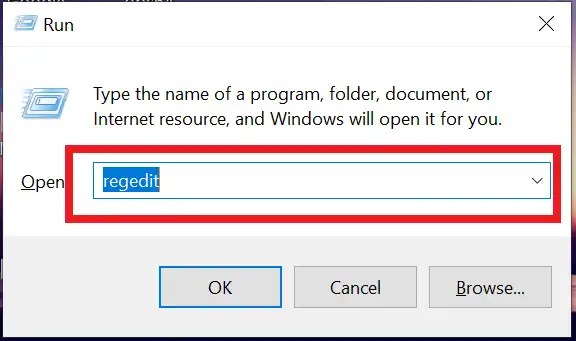
Step 6: Insert this allocation in the location bar in the navigation sector –
HKEY_LOCAL_MACHINE\SYSTEM\CurrentControlSet\Control\Class\{4D36E965-E325-11CE-BFC1-08002BE10318}
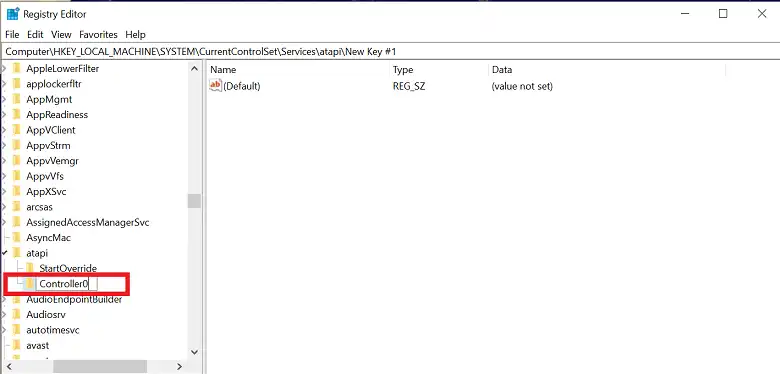
Step 7: Now, right-click on the atapi, extend the New section, and choose the Key option.
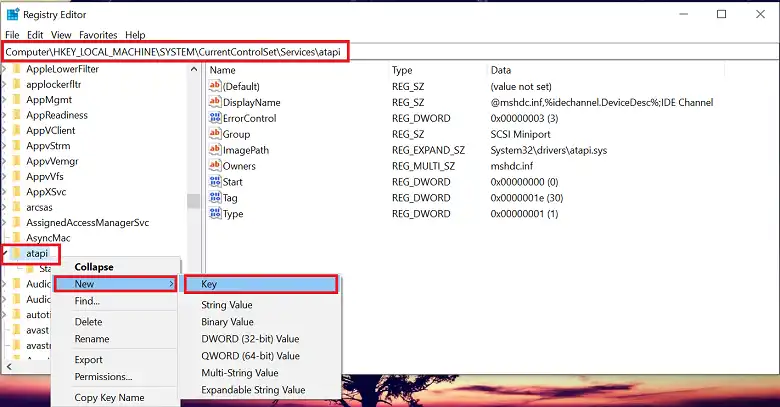
Step 8: Rename the newly created sub-key as Controller0.
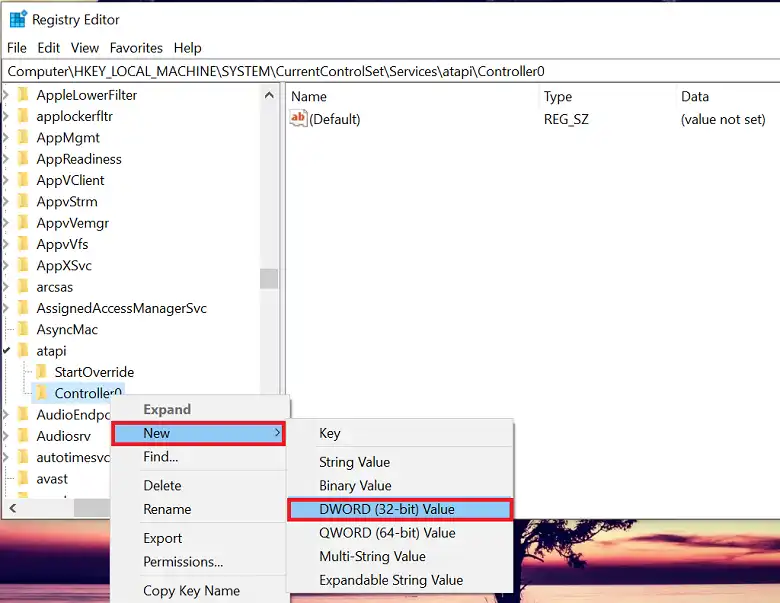
Step 9: Next, right-click on Controller0, go to New, and select DWORD (32-bit) Value. Name it EnumDevice1.
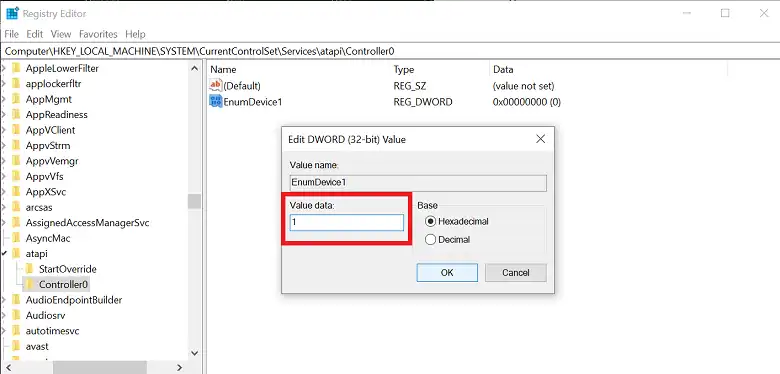
Step 10: Now, to enable the EnumDevice1 value, double-click on it. Then input 1 in the Value data box and go for it.
Step 11: Finally, restart the PC.
A reminder that, execute this procedure very carefully. If you do anything wrong while doing this then there will be serious problems. So, it will be wise to have a backup of the registry. After that, if any drive may not work properly, then reinstall the drivers with the latest versions.
Tips 3: Update DVD/CD-ROM Driver
You better try updating the CD/DVD driver as a corrupted or outdated driver may not allow the system to make the ATAPI device visible. So –
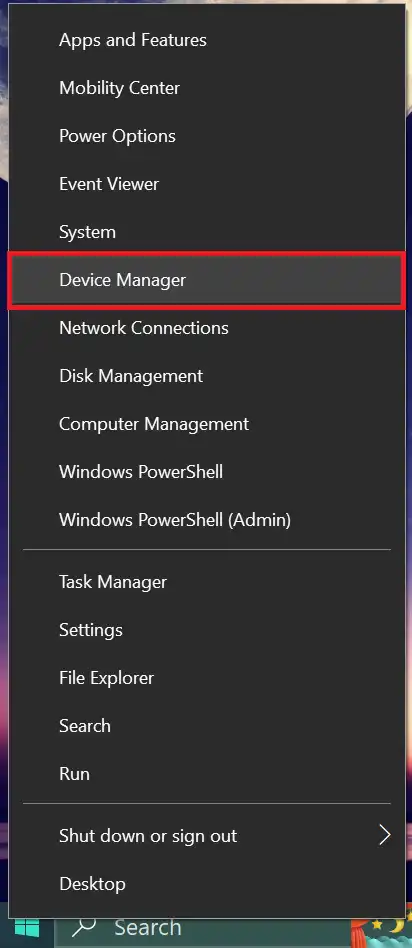
Step 1: Right-click on the Start menu and go for Device Manager.
Step 2: Expand the DVD/CD-ROM drives section.
Step 3: Now, right-click on the CD/DVD driver and select Update driver.
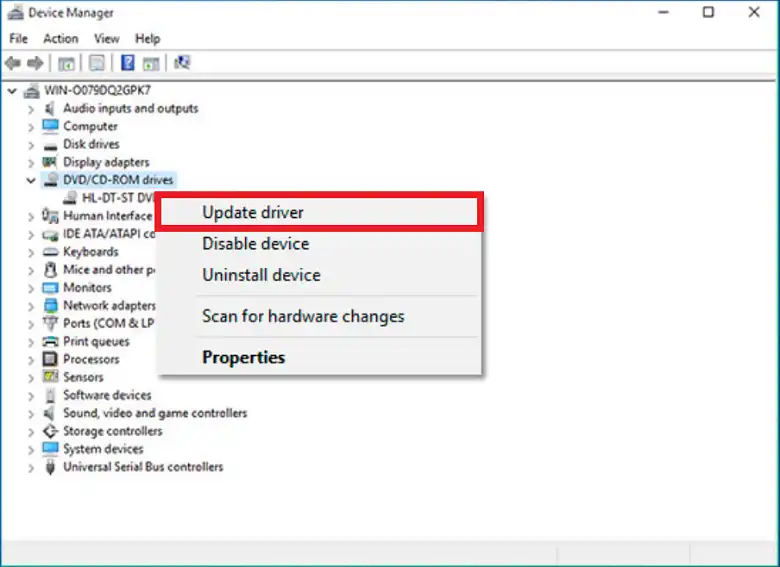
Step 4: Lastly, update the driver according to your preferred way.
NOTE: In the matter of CD and DVD drives, you can check for any dirt or dust that may cause a fault in the reading lens.
Tips 4: Update the Available Windows Update
Although not widely used, this approach is highly valuable. Some people express satisfaction with this solution. The actions to take are as follows –
Step 1: First, shut down the computer.
Step 2: After that, switch it off and unplug the external devices.
Step 3: Then turn on the computer and let it run through the usual bootup process. Do not do anything until the desktop appears.
Step 4: Now, connect the external devices to the USB ports that are not in use.
Step 5: Finally, the device drivers will attempt to install via Windows.
If it is unable to locate the drivers at this moment, then,
Step 1: Do not unplug the devices, let it them stay as it is they are.
Step 2: Go to Settings from the Start menu.
Step 3: Choose Update & Security.
Step 4: Stay in theWindows Update section and check for available latest drivers for the devices.
Step 5: If the updates are available, install them (search a couple of times if you do not get it the first chance).
Step 6: Restart the computer.
Tips 5: Enable USB Ports and DVD/CD-ROM drives
In case the problem is related to disabled USB ports or DVD/CD-ROM drives, you must check them and ensure they are enabled. To do that –
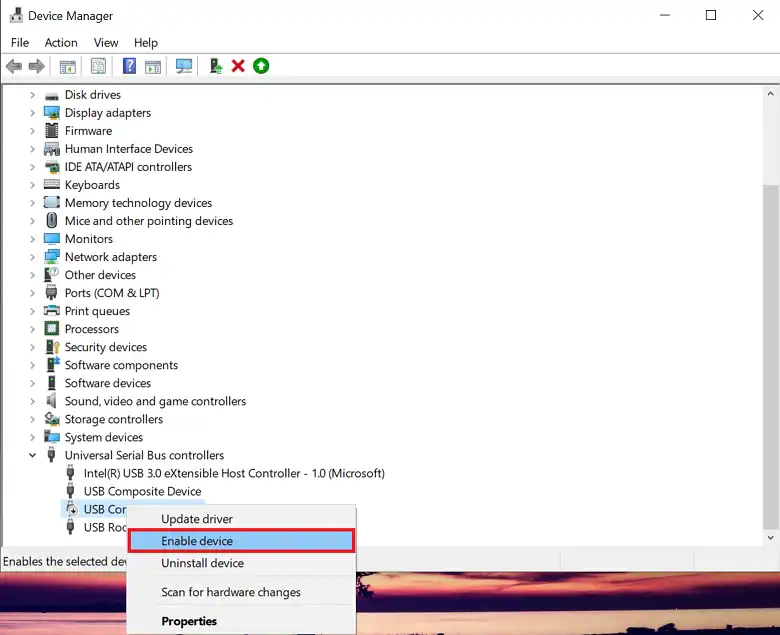
Step 1: Go to Device Manager.
Step 2: Then expand the Universal Serial Bus controllers section.
Step 3: Now, right-click on the relevant drive and select Enable device.
Step 4: In the same way, expand the DVD/CD-ROM drives section. Next, right-click on each driver and enable them.
Tips 6: Uninstall Faulty Windows Update
Sometimes a problematic Windows update is to blame to cause this issue. Even though Windows updates are meant to fix a lot of existing issues, often they bring some difficulties too. In this case, uninstalling the update can solve your problem.
Step 1: Get into the Windows Update section in Windows Update & Security.
Step 2: Select View update history and then Uninstall updates.

Step 3: Finally, right-click on that update and select Uninstall.


Hopefully, any of the tips will get you out of this mess.
Bonus Tips
To solve this problem follow the steps –
- Troubleshoot Hardware and Sound. Go to Control Panel, and search for Troubleshooting. Choose Hardware and Sound. Find Video Playback. Now, abide by the instructions to detect such problems and fix them.
- Restart the computer.
- Check the connections on the drive cables if they are properly connected.
Frequently Asked Questions
How will Windows 10 detect my CD/DVD drive?
Once Windows has booted to the desktop, choose Device Manager by holding down the Windows key and X. Expand DVD/CD-ROM drives, pick the specified optical drive from the menu bar, and select Uninstall. Restart your computer after exiting Device Manager. After detecting the drive, Windows will reinstall it.
How will my DVD drive get recognized in Windows 10?
To fix this issue, here are some tips – Ensure that your DVD player is properly attached. Updated to the most recent version of Windows 10. Install the DVD drive once more. Eliminate the IDE/ATAPI drivers. Repair damaged registry entries. Make a subkey in the registry. Have a backup of your system.
Conclusion
Missing ATAPI device is a common problem among users. It is generally popular as unknown device issue in device manager. Basically, this problem happens when the device drivers get corrupted or damaged by viruses or update issues. The given tips will help to resolve this problem and let you have comfortable usage.
