
Have you ever faced a problem with your computer? Maybe it wouldn’t start, or you wanted to install Windows 10 fresh. Knowing how to create a boot USB for Windows 10 can save you time and frustration.
Imagine you have a special tool that can fix most of your computer troubles. A boot USB acts like that tool. It helps you quickly install or repair your Windows 10 system. This guide will show you how to make your own boot USB easily.
Did you know that many people struggle with this task? They often think it’s too complicated. The truth is, it’s much simpler than you might think. With just a few steps, you can be ready to go.
So, are you curious about how to create a boot USB for Windows 10? Let’s jump in and discover the steps together!
How To Create Boot Usb For Windows 10: A Step-By-Step Guide
Creating a bootable USB for Windows 10 can be easy and fun! All you need is a USB drive and the Windows Media Creation Tool. Start by downloading the tool from Microsoft’s website. Then, insert your USB drive and follow the simple steps. Did you know this method can help you fix computer problems? It’s like a magic key for your PC! In no time, you’ll be ready to install Windows 10 or repair your system.
Understanding the Need for a Bootable USB
Importance of a bootable USB for system installation and recovery. Benefits over traditional installation methods.
A bootable USB is very important for installing or fixing a computer system. It helps you get started quickly, especially if your computer has problems. Unlike traditional methods, using a USB is often faster and easier. With a USB, you can:
- Install Windows easily on any computer.
- Recover data when your system fails.
- Use multiple devices without needing a CD drive.
- Store backups of important files.
Many people prefer bootable USBs because they save time and space.
Why is a bootable USB necessary?
A bootable USB allows easy installation and recovery of Windows 10. It ensures you have quick access to the system, making it an essential tool for everyone.
Downloading the Windows 10 ISO File
Official Microsoft website: Stepbystep instructions to download. Verifying the integrity of the ISO file.
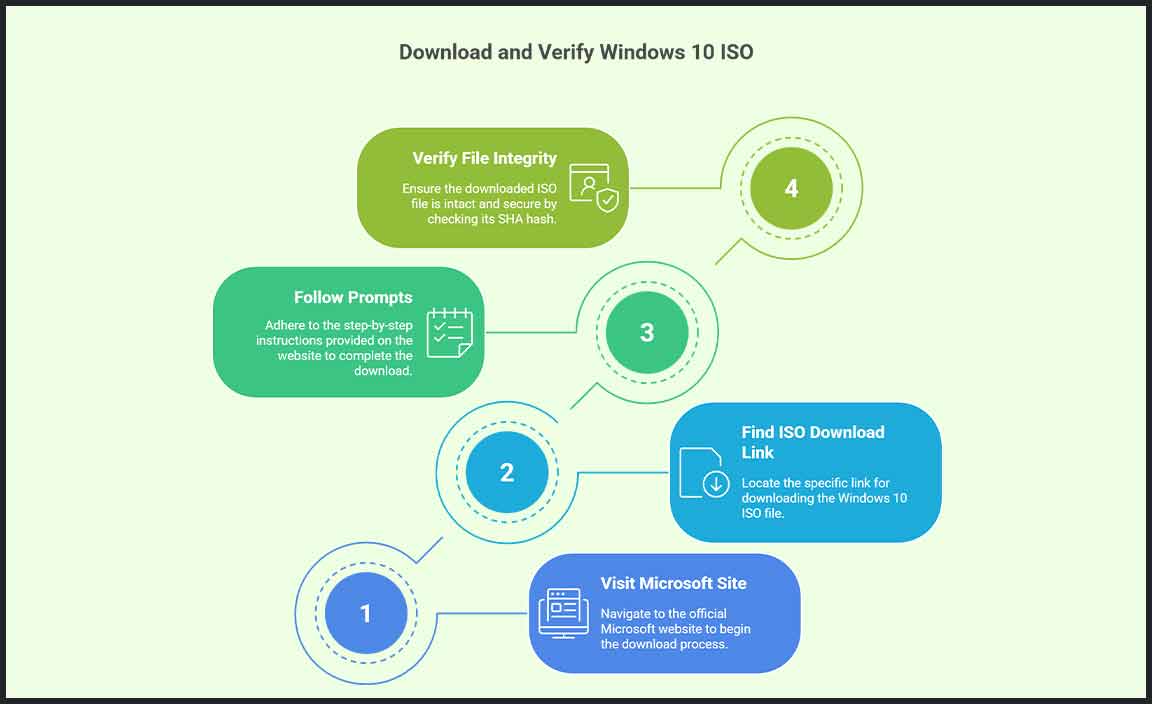
Ready to get Windows 10 on your boot USB? First, head over to the official Microsoft website. Look for the Windows 10 ISO download option, and click it like you mean it! Follow the step-by-step prompts that appear — they’re easier than tying your shoes, trust me. Once downloaded, you’ll want to verify your ISO file to ensure it’s as fresh as a morning donut. Check its SHA hash to confirm everything’s in tip-top shape!
| Step | Action |
|---|---|
| 1 | Go to the official Microsoft site |
| 2 | Find the ISO download link |
| 3 | Follow the prompts to download |
| 4 | Verify the file integrity |
Step-by-Step Guide to Creating the Bootable USB

Detailed instructions for using each recommended tool. Tips for formatting the USB drive correctly.
First, pick a tool to create your bootable USB. Popular choices are Rufus, Windows Media Creation Tool, and UNetbootin. Each works well but has its quirks. Follow the tool’s instructions carefully, like a treasure map, to avoid getting lost!
Next, it’s time to format your USB drive. Make sure to choose FAT32 as the file system. Why? Because Windows loves FAT32! To format, right-click on your drive in ‘This PC’ and select ‘Format.’ Don’t worry; this will only erase old files.
| Tool | Instructions |
|---|---|
| Rufus | Select your USB, choose Windows ISO, then click ‘Start.’ |
| Media Creation Tool | Follow the prompts to create installation media on the USB. |
| UNetbootin | Choose the ISO and USB drive, then click ‘OK.’ |
And there you go! Follow these steps, and you’ll have a bootable USB in no time. Who knew tech could be this easy? Just don’t forget where you hid that USB drive later!
Setting BIOS/UEFI for Booting from USB
How to access BIOS/UEFI settings. Adjusting boot order to prioritize USB drive.
To start, turn on your computer and look for the key that lets you enter BIOS or UEFI settings. Common keys are F2, DEL, or ESC. Press this key quickly as the computer begins to boot up. Once you’re in, look for the boot menu. Here, you can change the boot order. You want to move the USB drive to the top. This tells your computer to boot from the USB first. Save your changes and exit.
How do I access BIOS/UEFI settings?
To access these settings, restart your computer and press the right key like F2 or DEL right after it starts. This opens the BIOS menu.
Steps to Adjust Boot Order:
- Enter BIOS/UEFI settings.
- Find the boot order or boot menu option.
- Select USB as the first option.
- Save and exit the settings.
Troubleshooting Common Issues
Common problems during the creation process. Solutions for boot errors and USB recognition issues.
Creating a boot USB for Windows 10 can sometimes have hiccups. Some common issues include USB drives not being recognized or errors during the setup. If your USB isn’t showing up, try these steps:
- Check your USB connection; try a different port.
- Ensure the drive is formatted correctly.
- Test the USB on another computer.
If you face boot errors, consider the following:
- Restart your computer and try again.
- Verify that the BIOS settings are correct.
- Make sure the USB is set as the first boot device.
With these tips, you can resolve most problems quickly.
What should I do if my USB drive is not recognized?
Try using a different USB port or cable. Double-check that the drive is formatted correctly and compatible.
Verifying Your Bootable USB
Testing the USB drive on a different system. Checking for filesystem errors and corruptions.
After creating your bootable USB, it’s time for a little detective work! First, test the USB drive on a different computer. This way, you can see if it really works or if it’s like a magician that vanished. Next, check for any filesystem errors or corruption. Nobody wants a faulty USB that turns into a digital zombie!
| Step | Action |
|---|---|
| 1 | Test on another system |
| 2 | Check for errors |
If your USB fails these tests, don’t worry. You can always try again! Remember, even computers have their off days.
Using the Bootable USB to Install Windows 10
Stepbystep guidance for installation process. Tips for data backup and partitioning during installation.
Ready to install Windows 10? Grab your bootable USB and get started! First, plug in the USB and restart your computer. Make sure to boot from the USB. You’ll see a screen asking you to install. Just follow the prompts, like a treasure hunt, until you reach the installation options. Pro tip: Don’t forget to back up your data. You wouldn’t want to lose your cat videos, right? Also, create partitions for a tidy setup. Here’s a quick guide:
| Step | Action |
|---|---|
| 1 | Plug in the bootable USB. |
| 2 | Restart your computer. |
| 3 | Boot from the USB drive. |
| 4 | Follow the on-screen instructions. |
| 5 | Choose to partition your drive. |
And voilà! You’re on your way to a fresh Windows 10. Remember, a little patience goes a long way!
Conclusion
In conclusion, creating a boot USB for Windows 10 is simple. You need a USB drive and the Media Creation Tool. First, download the tool and follow the steps to transfer Windows 10. This will help you install or repair your system. Now that you know how to do this, try it yourself or read more online to deepen your understanding!
FAQs
What Tools Do I Need To Create A Bootable Usb Drive For Windows 1
To create a bootable USB drive for Windows, you need a few things. First, get a USB flash drive. It should have at least 8 GB of space. Then, you need a computer with Windows. Finally, download a tool like “Rufus” or “Windows Media Creation Tool.” These tools help you turn your USB drive into a bootable one.
How Can I Download The Windows Iso File For Use In Creating A Bootable Usb?
To download the Windows ISO file, go to the official Microsoft website. Look for the section about downloading Windows. You will find a button that says “Download.” Click it, and choose the version you want. Once the file is on your computer, you can use it to create a bootable USB.
What Steps Should I Follow To Use Rufus To Create A Bootable Usb For Windows 1
First, download and open Rufus on your computer. Next, plug your USB drive into the computer. In Rufus, select your USB drive from the list. Then, choose the Windows ISO file you want to use. Finally, click on “Start” to create your bootable USB. That’s it! Your USB is now ready to install Windows.
How Can I Ensure That The Usb Drive Is Properly Formatted Before Creating A Bootable Windows Installation?
To make sure your USB drive is ready, first, plug it into your computer. Next, open “File Explorer” and find your USB drive. Right-click on it and choose “Format.” In the format window, pick “FAT32” as the file system, and click “Start.” This clears everything on the drive and makes it ready for the Windows setup.
What Are The Potential Issues I Might Encounter While Creating A Bootable Usb For Windows 1And How Can I Troubleshoot Them?
You might run into a few problems when making a bootable USB for Windows. First, the USB might not be formatted correctly. If this happens, you can use a tool called Disk Management to fix it. Another issue could be the wrong version of Windows files. Check that you have the right version for your computer. If something goes wrong, try using a different USB drive or restarting your computer.
Resource:
-
Understanding File Systems (FAT32 vs NTFS): https://www.howtogeek.com/235596/whats-the-difference-between-fat32-exfat-and-ntfs/
-
What is BIOS and UEFI Explained: https://www.digitalcitizen.life/what-is-uefi/
-
How to Use Rufus for ISO Boot USB Creation: https://www.makeuseof.com/tag/create-bootable-usb-drive/
-
How to Check SHA Hash of a File in Windows: https://www.lifewire.com/verify-file-integrity-windows-5188612