Disabling Windows 10 updates might seem like a radical move, but for many users, it’s a necessary step to regain control over their operating system.
Whether you’re a gamer frustrated by performance drops after an update, a professional wary of compatibility issues with critical software, or simply someone who prefers a stable system without frequent, mandatory interruptions, understanding how to manage updates is crucial.
While Microsoft strongly encourages users to keep their systems up-to-date for security and performance reasons, there are legitimate scenarios where temporarily disabling them is the best course of action. This guide will walk you through the most effective and accessible methods to disable or pause Windows 10 updates, ensuring you can maintain your workflow without unwelcome disruptions.
Why Would You Want to Disable Windows 10 Updates?

Before we delve into the “how,” it’s important to understand the “why.” Windows 10 updates, while generally beneficial, can sometimes cause more problems than they solve for certain users. Here are some common reasons why people seek to disable Windows 10 updates:
Performance Issues: New updates can sometimes introduce bugs or inefficiencies that negatively impact system performance, especially on older hardware. Gamers, in particular, often experience frame rate drops or stuttering after an update.
Software Compatibility: Mission-critical software, especially for business environments, might not be immediately compatible with the latest Windows updates. A forced update could render essential tools unusable, leading to significant productivity losses.
Unwanted Features and UI Changes: Microsoft occasionally rolls out updates that introduce new features or alter the user interface in ways users don’t appreciate. If you’ve customized your Windows environment to your liking, an update could reset those preferences.
Bandwidth Limitations: For users with limited or capped internet data plans, large Windows updates can consume a significant portion of their monthly allowance, leading to unexpected costs.
Stability Concerns: Some users prefer to wait for a few weeks or even months after a major update is released to allow Microsoft to iron out any initial bugs that are inevitably discovered.
Method 1: Pausing Updates Through Windows Settings

The most straightforward and Microsoft-sanctioned method to temporarily disable Windows 10 updates is by utilizing the built-in Windows Update settings. This approach is ideal for short-term needs and won’t permanently disable updates, which is generally recommended for security reasons.
1. Open Settings: Click the Start button and select the gear icon to open the Settings app. Alternatively, press `Windows key + I`.
2. Navigate to Update & Security: Click on “Update & Security.”
3. Select Windows Update: In the left-hand menu, ensure “Windows Update” is selected.
4. Pause Updates: You’ll see an option to “Pause updates for 7 days.” Clicking this will temporarily halt all incoming updates. You can click this button up to five times, effectively pausing updates for up to 35 days.
5. Resume Updates: To re-enable updates before the pause period ends, simply return to the same screen and click “Resume updates.”
Important Note: Once your 35-day pause period expires, Windows 10 will require you to install the latest updates before you can pause them again. This is a crucial security measure to ensure your system remains protected.
Method 2: Using the Services Manager to Disable Windows Update Service
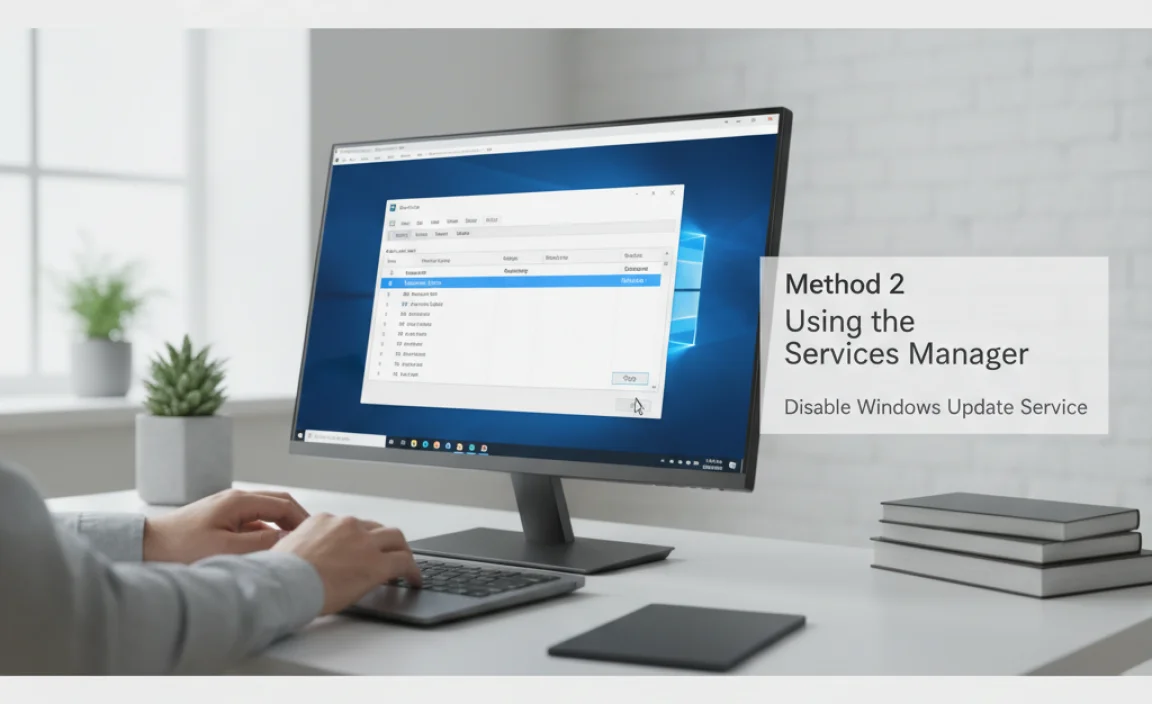
For a more persistent, albeit temporary, way to disable Windows 10 updates, you can directly disable the Windows Update service. This method requires administrative privileges and is more intrusive than the basic settings pause.
1. Open Services: Press `Windows key + R` to open the Run dialog box. Type `services.msc` and press Enter.
2. Locate Windows Update Service: In the Services window, scroll down and find “Windows Update.”
3. Stop the Service: Double-click on “Windows Update.” In the properties window, click the “Stop” button to halt the service.
4. Disable the Startup Type: Under “Startup type,” change the dropdown menu from “Automatic” or “Manual” to “Disabled.”
5. Apply and OK: Click “Apply” and then “OK” to save the changes.
Caveats: While this effectively stops Windows Update from checking for and downloading updates, it can also interfere with other Microsoft services that rely on it. Furthermore, Windows can sometimes automatically re-enable this service, especially after a cumulative update installs successfully. To re-enable updates, you would follow the same steps but change the “Startup type” back to “Automatic” and click “Start.”
Method 3: The Group Policy Editor (for Windows 10 Pro, Enterprise, and Education Editions)
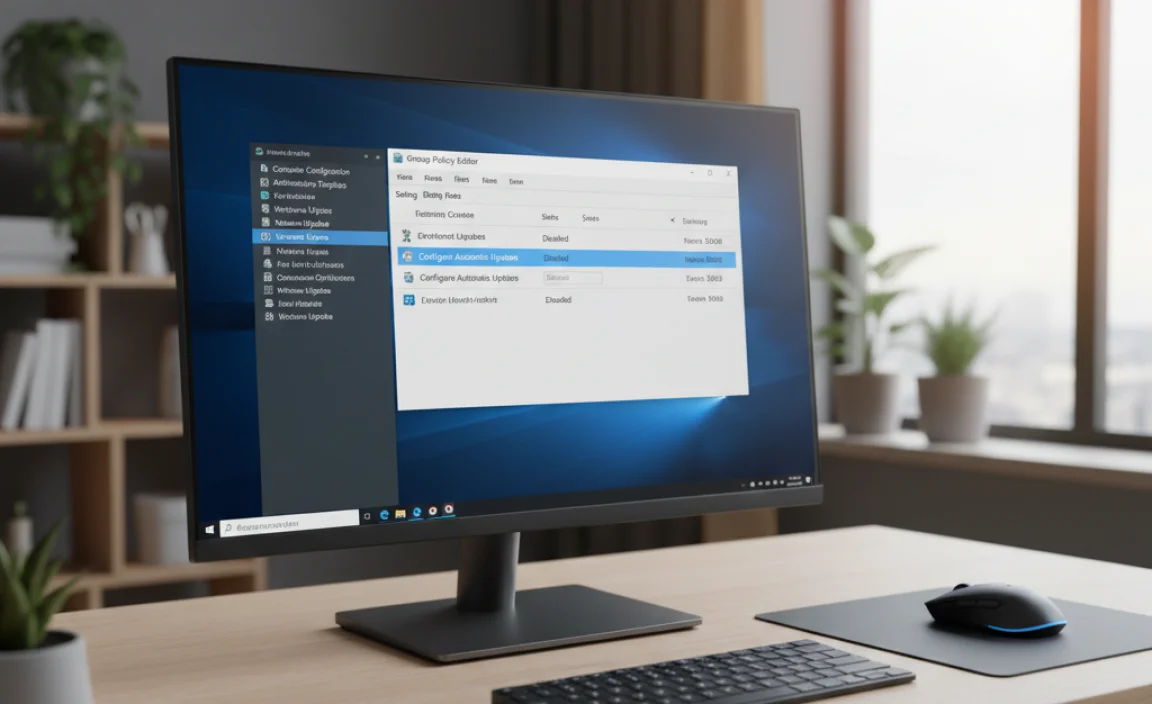
If you’re running a professional version of Windows 10, the Group Policy Editor offers a more robust way to manage update behavior. This is a powerful tool and should be used with caution.
1. Open Group Policy Editor: Press `Windows key + R`, type `gpedit.msc`, and press Enter.
2. Navigate to Windows Update Settings: In the left-hand pane, navigate to:
`Computer Configuration` > `Administrative Templates` > `Windows Components` > `Windows Update`.
3. Configure Automatic Updates: Double-click on “Configure Automatic Updates.”
4. Enable and Select Options:
Select the “Enabled” radio button at the top.
Under the “Options” section, you’ll find a dropdown menu. You can choose various configurations:
2 – Notify for download and notify for install: You’ll be notified when updates are available, but they won’t download or install without your explicit permission.
3 – Auto download and notify for install: Updates will download automatically, but you’ll be prompted to install them.
4 – Auto download and schedule the install: This is the default behavior, often with a specified installation time.
5 – Allow local admin to choose setting: Gives administrators more granular control.
To effectively disable Windows 10 updates from automatically downloading and installing, you would typically choose option `2` and ensure no specific installation times are set.
5. Apply and OK: Click “Apply” and then “OK.” You may need to restart your computer for the changes to take effect.
Note: If you want to completely disable Windows Update via Group Policy, you can also find a policy called “Remove access to use all Windows Update Features” under the same `Windows Update` settings. Enabling this policy will prevent users from accessing Windows Update entirely.
Method 4: Using the Registry Editor (Use with Extreme Caution)
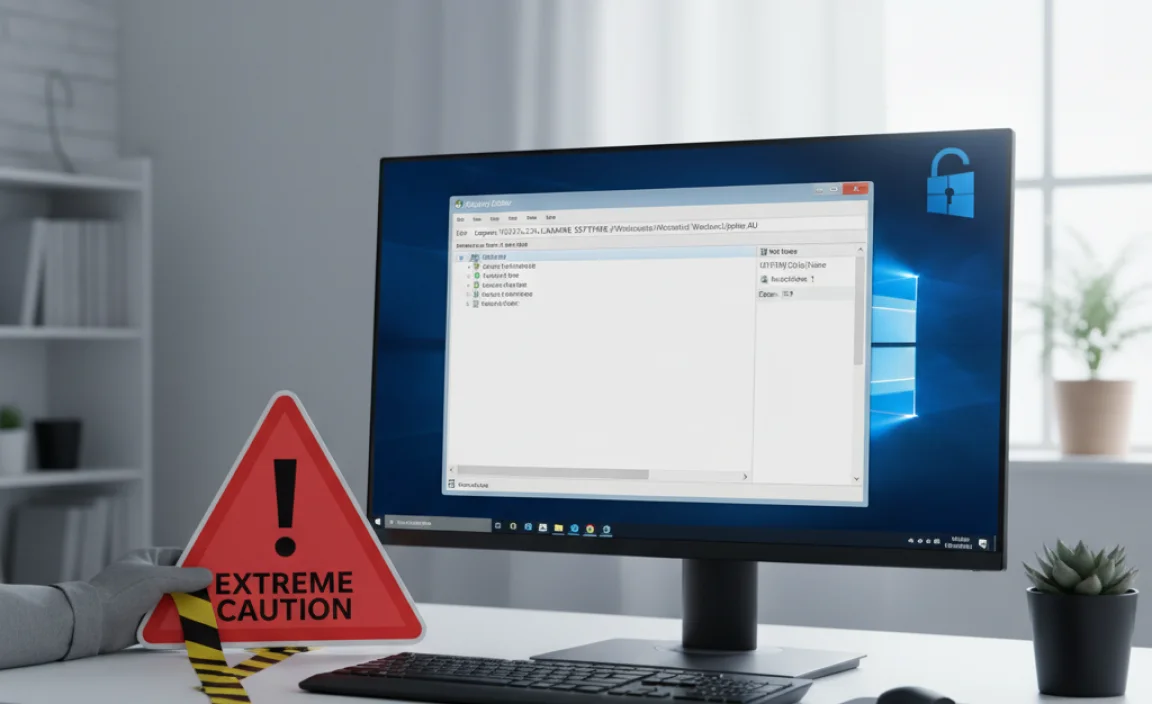
The Registry Editor is a powerful tool that allows for deep customization of Windows, but incorrect modifications can lead to serious system instability. Disabling Windows 10 updates through the registry should only be attempted if you are comfortable with advanced system modifications and have backed up your registry.
1. Open Registry Editor: Press `Windows key + R`, type `regedit`, and press Enter.
2. Navigate to the WindowsUpdate Key: Go to: `HKEY_LOCAL_MACHINESOFTWAREPoliciesMicrosoftWindowsWindowsUpdateAU`
If you don’t see `WindowsUpdate` or `AU` keys, you may need to create them by right-clicking on the parent key and selecting New > Key.
3. Create or Modify DWORD Value:
In the right-hand pane, right-click and select New > DWORD (32-bit) Value.
Name the new value `NoAutoUpdate`.
Double-click `NoAutoUpdate` and set its Value data to `1`.
4. Restart Your Computer: Changes to the registry usually require a system restart to take effect.
To Re-enable Updates: Change the Value data of `NoAutoUpdate` back to `0` or delete the `NoAutoUpdate` value entirely.
Important Considerations Before Disabling Updates
While the methods above offer ways to disable Windows 10 updates, it’s crucial to reiterate the importance of security. Windows updates often contain critical security patches that protect your system from malware, viruses, and exploitation.
Security Risk: Running an unpatched system leaves you vulnerable to known exploits, making your personal data and system integrity at risk.
Delayed Functionality: You’ll miss out on new features, performance improvements, and bug fixes.
* Potential for Issues: When you eventually decide to update, a large backlog of updates could lead to longer installation times or compatibility conflicts.
Therefore, it’s generally advisable not to disable updates permanently. Instead, use these methods strategically for short periods when absolutely necessary. Once your immediate need is resolved, remember to re-enable updates to keep your system secure and running optimally. Consider setting a regular schedule for when you will allow updates to install, even if it’s just once a month, to balance control with security.