Looking for CCleaner Free for Windows 10? This guide walks you through downloading, installing, and safely using CCleaner Free to optimize your PC. Keep your Windows 10 running smoothly and efficiently with this trusted tool.
Is your Windows 10 computer feeling a bit sluggish? Do you suspect it’s bogged down by temporary files, browser clutter, or unnecessary junk that’s slowing things down? You’re not alone! Many Windows 10 users experience a dip in performance over time. It’s frustrating when your once-speedy PC starts to lag, making everyday tasks feel like a chore.
But don’t worry, there’s a simple and very popular solution that can help. In this friendly guide, we’ll show you exactly how to get CCleaner Free downloaded and installed on your Windows 10 machine. We’ll cover everything from the download itself to using its key features to give your PC a much-needed tune-up. Get ready to revitalize your computer, one simple step at a time!
Why Your Windows 10 Needs a Regular Clean-Up
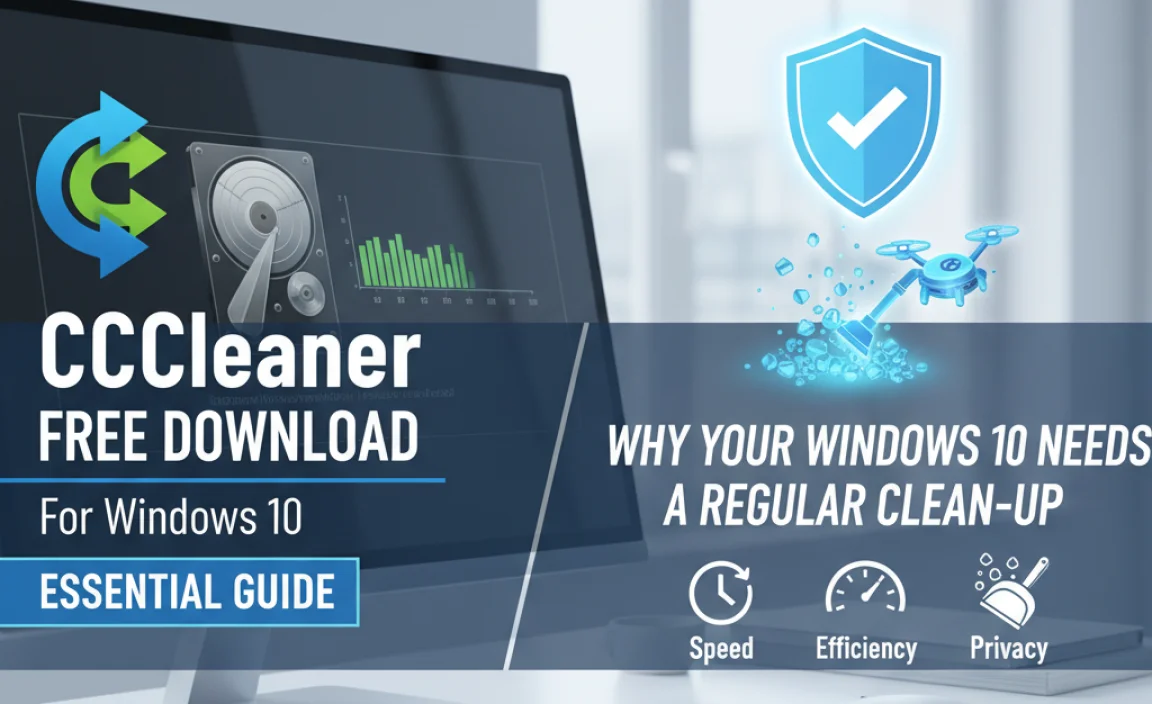
Over time, your Windows 10 computer accumulates a lot of digital “clutter.” Think of it like your desk at home; if you don’t tidy it up now and then, papers pile up, pens get lost, and it becomes hard to focus on what you need to do. Your PC is similar. Here’s what can build up:
- Temporary Files: Windows and applications create temporary files for various tasks. Sometimes, these files aren’t properly deleted, taking up valuable space.
- Browser Cache and Cookies: When you browse the internet, your browser stores data to speed up loading times on familiar sites. Over time, this cache can grow quite large and sometimes cause issues.
- Recycle Bin: Files you delete often go to the Recycle Bin, waiting for permanent removal. If it’s never emptied, it continues to occupy disk space.
- Downloaded Program Files: Small pieces of software used by web browsers can also accumulate.
- Error Logs and Crash Dumps: If an application or Windows itself crashes, it often generates log files that can gather over time.
All this accumulated data can not only eat up your hard drive space but can also potentially slow down your system’s performance. It’s like a car that needs regular maintenance to run at its best. A clean system is a happy system!
What is CCleaner Free?

CCleaner Free is a popular and trusted utility tool designed to clean up your computer and optimize its performance. Developed by Piriform (now owned by Avast), it has been helping users manage their PCs for years. The “Free” version offers a robust set of features that are perfect for most home users looking to declutter their Windows 10 systems.
It’s well-known for its ability to:
- Remove junk files and temporary data.
- Free up valuable hard drive space.
- Speed up your computer’s startup time.
- Improve overall system stability.
- Ensure your privacy by cleaning browser activity.
CCleaner Free is designed with simplicity in mind, making it an excellent choice for beginners who might be intimidated by more complex system tools. It guides you through the process, ensuring you understand what you’re doing without needing to be a tech expert.
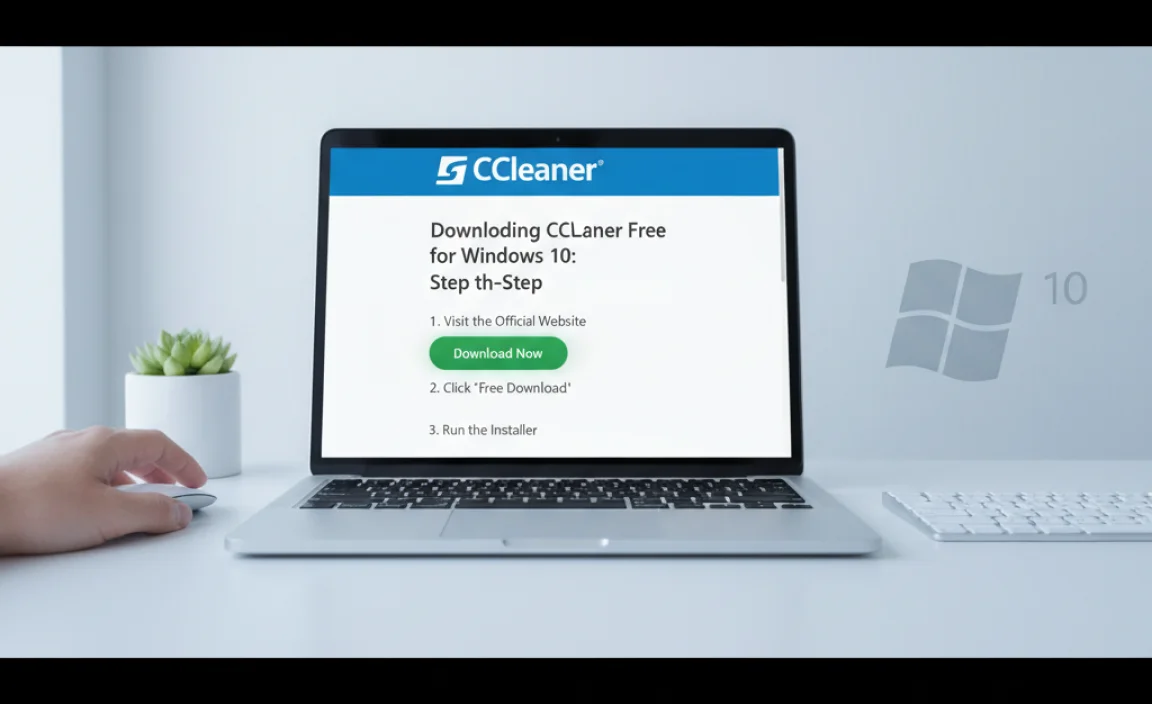
Downloading CCleaner Free for Windows 10: Step-by-Step
Getting CCleaner Free onto your Windows 10 computer is a straightforward process. We’ll guide you every step of the way to ensure you download the legitimate software safely. It’s crucial to download from the official source to avoid any unwanted bundled software or malware.
Step 1: Visit the Official CCleaner Website
Open your preferred web browser (like Microsoft Edge, Chrome, or Firefox) and navigate to the official CCleaner website. For the most reliable download, always go directly to the source:
https://www.ccleaner.com/ccleaner/download
This ensures you’re getting the genuine software straight from the developers.
Step 2: Select the Free Version Download
On the download page, you’ll typically see options for different versions of CCleaner. Look for the “CCleaner Free” or “Download Free” button. There might also be options for paid versions like CCleaner Professional, but for basic cleaning, the Free version is more than sufficient.
Click the download button for the Free version. Your browser will likely show a download progress indicator in a corner or a separate download window.
Step 3: Run the Installer File
Once the download is complete, you need to run the installer file. You can usually find this file in your browser’s “Downloads” folder. It will typically have a name like `ccsetupX.Y.exe` (where X.Y represents the version number).
Double-click the downloaded `.exe` file. Windows User Account Control (UAC) might pop up, asking for permission to make changes to your device. Click “Yes” to allow the installation to proceed.
Step 4: Customize Installation (Optional but Recommended)
The CCleaner installer will launch. Before you click “Install,” pay close attention to the customization options. This is where you can avoid installing any extra software that you might not want.
Look for a “Customize” or “Options” link, often located near the “Install” button. Clicking this will usually reveal choices for installation path and software offers. Carefully uncheck any boxes related to bundled software, offers for other programs, or browser extensions that you don’t wish to install.
Important Note: In the past, CCleaner has sometimes offered to install Google Chrome or other software during the setup. Always review these screens carefully and uncheck anything you don’t explicitly want. The goal is to install only CCleaner itself.
Step 5: Install CCleaner
After reviewing the customization options, click “Install.” The installer will then add CCleaner to your Windows 10 system. This usually takes only a minute or two.
Step 6: Launch CCleaner
Once the installation is finished, you’ll likely see a checkbox to launch CCleaner. You can leave it checked and click “Run CCleaner,” or you can uncheck it and find the CCleaner icon on your desktop or in your Start Menu later.
Congratulations! You’ve successfully downloaded and installed CCleaner Free on your Windows 10 PC.
Getting Started with CCleaner Free: Your First Clean
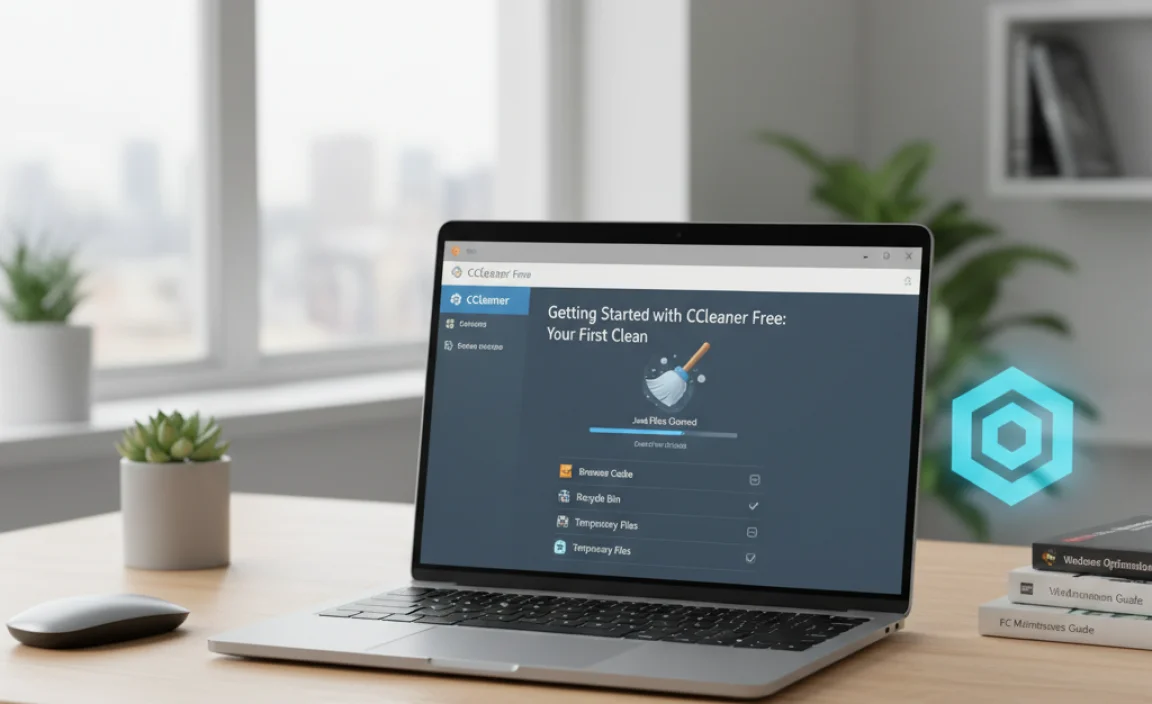
Now that CCleaner is installed, let’s get it to work its magic. The most common and impactful feature for beginners is the “Health Check.” This function provides a guided, safe way to clean your PC.
Using the Health Check Wizard
When you launch CCleaner Free, you’ll likely be greeted by the “Health Check” wizard. This is the easiest way to perform a basic cleanup.
- Start the Health Check: Click the “Start Health Check” button.
- Privacy Scan: CCleaner will first offer to scan for privacy data (browser history, cookies, etc.). You can choose whether to run this scan. For a general cleanup, you can proceed. Click “Next.”
- Junk Files Scan: CCleaner will then scan for junk files. This includes temporary internet files, system temporary files, Recycle Bin contents, and more.
- Review and Clean: After the scan, CCleaner will show you a summary of what it found and suggest steps to clean your PC. Review the suggestions. For your first cleanup, it’s generally safe to accept the defaults. Click the “Fix All” button.
- Confirmation: CCleaner might ask for confirmation before making changes. Confirm to proceed.
The wizard will then automatically clean up the identified junk files and privacy data. This process might take a few minutes, depending on how much clutter is found.
Once the Health Check is complete, you’ll usually see a confirmation message. Your PC is now cleaner!
Exploring CCleaner’s Custom Clean Feature

While Health Check is great for a quick tune-up, CCleaner Free also offers a more detailed “Custom Clean” feature. This allows you to choose exactly which types of files and data you want to clean. For users who want more control, this is where you’ll spend most of your time.
How to Use Custom Clean
- Navigate to Custom Clean: On the left-hand side menu of CCleaner, click on “Custom Clean.”
- Select Applications/Windows Tabs: At the top of the Custom Clean window, you’ll see two tabs: “Windows” and “Applications.”
- Windows Tab: This section focuses on cleaning temporary files and data generated by Windows itself (e.g., Recycle Bin, Temporary Internet Files, Log Files).
- Applications Tab: This section covers temporary files and data created by the various applications you have installed (e.g., browser history for Chrome, Firefox, Edge; temporary files for programs like Skype, VLC, etc.).
- Choose Items to Clean: Browse through the checkboxes under each tab. Check the boxes for the items you want CCleaner to clean. For beginners, it’s usually safe to select most of the default options, especially those related to temporary files and the Recycle Bin.
- Optional: Browser History & Cookies: Be mindful of cleaning browser history and cookies. Cleaning cookies will log you out of most websites you visit. If you frequently visit sites where you want to stay logged in, you might want to uncheck the “Cookies” option for those specific browsers.
- Run Cleaner: Once you’ve made your selections, click the “Run Cleaner” button in the bottom right corner.
- Confirmation: CCleaner will warn you that it’s about to delete files from your computer. Click “Continue” to proceed.
CCleaner will then perform the scan and cleanup based on your selections. This gives you a more granular approach to managing your computer’s cleanliness.
Other Useful Tools in CCleaner Free
Beyond just cleaning files, CCleaner Free includes a few other handy tools that can help manage your PC’s performance and software.
1. Driver Updater (Brief Mention)
While CCleaner’s core strength is cleaning, some versions might offer a Driver Updater tool. It’s important to be cautious with driver updaters. Always ensure you trust the source and understand what drivers are being updated. For critical driver updates, relying on Windows Update or your hardware manufacturer’s official website is often the safest bet. If you do choose to use CCleaner’s Driver Updater, make sure to create a backup of your system first. For official driver information, Microsoft’s support site is invaluable: Microsoft Driver Update Guide.
2. Uninstall Programs
CCleaner’s “Tools” section includes an “Uninstall” option. This is a more user-friendly interface for managing your installed programs compared to the standard Windows “Add or Remove Programs” or “Apps & features.”
- Click on “Tools” on the left-hand menu.
- Select “Uninstall.”
- You’ll see a list of all programs installed on your computer.
- You can sort them by name, publisher, installation date, or size.
- If you want to remove a program, select it and click the “Run Uninstaller” button.
This can be helpful for removing old software you no longer need, which can also free up disk space and potentially improve startup times.
3. Startup Programs
Many programs set themselves to launch automatically when Windows starts. This can significantly increase your boot time. CCleaner’s “Startup” tool (under “Tools”) allows you to easily manage these entries.
- Go to “Tools,” then select “Startup.”
- You’ll see entries categorized by “Windows,” “Scheduled Tasks,” and “Context Menu.”
- Carefully review each entry. If you see a program that you don’t need to start automatically, select it and click the “Disable” button.
Caution: Do not disable entries you are unsure about, especially those related to system components or security software. Disabling essential startup items can cause system instability.
4. System Restore
CCleaner also provides easy access to Windows’ System Restore feature. This is a crucial tool for reverting your system to a previous state if a software change or update causes problems.
- Go to “Tools,” then select “System Restore.”
- You’ll see a list of available restore points.
- You can choose to create a new restore point or delete older ones to save space (use with caution, as deleting restore points limits your recovery options).
- You can also launch the System Restore wizard from here.
These extra tools in CCleaner Free can be very beneficial for maintaining a healthy and responsive Windows 10 system.
CCleaner Free vs. CCleaner Professional
For many users, CCleaner Free is all they need. However, it’s worth knowing what makes the Professional version different. This helps you decide if an upgrade is right for you.
- Disk Space Cleanup
✓✓
- Startup Program Management
✓✓
- Uninstall Manager
✓✓
- Driver Updater
Limited / Not always included✓ (Advanced features, real-time checks)
- Real-time Monitoring
✗
✓ (Continuously monitors and cleans in the background)
- Automatic Updates
Manual check required✓ (Automatic checks and installs for CCleaner itself)
- Premium Support
Community forums✓ (Direct support from Avast)
- Software Updater
✗✓ (Helps update other popular applications)
| Feature | CCleaner Free | CCleaner Professional |
|---|---|---|
| Basic Cleaning (Junk Files, Browser Data) | ✓ | ✓ |
In summary, CCleaner Free is excellent for manual cleaning and basic PC maintenance. CCleaner Professional adds convenience and advanced features like real-time monitoring and automatic updates, which can be very appealing if you want a set-and-forget solution or require more advanced system management capabilities.
Security and Privacy Considerations with CCleaner
CCleaner is a powerful tool, and like any tool that modifies system files or browser data, it’s important to use it responsibly. Here are some key points regarding security and privacy:
- Download from Official Source: As stressed before, always download CCleaner from the official ccleaner.com website. This is the single most important step to avoid malware or bundled unwanted software.
- Be Selective with Cleaning:
- Cookies: Cleaning cookies will log you out of websites. If you want to remain logged in, uncheck the cookie-related options in the “Custom Clean” section.
- Saved Passwords: CCleaner does not clean saved passwords by default, and it is good practice to keep it that way. If you ever feel the need to clean this data, ensure you have backups or are absolutely certain you wish to remove it.
- System Restore Point: Before performing any significant cleaning or using advanced tools like the Registry Cleaner (which is NOT recommended for beginners), it’s a wise practice to create a System Restore Point. CCleaner itself often prompts you to do this for certain operations. If something goes wrong, you can revert your system.
- Registry Cleaner Caution: While CCleaner Free includes a Registry Cleaner tool, I strongly advise beginners against using it. The Windows Registry is a critical part of your operating system. Incorrectly cleaning or modifying it can lead to severe system instability, crashes, or prevent Windows from booting. Stick to the file cleaning and system optimization features. For official guidance on Windows stability, you can refer to Microsoft’s support resources.
By following these guidelines, you can use CCleaner Free safely and effectively to maintain your Windows 10 PC.
Tips for Maximizing CCleaner’s Benefits
To get the most out of CCleaner Free on your Windows 10 machine, consider these tips:
- Regular Schedule: Don’t just clean your PC once. Set a schedule, perhaps once a week or bi-weekly, to run CCleaner. This prevents clutter from building up excessively.
- Focus on Performance: If your main goal is speed, focus on cleaning temporary internet files, temporary system files, and optimizing startup programs.
- Space Saving: If you’re running low on disk space, make sure to empty the Recycle Bin and clean out temporary files thoroughly.
- Backup Before Major Changes: Even though CCleaner Free is generally safe, it’s always a good idea to create a System Restore point or a full system backup before using any new tool or performing a deep clean.
- Understand the Tool: Take a few minutes to explore the different sections in CCleaner. The better you understand what each option does, the more effectively you can use it.
- Combine with Windows Update: Ensure your Windows 10 is up-to-date. Running CCleaner is helpful, but regular Windows updates are crucial for security and performance. You can access Windows Update via Settings > Update & Security > Windows Update.
Troubleshooting Common Issues
While CCleaner is reliable, you might occasionally encounter minor issues. Here are a few common ones and how to address them:
| Issue | Possible Cause | Solution |
|---|---|---|
| CCleaner won’t install. | Antivirus software is blocking the installation; corrupted download file. | Temporarily disable your antivirus during installation (remember to re-enable it afterward); download the installer again from the official site. |
| CCleaner misses some junk files. | The files are in use by a running program; specific cleaning rules are not enabled. | Close all unnecessary applications before running CCleaner. Explore the “Options” > “Settings” in CCleaner to enable more cleaning rules (use caution). |
| Websites are asking me to log in again after using CCleaner. | You cleaned browser cookies. | In CCleaner’s “Custom Clean” > “Applications” tab, uncheck “Cookies” for the browsers you use before running the cleaner. You can also specifically exclude certain website cookies in your browser’s settings (e.g., Chrome Settings > Privacy and security > Cookies and other site data > Sites that can always use cookies). |
| System is unstable after cleaning. | Potentially cleaned critical system files or (if used) the registry incorrectly. | Use the “System Restore” tool in CCleaner or Windows to revert your PC to a previous state. If you used the Registry Cleaner, this is the most likely culprit. Reinstalling Windows might be necessary in severe cases. |
Remember, for any significant issues or if you’re unsure about a particular setting, it’s always best to consult the official CCleaner support or Microsoft’s support forums.
Frequently Asked Questions (FAQ)
Q1: Is CCleaner Free safe to download and use on Windows 10?
Yes, CCleaner Free is generally safe when downloaded directly from the official Piriform/CCleaner website. It’s a reputable tool that millions use. Just be careful during installation to opt out of any bundled software offers.
Q2: Will CCleaner Free speed up my Windows 10 computer?
It can help! By removing junk files and optimizing startup programs, CCleaner can free up disk space and reduce boot times, often leading to a noticeable improvement in perceived speed and responsiveness.
Q3: Can I use CCleaner to clean temporary files for all my applications?
Yes, the “Custom Clean” feature in CCleaner Free allows you to select and clean temporary files and data for many popular applications installed on your PC.
Q4: Should I use CCleaner’s Registry Cleaner tool?
For beginners and most users, it’s highly recommended to avoid the Registry Cleaner tool. It can potentially cause system instability if used incorrectly. Stick to file cleaning and startup management.
Q5: How often should I run CCleaner?
A good schedule is to run CCleaner for a basic cleanup once a week or every two weeks. If you notice your PC slowing down or running out of disk space, you can run it more frequently.
Q6: Does CCleaner Free remove viruses?
No, CCleaner is not an antivirus program. It’s a system optimization and cleaning tool. You need separate, dedicated antivirus software to protect your computer from viruses and malware.
Q7: What’s the difference between CCleaner Free and Professional?
CCleaner Professional offers additional features like real-time monitoring, automatic updates, and a software updater, which are not available in the Free version. The Free version provides essential cleaning and optimization tools sufficient for most home users.
Conclusion: Your PC, Optimized and Ready
You’ve taken a great step towards maintaining a healthier, faster, and more reliable Windows 10 computer by learning how to download and use CCleaner Free. We’ve walked through the safe downloadable process, explored the easy “Health Check” and the more detailed “Custom Clean” features, and even touched upon other helpful tools within CCleaner’s suite.
Remember, keeping your system clean is a vital part of PC care. By incorporating regular cleanups with CCleaner Free into your routine, you’re helping to prevent performance issues, free up valuable disk space, and ensure your Windows experience remains smooth and enjoyable. Always prioritize downloading from the official source and use the tools wisely, especially avoiding the registry cleaner if you’re new to this level of system maintenance. With these steps, you can confidently manage your PC’s cleanliness and keep it running at its best. Happy computing!