
Ultimate how to install windows 7 Guide!
Have you ever wondered how your computer starts up? It needs a special brain called an operating system. Imagine your computer is a new toy without instructions. It cannot do anything on its own. Windows 7 was a very popular operating system for many years. Learning how to install Windows 7 gives your computer its instructions. It helps your computer know how to run programs and play games. This process might seem tricky, but it is like following a recipe. We will explore each step together. You will see it is not so hard after all.
Key Takeaways
- Always back up important files before you start.
- You need a Windows 7 disk or USB drive.
- Change your computer’s boot order to start the setup.
- Follow the on-screen steps carefully to install Windows 7.
- Activate Windows 7 with your product key later.
Preparing for How to Install Windows 7
Before you begin to install a new operating system, you must prepare. This step is super important for how to install Windows 7 smoothly. Think of it like getting ready for a big trip. You would pack your bags and check your map first. First, you need to make sure your computer is strong enough. It needs enough memory, disk space, and a good processor. If your computer is too old, Windows 7 might run slowly. Next, you must back up your files. Backing up means saving copies of your photos, games, and school projects. You can save them on a USB stick or an external hard drive. What if something goes wrong during the installation? Your files would be safe. This step prevents sad surprises. It is like having a spare key for your house. Always check your computer’s power supply too. You do not want it to turn off in the middle of installing. A sudden power loss can break the installation.
- Check your computer’s system requirements first.
- Back up all your important files safely.
- Find your Windows 7 product key.
- Make sure your computer has steady power.
- Gather all necessary drivers for your computer.
- Disconnect extra devices like printers.
Once your files are safe, you need your special product key. This key is a long code of letters and numbers. It tells Windows 7 that you own it. You usually find it on a sticker on your computer or inside the Windows 7 box. Keep this key handy. You will need it to make Windows 7 work fully. Also, think about your computer’s drivers. Drivers are small programs. They help your computer parts talk to Windows 7. Sometimes you need to install these drivers after Windows 7 is set up. You can usually find them on your computer maker’s website. Having them ready saves time. These preparations make the whole process much easier. They help ensure a successful setup.
Fun Fact or Stat: Windows 7 sold over 100 million copies in its first six months.
Backup Your Important Files First
Imagine drawing a beautiful picture for school. What if you lost it before turning it in? That would be very sad. This is why backing up your files is so important. When you learn how to install Windows 7, your computer’s main storage, called the hard drive, will be changed. This change often means all your old files are erased. So, before you start, find all your favorite games, photos of family, and important school work. Copy them onto another storage device. A USB flash drive or an external hard drive works well. Think of these as safe little boxes for your digital treasures. You can also use online cloud storage. This is like saving your files on the internet. It keeps them safe in case anything happens to your computer. Always double-check that your backups are complete. It gives you peace of mind.
Find Your Windows 7 Product Key
Every new game console or toy often has a special code. This code proves you bought it. Windows 7 also has a special code. It is called a product key. This key is like a secret password. It tells Windows that you are the rightful owner. Without this key, your Windows 7 might not work forever. You will find this key in a few places. It could be on a sticker at the bottom or side of your computer. Sometimes it is inside the box where you bought Windows 7. It looks like a long string of letters and numbers. Write it down carefully on a piece of paper. Keep this paper somewhere safe. You will need to type this key in during the installation. It makes sure your copy of Windows 7 is real.
Check Your Computer’s Power Supply
Have you ever been building a tall tower of blocks? What happens if someone bumps the table? Your tower might fall down. Installing Windows 7 is a bit like building that tower. It takes time and needs to be stable. If your computer turns off halfway through, the installation can get broken. This means you might have to start all over again. So, make sure your computer is plugged into a wall outlet. For laptops, ensure the battery is fully charged. Then, plug it in too. This way, you have power from two sources. It is like wearing both a belt and suspenders. This simple step can prevent a big headache later. A steady power supply ensures a smooth installation process.
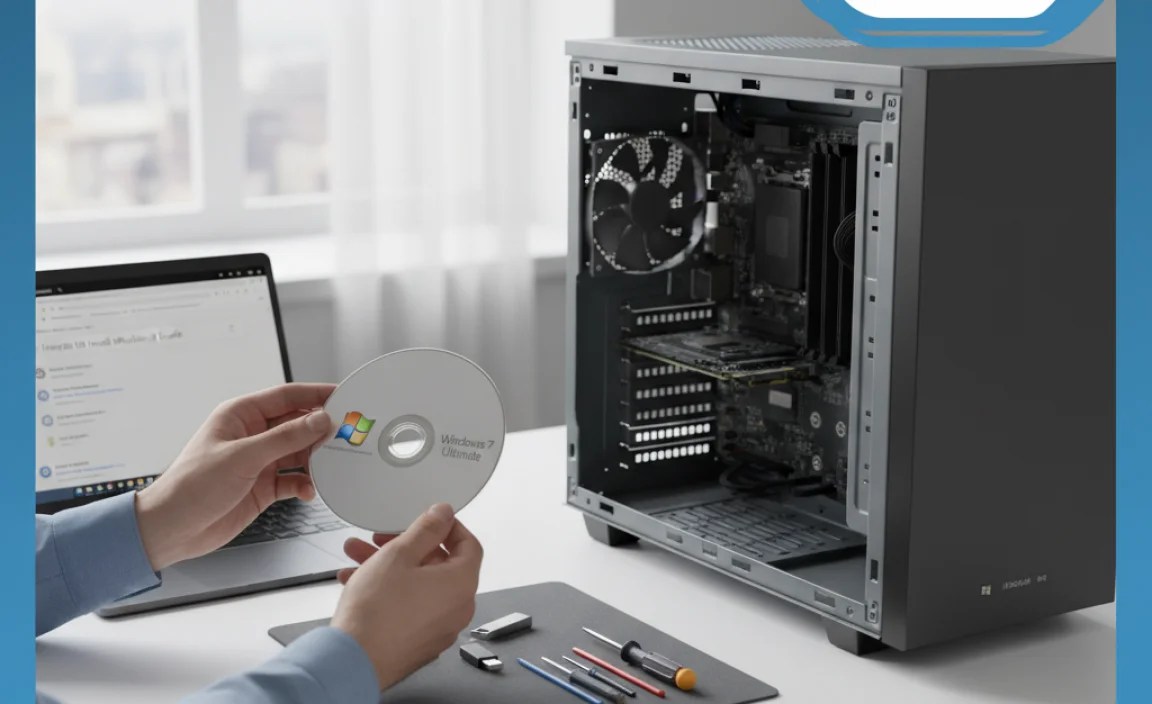
Getting Your Windows 7 Installation Media

To learn how to install Windows 7, you need special tools. Think of it like baking a cake. You need the right ingredients first. For Windows 7, your main ingredient is the installation media. This is how the Windows 7 program gets onto your computer. Most people use a DVD or a USB flash drive. If you bought Windows 7 in a box, it probably came with a DVD. You just put this disk into your computer’s DVD player. If your computer does not have a DVD player, or if you got Windows 7 digitally, you might use a USB drive. You can download the Windows 7 setup files from Microsoft’s website. Then, you use a special tool to copy these files onto a USB drive. This makes the USB drive “bootable.” A bootable drive means your computer can start from it. This is a very important step. Make sure your USB drive is empty first. The copying process will erase everything on it.
| Installation Media Type | Pros | Cons | Best For |
|---|---|---|---|
| DVD Disc | Easy to use if you have a DVD drive. | Slower than USB. Can get scratched. | Older computers with DVD players. |
| USB Flash Drive | Much faster installation. Portable. | Requires creating a bootable drive. | Newer computers without DVD drives. |
| Network Installation | Great for many computers. | Needs advanced computer skills. | Businesses or schools. |
| External Hard Drive | Large storage for many installations. | Can be more complex to set up. | Tech experts or IT professionals. |
Once you have your DVD or USB ready, keep it safe. This is your key to starting the installation. If you are using a USB drive, make sure it has at least 4GB of space. This is usually enough for Windows 7 files. Always download the official Windows 7 files. Do not use files from unknown websites. They might contain viruses or other bad software. Using official sources keeps your computer safe. This media is what tells your computer how to get Windows 7. It starts the whole process. Having the correct media is a big part of how to install Windows 7 without problems.
Fun Fact or Stat: The smallest USB drive ever made was the size of a paperclip.
Using a Windows 7 Installation DVD
Many computers still have a special slot for disks. This slot is called a DVD drive. If you bought Windows 7 in a box, it likely came with a shiny DVD. This DVD has all the files needed to install Windows 7. To use it, simply open your computer’s DVD tray. Gently place the Windows 7 DVD inside. Make sure it clicks into place. Then, close the tray. Your computer will now know there is a disk inside. When you restart your computer, it will look at this disk. It will begin the installation process from the DVD. This is often the easiest way if you have a DVD drive. Make sure the disk is clean and has no scratches. Scratches can stop the installation.
Creating a Bootable USB Drive
What if your computer does not have a DVD drive? Many newer laptops skip them. No problem! You can use a USB flash drive instead. First, you need a USB drive that is empty. It should have at least 4 gigabytes of space. Next, you will need to get the Windows 7 installation files. You can download these from Microsoft’s website. Then, you need a special tool. This tool will copy the files onto your USB drive. It makes the USB drive “bootable.” This means your computer can start from it. A popular tool for this is the “Windows USB/DVD Download Tool.” It is easy to use. Just follow its steps. It will ask you where your Windows 7 files are and which USB drive to use. Be careful to pick the right USB drive! It will erase everything on it.
Downloading Official Windows 7 Files
It is super important to get your Windows 7 files from the right place. Imagine you need to download a game. You would go to a trusted game store, right? The same is true for Windows 7. Always download the installation files from Microsoft’s official website. This ensures that the files are real and safe. Other websites might offer “free” Windows 7 downloads. These can be dangerous. They might contain viruses or other bad software. These can harm your computer. So, stick to official sources. You will usually need your product key to download the correct version. This keeps your computer secure and healthy. It is a smart choice for how to install Windows 7 safely.
Starting the Windows 7 Setup Process
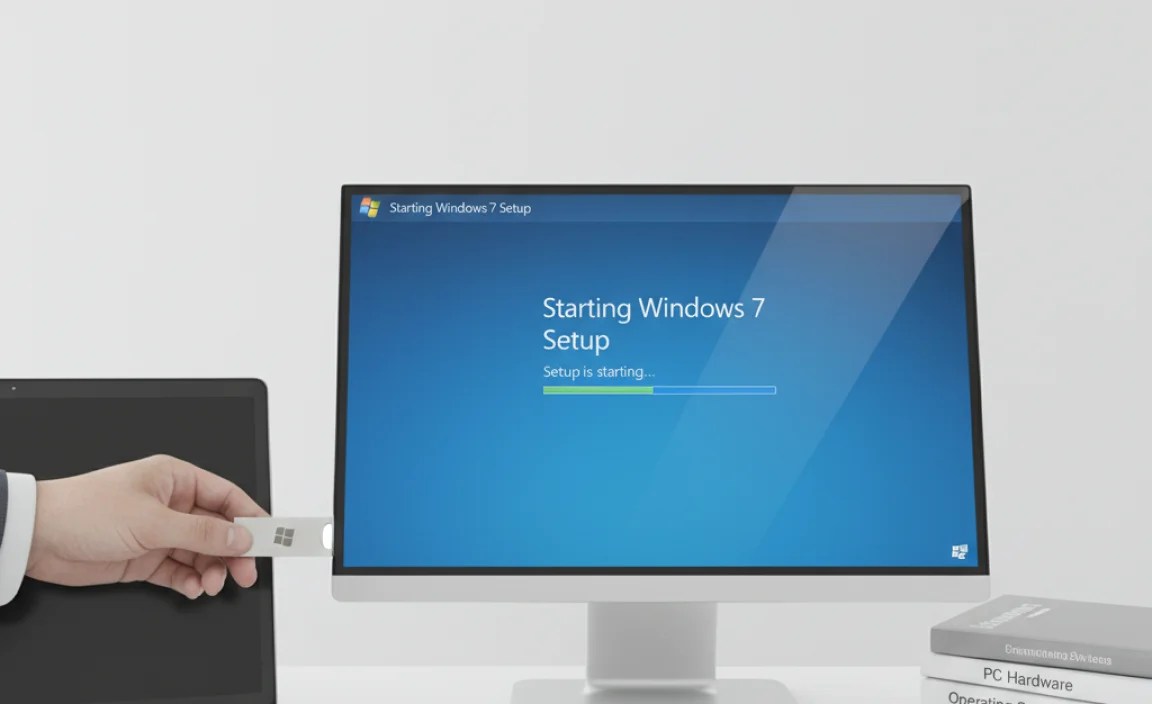
Now that you have your installation media ready, it is time to start. This is a very exciting part of how to install Windows 7. First, make sure your computer is turned off. Then, plug in your USB drive or insert your DVD. Now, turn your computer on. As soon as it starts, you need to press a special key. This key tells your computer to start from the DVD or USB, not from your old hard drive. Common keys are F2, F10, F12, or the Delete key. You might see a message on your screen telling you which key to press. It often flashes very quickly. If you miss it, just restart your computer and try again. This key takes you to the “boot menu” or “BIOS/UEFI settings.” In this menu, you choose your DVD drive or USB drive as the “first boot device.” Then, save your changes and exit. Your computer will restart. This time, it will start the Windows 7 setup.
- Insert your Windows 7 DVD or USB drive.
- Turn on your computer right away.
- Press the special key to enter the boot menu.
- Select your installation media from the list.
- Save and exit the boot menu settings.
- Watch for the “Press any key to boot” message.
When the Windows 7 setup starts, you will see a blue screen. It will ask you to choose your language, time, and keyboard settings. Pick the ones that are right for you. Then, click “Next.” On the next screen, you will see a big “Install now” button. Click this button to begin the main installation. The setup will ask you to accept the license terms. These are the rules for using Windows 7. Read them if you want, then check the box that says “I accept the license terms.” After that, click “Next.” This gets you ready for the next big decision. This initial setup is very important for how to install Windows 7 correctly.
Fun Fact or Stat: The very first computer “bug” was a real moth stuck in a relay in 1947.
Changing Your Computer’s Boot Order
Imagine you have two doors to enter your house. One door goes to the living room, and the other goes to a secret workshop. Normally, you use the living room door. But today, you want to go straight to the workshop. Your computer has a similar idea. It usually starts from its main storage, the hard drive. But to install Windows 7, you need it to start from your DVD or USB. This is called changing the “boot order.” When you turn on your computer, quickly press a special key. This key often is F2, F10, F12, or Delete. It opens a special menu called the BIOS or UEFI. In this menu, look for “Boot Options” or “Boot Priority.” Change the order so your DVD drive or USB drive is first. Then, save your changes and exit. Now, your computer will check the DVD or USB first.
Selecting Language and Keyboard Settings
When the Windows 7 setup begins, it needs to know a few things about you. It will ask about your language. Do you speak English, Spanish, or another language? Choose the one you use. Then, it asks about your time and currency format. This tells Windows how to show dates and money. Finally, it asks about your keyboard type. Different countries have slightly different keyboard layouts. Pick the one that matches your keyboard. This ensures your keys work correctly. For most people in America, “English (United States)” for all three options is correct. These choices help Windows 7 understand how you use your computer. They are simple but important first steps.
Accepting the Windows 7 License Terms
Every time you buy a video game, there are rules. You cannot copy the game and give it to all your friends. This is like a license agreement. Windows 7 also has rules. These are called the “license terms.” They tell you what you can and cannot do with Windows 7. When the setup shows these terms, you need to agree to them. It is important to check the box that says “I accept the license terms.” If you do not agree, you cannot install Windows 7. It is like agreeing to the rules before you can play a game. Once you accept, you can move on to the next part of the installation.
Choosing Where to Install Windows 7

This step is very important when you learn how to install Windows 7. It is like deciding which room in a house your new furniture will go into. You will see a screen with options: “Upgrade” or “Custom (advanced).” For most people installing Windows 7 on a fresh computer, or when replacing an old operating system, you will choose “Custom (advanced).” This option lets you decide exactly where Windows 7 will go. Next, you will see a list of “drives” or “partitions.” These are like different sections of your computer’s hard drive. If your computer is brand new, you might just see one big drive. If you are replacing an old Windows version, you might see several. You need to pick the right one. Be very careful here. If you pick the wrong drive, you could accidentally erase important files from another part of your computer.
- Select “Custom (advanced)” for a fresh install.
- Look at the list of available drives.
- Choose the drive where you want Windows 7.
- You might need to format the chosen drive.
- Click “Next” to continue the installation.
- Do not pick a drive with important files by mistake.
If you are installing Windows 7 on a drive that already has an old operating system or files, you might need to “format” it. Formatting is like wiping a blackboard clean. It erases everything on that part of the hard drive. This makes sure Windows 7 has a clean space to install itself. To format, select the drive you want to use, then click “Drive options (advanced).” You will see a “Format” button. Click it, and confirm you want to format. Remember, this erases everything! Once formatted, or if you picked an empty drive, select it and click “Next.” Windows 7 will then start copying files. This part takes a little while. This is a critical stage for how to install Windows 7 correctly.
Fun Fact or Stat: A typical hard drive spins at 5,400 to 7,200 revolutions per minute.
Selecting “Custom (advanced)” Installation
When you want to install Windows 7, you will see two main choices. One is “Upgrade” and the other is “Custom (advanced).” The “Upgrade” option tries to keep your old files and programs. But this usually works best if you are upgrading from an older Windows version, like Vista, directly to Windows 7. For most people, especially if you want a clean start or are replacing a different operating system, “Custom (advanced)” is the better choice. Think of it like moving into a new house. Do you just put your new things on top of the old mess? Or do you clean everything out first? “Custom” means you get a fresh, clean installation. It avoids problems from old, leftover files. This is almost always the recommended option.
Understanding Drives and Partitions
Imagine your computer’s hard drive is a big bookshelf. Sometimes, you might divide that bookshelf into different sections. One section for storybooks, one for schoolbooks. These sections are like “partitions” on your hard drive. When you install Windows 7, you need to pick which section, or “drive,” it will live on. You might see “Drive 0 Partition 1” or “Drive 1.” If your computer is new, there might just be one big Drive 0. If you have an older computer, you might see several partitions. Be careful to choose the correct one. Usually, Windows 7 goes on the largest partition, often called “C:”. If you pick the wrong one, you could erase another operating system or important files. So, take your time and choose wisely.
Formatting Your Chosen Drive
What if you want to write a new story on a blackboard that already has old drawings? You would wipe it clean first, right? “Formatting” a drive is just like that. It erases all the data on that part of the hard drive. This gives Windows 7 a completely clean space to install itself. If you are installing Windows 7 on a drive that was used before, you will likely need to format it. To do this, after selecting the drive, click “Drive options (advanced).” Then, you will see a “Format” button. Click it and say “Yes” when it asks if you are sure. Remember, this removes everything! Make sure you have backed up all your important files from that drive. After formatting, your drive is ready for a fresh start.
Completing Your Windows 7 Setup
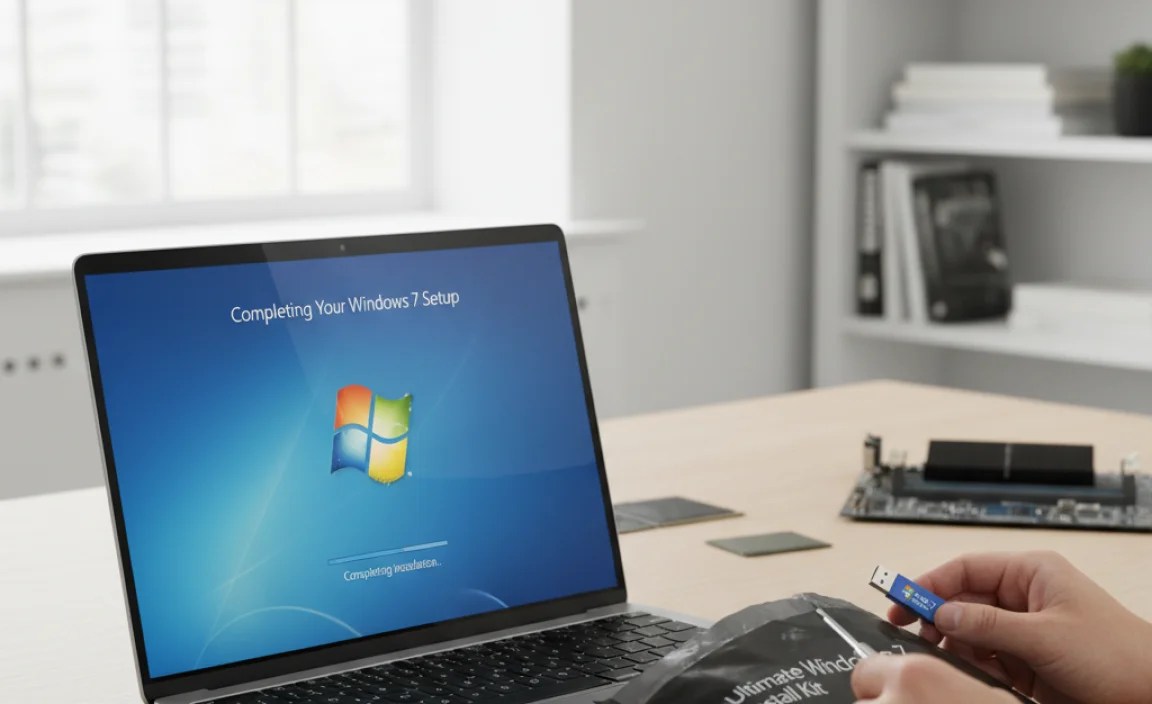
After you choose where to install Windows 7 and click “Next,” the main part of the installation begins. This is where Windows 7 copies all its files onto your computer. It then sets up all the programs and features. You will see a progress bar move across the screen. It might say “Installing Windows” or “Copying files.” This process takes some time. It could be 20 minutes, or even longer. Your computer will probably restart a few times during this stage. This is normal. Do not turn off your computer when it restarts! Just let it do its job. After the restarts, Windows 7 will ask you a few more questions. It needs to know your name and a computer name. Your name is for your user account. The computer name helps other computers find yours on a network. Pick names that are easy for you to remember.
- Wait patiently as Windows 7 copies files.
- Your computer will restart several times.
- Do not turn off the power during restarts.
- Enter your chosen username for the computer.
- Give your computer a unique name.
- Set a strong password for your account.
Next, Windows 7 will ask you to set a password for your user account. This is very important for keeping your computer safe. Pick a password that is hard for others to guess but easy for you to remember. You can also add a “password hint.” This is a little reminder in case you forget your password. Then, you will choose your time zone. This tells Windows 7 what time it is where you live. Finally, Windows 7 will ask about updates. It is best to choose “Use recommended settings.” This allows Windows to download important security updates. These updates keep your computer safe from new threats. After these final steps, your computer will prepare your desktop. You will see your new Windows 7 desktop appear! You have successfully learned how to install Windows 7.
Fun Fact or Stat: The first computer mouse was made of wood in 1964.
Setting Up Your User Account
When you get a new game console, you often create a profile. This profile saves your games and settings. Windows 7 is similar. It needs you to create a “user account.” This account is like your personal space on the computer. It saves your documents, pictures, and game progress. The first thing you will do is type your name. This will be the name of your user account. Then, you will choose a name for your computer. This name helps other computers find yours if you connect them. Pick something fun and easy to remember, like “MyGamingPC.” You can also set a password. This password keeps your account safe from others. Always choose a strong password.
Choosing Your Time Zone and Updates
Imagine you are talking to a friend in another country. If you do not know their time zone, you might call them in the middle of the night! Your computer needs to know your time zone too. This ensures your clock is always correct. Windows 7 will show you a map or a list. Find your city or your time zone on the list. Then, choose it. This is a quick and easy step. After that, Windows 7 will ask about “updates.” Updates are like small improvements or fixes for Windows. They help keep your computer safe and running well. It is usually best to choose “Use recommended settings.” This allows Windows to download important updates automatically. It protects your computer from new problems.
Setting a Strong Password for Security
Think about your bike lock. You choose a code that is hard for others to guess, right? The same is true for your computer password. A strong password keeps your computer safe from people who should not be looking at your files. When Windows 7 asks you to create a password, do not use simple things like “12345” or your name. Try to mix letters, numbers, and even special characters like “!@#”. Make it long enough, maybe 8-12 characters. Also, write down a password hint. This hint can remind you of your password if you forget it. Keep your real password secret. A strong password is a key part of keeping your computer and your information safe.
Activating and Updating Windows 7
You are almost done with how to install Windows 7! Once you see your new desktop, there are a few more important steps. First, you need to “activate” Windows 7. Remember that product key you wrote down earlier? Now is the time to use it. Windows 7 will usually remind you to activate it. You can find the activation option in the “System” settings. Just click the Start button, right-click “Computer,” and choose “Properties.” At the bottom, you will see a section for Windows Activation. Click “Activate Windows now.” Then, type in your product key. This key proves you own Windows 7. Without activation, some features might stop working after a while. It is like getting a new toy and needing to put the batteries in for it to work fully. Activation makes your Windows 7 truly yours.
- Activate Windows 7 using your product key.
- Find the activation option in System Properties.
- Connect your computer to the internet for activation.
- Install all available Windows Updates.
- Install drivers for your computer’s hardware.
- Restart your computer after installing updates and drivers.
After activation, the next big step is to update Windows 7. Updates are like regular check-ups for your computer. They fix problems and add new security features. Connect your computer to the internet. Then, click the Start button and search for “Windows Update.” Run the update process. It might find many updates, especially if Windows 7 has been around for a while. Let it download and install all of them. This can take a long time, and your computer might restart several times. This is normal. Do not turn it off! Once all updates are installed, you might also need to install “drivers.” Drivers help your computer’s parts, like your screen or sound card, work perfectly with Windows 7. You can usually find these drivers on your computer manufacturer’s website. After all updates and drivers are installed, your Windows 7 computer is ready to go!
Fun Fact or Stat: Microsoft releases new security updates for its operating systems every second Tuesday of the month.
Activating Your Windows 7 Copy
You have a special key that came with your Windows 7. It is called a product key. This key is like a secret code that unlocks all of Windows 7’s features forever. After you finish installing, Windows 7 will ask you to activate it. You can usually find the activation spot in your computer’s “System Properties.” Just click the “Start” button, right-click on “Computer,” and choose “Properties.” Look for a section that says “Windows Activation.” Click on it and type in your product key. Make sure your computer is connected to the internet. Windows 7 needs to talk to Microsoft’s servers to check your key. Once activated, your Windows 7 is fully yours and will not have any limitations.
Downloading and Installing Windows Updates
Think of updates as little gifts for your computer. These gifts fix problems, make things faster, and add new ways to stay safe from bad software. After you install Windows 7, it is very important to get all the latest updates. Connect your computer to the internet first. Then, click the “Start” button and type “Windows Update” into the search box. Click on “Windows Update” when it appears. It will look for new updates. There might be many of them, especially if you just installed Windows 7. Click “Install updates” and let your computer do its work. It might restart several times during this process. This is normal. Do not turn off your computer until it is all done. Updates keep your computer healthy and protected.
Installing Necessary Device Drivers
Imagine you bought a new toy car, but it came without wheels. It would not roll! Your computer parts are similar. They need special “drivers” to work with Windows 7. A driver is like a small instruction book for each part. It tells Windows 7 how to use your screen, your sound card, your Wi-Fi, and more. Sometimes, Windows 7 installs many drivers automatically. But sometimes, you need to add them yourself. You can usually find these drivers on the website of your computer’s maker. For example, if you have a Dell computer, go to Dell’s website. Find your computer model and look for “drivers.” Download and install them. Installing the right drivers makes sure everything on your computer works perfectly.
Troubleshooting Windows 7 Installation
Sometimes, even when you follow all the steps, things can go a little wrong. This is called troubleshooting, and it is part of how to install Windows 7. It is like when your toy breaks, and you need to figure out how to fix it. One common problem is that your computer does not start from the DVD or USB. This usually means you did not change the boot order correctly. Go back into your computer’s BIOS or UEFI settings. Make sure your installation media is listed first. Another issue might be a blue screen error. These errors can be scary. They often mean there is a problem with your computer’s memory or hard drive. Try to restart the installation. If it happens again, you might need to test your computer’s hardware. There are special tools for this.
- Double-check your computer’s boot order.
- Ensure your installation media is not damaged.
- Try using a different USB port or DVD drive.
- Check your computer’s memory for errors.
- Make sure your hard drive is properly connected.
- Search online for specific error messages.
- Restart the installation process from the beginning.
If Windows 7 seems to freeze during installation, it could be a problem with your installation media itself. Try using a different USB drive or burning the Windows 7 files to a new DVD. Sometimes, the download might have been corrupted. Downloading the files again from Microsoft’s official website can help. If your hard drive is old or damaged, Windows 7 might not be able to install on it. You might need a new hard drive. It is also a good idea to disconnect any extra devices before installing. Things like printers, extra monitors, or game controllers can sometimes confuse the setup. Keep it simple. If you see specific error codes, write them down. You can search for these codes online. This helps you find exact solutions. Troubleshooting is a normal part of how to install Windows 7, and patience is key.
Fun Fact or Stat: The first computer virus was created in 1983 and was named “Elk Cloner” for Apple II systems.
Resolving Boot Order Issues
Remember when we talked about changing your computer’s boot order? This tells your computer where to look first when it starts. If your computer does not start the Windows 7 installation, it is probably still trying to start from your old hard drive. You need to go back into the special BIOS or UEFI settings. Turn on your computer and quickly press the key like F2, F10, F12, or Delete. Look for “Boot Options” or “Boot Priority.” Make sure your DVD drive or your USB drive is listed at the very top. Then, save your changes and exit. Your computer will restart. This time, it should see the Windows 7 installation files and begin the setup. It is a common first step in troubleshooting.
Dealing with Blue Screen Errors
Sometimes, a scary blue screen might pop up during the installation. This is called a “Blue Screen of Death” (BSOD). It usually means something serious went wrong. Do not panic! These screens often have


