
Is your Brother printer printing black pages with white text?
Are you stuck with the problem?
Most probably, you are searching for an appropriate solution to fix the error. Indeed, you have come to the right place. In the entire article, I compile the possible solutions with related reasons behind the error.
Why is Brother Printer Printing Black Pages with White Text?
This is a peculiar error indeed. But I assure you that the problem of printing black pages with white text can not be a hardware issue. That means you won’t need to change the printer or other related hardware solutions if it happens to you.
So, what are the reason that stayed behind the issue? I compile a couple of reasons here.
- The problem can happen because the settings of your printer might change somehow. To ensure, you can check the settings that either the ‘Print Text in Black‘ is on or off. Another option like ‘Grayscale‘ you can check for so.
- Paper size can be a matter too. Every printer has the standard paper size. It can do so for your Brother Printer too. The reason is rare but has a minimal chance to be the one. So whenever you face the error, you also have to check this issue.
- Outdated software driver is one of the most possible reasons. The driver can be too old to execute the printing operation appropriately. Or it may have an important update that is not installed yet.
Overall, these problems are solvable. And I am going to do so. So, I would request you to don’t panic and follow my guideline to solve the error easily.
How to Solve If Brother Printer Printing Black Pages with White Text?
The problem mostly arises because of the software settings. So, you need to resolve the error by making some settings changes. Another reason might be an outdated or older driver too. That’s why you also need to re-add the driver. Here I will discuss three related fixes. These are-
- Fix 1: Activate the ‘Print Text in Black’ option
- Fix 2: Re-add the Printer
- Fix 3: Deselect the ‘Grayscale’
Fix 1: Activate the ‘Print Text in Black’ option
There will be the highest chance to solve the error whenever you apply to fix no. 1. I brief the process step by step below.
Step 1
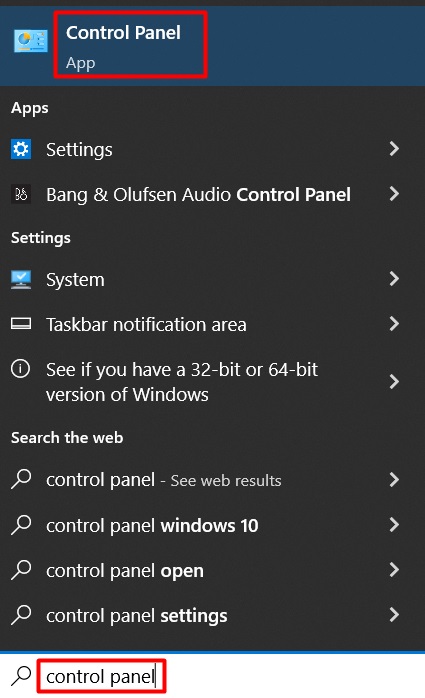
Firstly, press the Windows key and type ‘control panel’. As a result, you will see the ‘Control Panel’ app icon on the top of the interface. You have to click on it.
Step 2
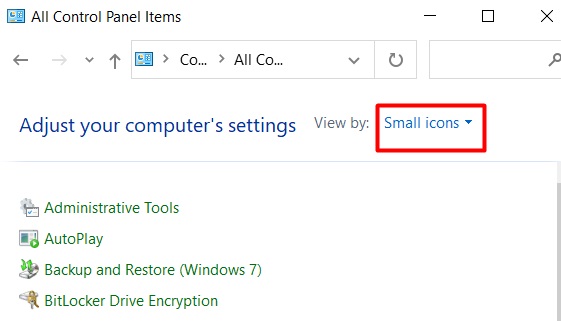
While the ‘Control Panel’ window will be visible, you need to change the ‘View by’ into ‘Small icons’.
Step 3
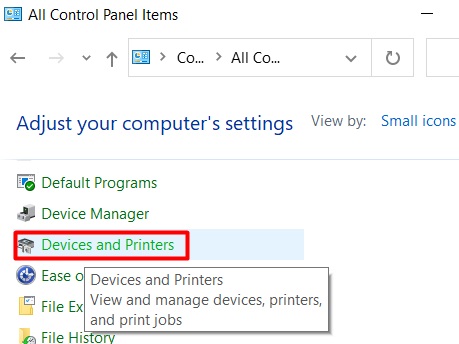
After that, you have to find out the ‘Devices and Printers’ section from the appeared options.
Step 4
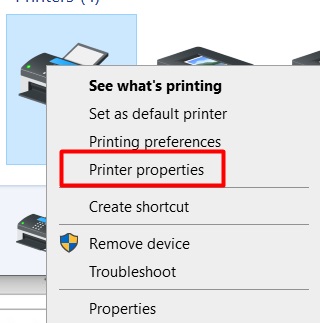
Then right-click on the printer that creates the issue. You have to select ‘Printer properties’ at the end of the step.
Step 5
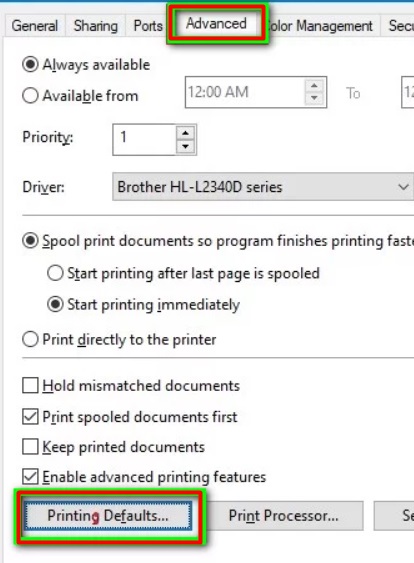
Now, look at the top of the newly appeared interface. Tap the ‘Advanced’ tab and then select the ‘Printing Defaults…’ option.
Step 6
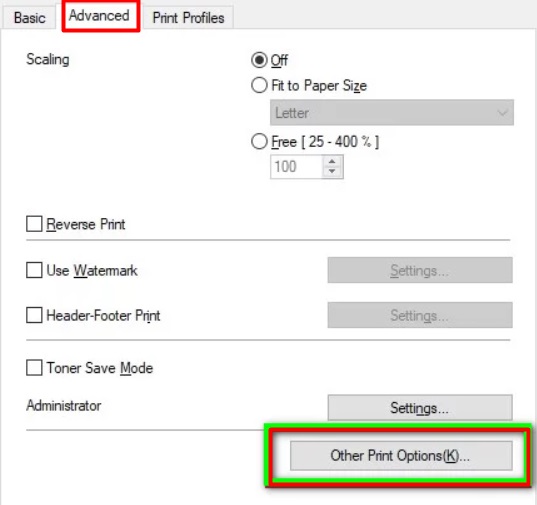
After that, you need to click on the ‘Advanced’ tab and press the ‘Other Print Options(K)…’ tab.
Step 7
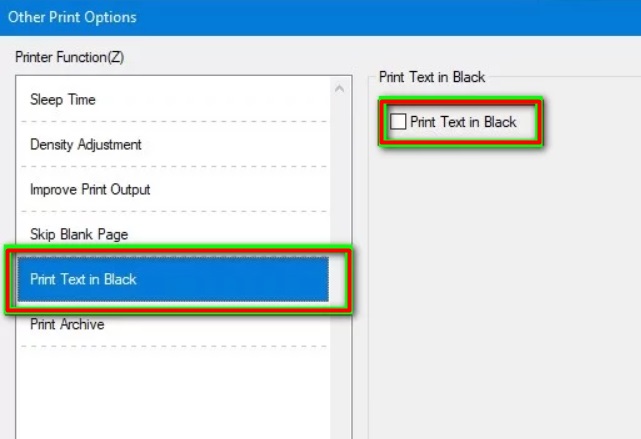
Next, select the ‘Print Text in Black’ from the left sidebar. Then look at the right sidebar and checkmark the ‘Print Text in Black’ box.
Step 8
To complete the process, you have to press ‘Ok’ for consecutive 3 windows.
Finally, try to print a copy through the printer and check the error. Will it exist or not?
Fix 2: Re-add the Printer
You may solve the error by re-adding the printer. To do so, you have to remove the printer driver from your PC first. Then add the driver. Here you need to follow some chronological steps one by one.
Step 1
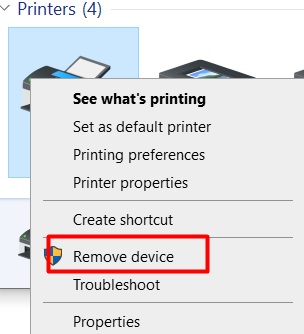
Again you have to work with the ‘Control Panel’. To do so, press the Window key and type ‘control panel’. Click on the app icon. Select ‘Device and Printers’ from inside the newly appeared interface. Then right-click on the printer that has occurred the error. You have to click on the ‘Remove device’ option.
Step 2
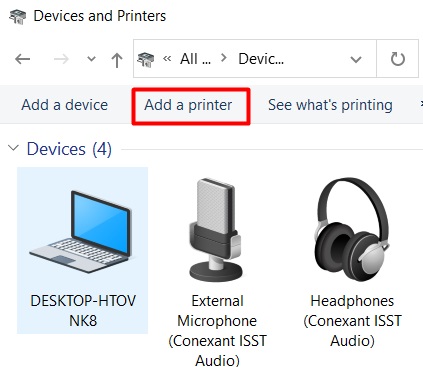
After that, you need to tap the ‘Add a printer’ tab. You will find it on the top of the ‘Device and Printers’ window.
Step 3
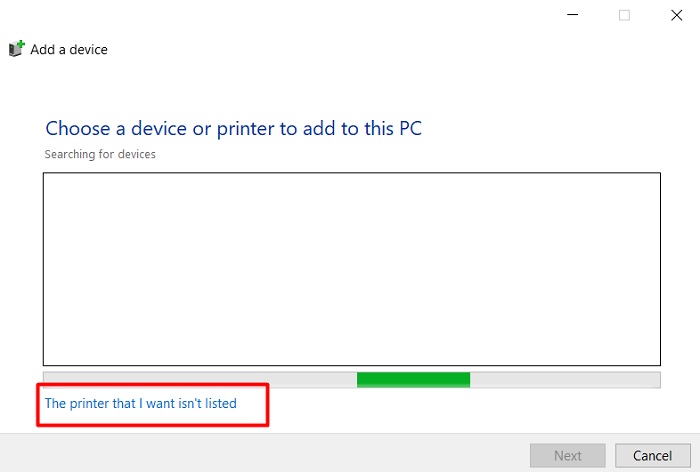
Consequently, the System will start searching for the drivers. Here you have to click on the ‘The Printer that I want isn’t listed’ option even the printer appeared on the searching.
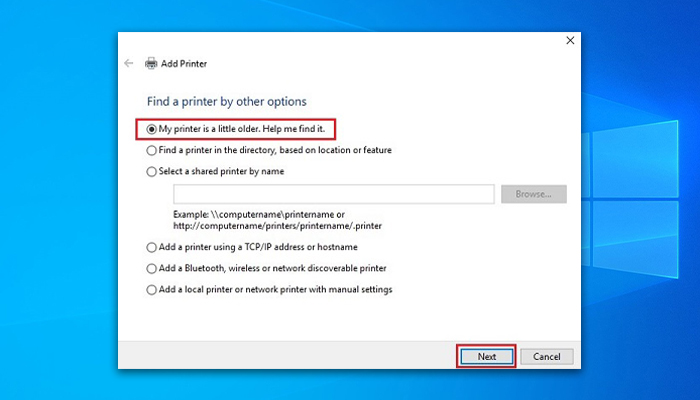
Step 4
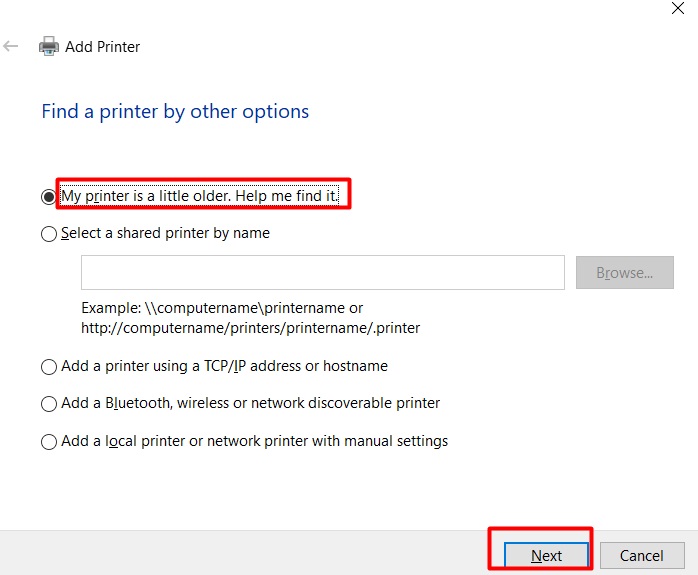
Next, you need to checkmark the ‘My printer is a little older. Help me find it.’ option and then press ‘Next’.
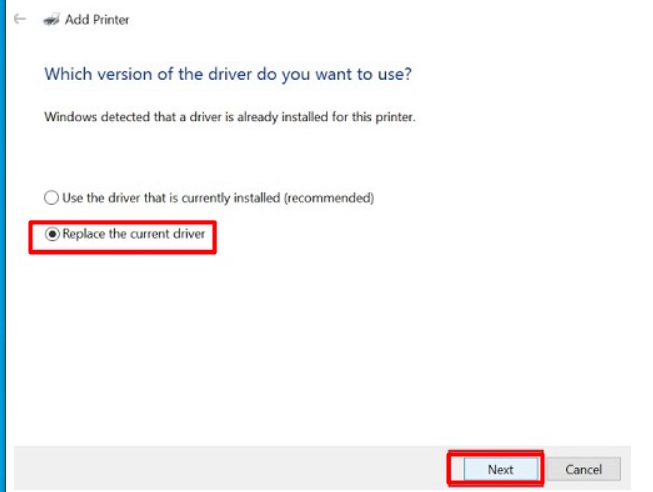
Step 5
From here, you have to select which version of the driver do you want to use. So, mark on the ‘Replace the current driver’ option. And click on ‘Next’ then.
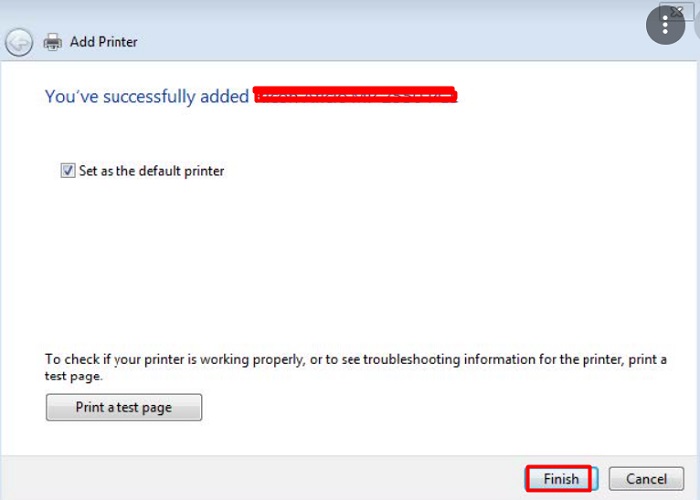
Step 6
Here, you have to press ‘Next’ for 2 consecutive times with the default selection. Finally, click on the ‘Finish’ option to complete the process.
Fix 3: Deselect the ‘Grayscale’
You can try another setting change to fix the error. The first phase of the process will be almost the same as fix no. 1. To apply the fix, you need to follow the below steps.
Step 1
Click on the problematic printer’s icon. You will get it under the ‘Devices and Printers section of the ‘Control Panel’. To access the ‘Control Panel’, you can press the Windows key and type ‘control panel’.
Step 2
While clicking on the printer pre interface, a new settings window will become evident. From here, you need to tap the ‘Advanced’ tab. Then, you have to deselect the ‘Grayscale’ option.
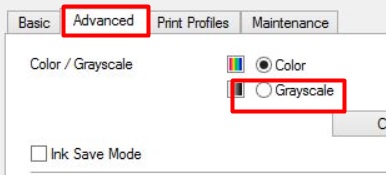
In the end, print a copy and check the error’s existence. Hopefully, no more white text in black page printing will be held with you.
Final Words
Therefore, if your Brother printer prints black pages with white text, I would like to remind you that the error occurs not for the hardware issue. So, you do not need to be worried. You have to keep patience and follow the fixes I have discussed in this entire article.