Mastering the File Manager in Windows 10 is key to organizing your digital life. This guide offers essential tips to navigate, manage, and protect your files efficiently, making your Windows 10 experience smoother and more secure.
Hey there! Ever feel like your digital files are playing hide-and-seek on your Windows 10 computer? You know that important document or precious photo is somewhere, but finding it feels like a treasure hunt with no map. It’s a common frustration, and honestly, it can slow you down and make using your PC feel a bit overwhelming. But don’t worry, you’re not alone, and it’s much easier to regain control than you might think.
Your PC has a built-in tool, the File Manager (also called File Explorer), that’s surprisingly powerful once you know a few tricks. This guide will walk you through some essential tips to become a File Manager pro in Windows 10. Get ready to organize, find, and manage your files with confidence!
What is File Manager (File Explorer) Anyway?
Think of File Manager as the digital filing cabinet for your Windows 10 computer. It’s the program you use to see all your files and folders – your documents, pictures, music, videos, and all the hidden system stuff. It’s where you go to copy, move, delete, rename, and organize everything stored on your hard drive, USB drives, and even cloud storage linked to your PC.
In Windows 10, this tool is officially called File Explorer. It’s been around for a long time, evolving with each version of Windows to become more user-friendly and feature-rich. For beginners, it might just seem like a simple way to open files. But with a few key tips, you can unlock its full potential, making your day-to-day computer tasks much quicker and more organized. Let’s dive into how you can get the most out of it.
Why Mastering File Manager Matters
Sure, you can stumble your way through finding files. But when you understand how to use File Manager effectively, you unlock several benefits:
- Speed: Find what you need faster, saving valuable time.
- Organization: Keep your digital life tidy. No more scattered files!
- Productivity: Work more efficiently by understanding how files and folders interact.
- Security: Better awareness of where your files are can help prevent accidental deletion or misplacement of sensitive data.
- Troubleshooting: Sometimes, a quick peek in File Manager can help diagnose simple storage issues.
Getting Around: The File Explorer Interface
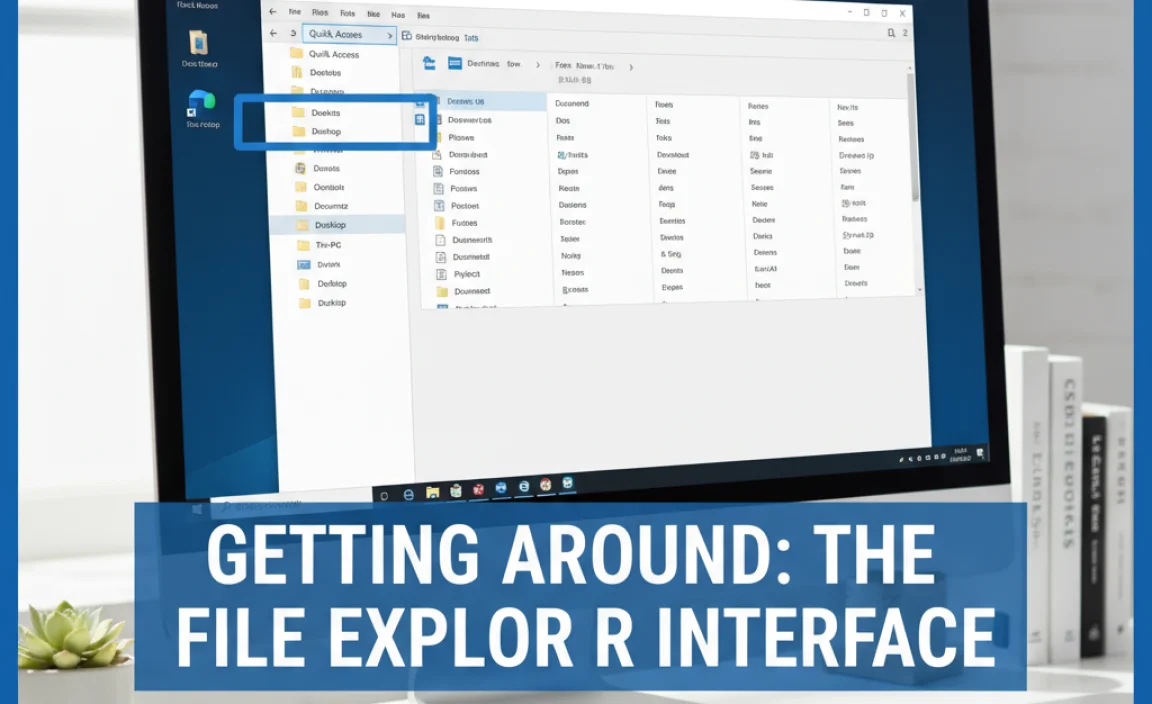
Before we get into the tips, let’s quickly get acquainted with the File Explorer window. When you open it (usually by clicking the folder icon on your taskbar or pressing `Windows key + E`), you’ll see a few key areas:
The Ribbon
At the very top, you’ll find the Ribbon. It’s organized into tabs like “File,” “Home,” “Share,” and “View.” Each tab has different commands that help you manage files, like copy, paste, rename, sort, and change how files are displayed. Don’t be intimidated by all the buttons; you’ll mostly use just a few key ones.
Navigation Pane
On the left side, you have the Navigation pane. This is like a directory tree that shows you Quick access, your OneDrive, This PC (which shows your drives like C:, D:, and any connected devices), and Network locations. Clicking on these items instantly shows you their contents in the main window.
Main Window Area
The largest part of the screen is where you see the files and folders within the location you’ve selected in the Navigation pane. This is where you’ll do most of your clicking, dragging, and dropping.
Address Bar
Above the main window, the Address bar shows you the current folder path you’re in (e.g., `This PC > Documents > Projects`). You can click on parts of this path to quickly jump to higher-level folders, or even type a new path directly into it.
Essential File Manager Tips for Windows 10 Users
Now, let’s get to the good stuff! These tips will make using File Explorer a breeze.
1. Master Keyboard Shortcuts for Speed
Keyboard shortcuts are your best friends for efficiency. Here are a few must-knows:
- `Windows key + E`: Opens File Explorer.
- `Ctrl + N`: Opens a new File Explorer window for the same folder.
- `Ctrl + D`: Moves the selected file or folder to the Recycle Bin.
- `Ctrl + C`: Copies the selected file or folder.
- `Ctrl + X`: Cuts the selected file or folder.
- `Ctrl + V`: Pastes the copied or cut file or folder.
- `F2`: Renames the selected file or folder.
- `Alt + D`: Selects the address bar.
- `Alt + Left Arrow`: Goes back to the previous folder.
- `Alt + Right Arrow`: Goes forward to the next folder.
Practice these a few times, and they’ll become second nature, saving you a ton of clicking.
2. Customize Quick Access
Quick Access shows up at the top of the Navigation pane and is designed to show you your most frequently used folders and recent files. This is incredibly useful for getting to your common work areas fast.
- Pin Folders: When you find a folder you want to access regularly, right-click on it and select “Pin to Quick access.” It will then appear in the Quick Access section.
- Unpin Folders: If a folder in Quick Access isn’t relevant anymore, right-click on it and select “Unpin from Quick access.”
- Clear Recent Files: If you don’t want to see recent files, go to File Explorer, click the “View” tab, then “Options,” and under the “General” tab, uncheck “Show recently used files in Quick access” and “Show frequently used folders in Quick access.” You can also click “Clear” to remove the current list.
3. Use File Explorer Options for Enhanced Control
The File Explorer Options (found under the “View” tab, then “Options”) give you a lot of control over how File Explorer behaves. Here are a few useful settings under the “View” tab:
- “File name extensions”: Check this box to always see file extensions (like .docx, .jpg, .exe). This is crucial for security, as it helps you spot potentially harmful files disguised as something else.
- “Hidden items”: Check this box to reveal hidden files and folders. Some system files are hidden by default to prevent accidental changes. Only show them if you know what you’re doing.
- “Navigation pane”: You can choose to show or hide certain parts of the pane, or expand specific folders to always see their contents.
Security Tip: Always have “File name extensions” checked. This is a simple yet powerful way to help identify suspicious files. For instance, if you receive an email attachment that looks like a document but has an extension like `.exe` after the `.docx` (e.g., `document.docx.exe`), it’s likely a malicious program trying to trick you.
4. Efficiently Select Multiple Files
Working with groups of files is much easier with these selection methods:
- Click and Drag: Click on one file, then hold down the mouse button and drag a box around other files.
- Shift + Click: Click on the first file, then hold down the Shift key and click on the last file in a sequential list. All files between them will be selected.
- Ctrl + Click: Hold down the Ctrl key and click on individual files that are not next to each other.
- Select All: Press Ctrl + A to select every file and folder in the current view.
- Deselect: Click anywhere in an empty space within the file list to deselect everything.
5. Leverage the Power of Search
Windows Search is integrated into File Explorer and is quite powerful. You can find files not just by their name, but also by content (if indexed), date created, file type, and size.
- Basic Search: Simply type your search query into the search box in the top-right corner of the File Explorer window.
- Search Tools: After you perform a search, a “Search Tools” tab appears on the Ribbon. Here you can refine your search by “Date modified,” “Type,” “Size,” and other properties.
- Search within Current Folder: The search usually defaults to searching the current folder and all its subfolders. You can change this scope using the “Search Tools” tab.
For example, if you’re looking for a Word document you worked on last week, you could search for “report” and then use the “Date modified” filter to select “Last week.”
6. Use Views to Your Advantage
The “View” tab on the Ribbon lets you change how files and folders are displayed. Experimenting with these can greatly improve how you scan and find information.
- Icons: Extra large, Large, Medium, Small icons. Good for quickly identifying images or documents visually.
- List: Shows a simple list of file names.
- Details: This is often the most useful. It displays files in a list with columns for Name, Date modified, Type, and Size. You can click on column headers to sort files by that attribute (e.g., click “Date modified” to see the newest files first).
- Content: Similar to Details, but shows a preview of the file’s content on the right.
Tip: Right-click in an empty space within a folder and select “Sort by” to quickly change the view or sorting order without going up to the Ribbon.
7. Get Comfortable with the Recycle Bin
When you delete files using File Explorer (or by pressing `Delete` or `Ctrl+D`), they don’t disappear immediately. They go to the Recycle Bin on your desktop. This is a crucial safety net.
- Restore: If you accidentally delete something important, open the Recycle Bin, find the file, right-click it, and select “Restore.” It will be put back where it was.
- Empty: To permanently free up disk space, you’ll need to empty the Recycle Bin. Right-click the Recycle Bin icon and select “Empty Recycle Bin.” Be careful, as this action is irreversible.
Security Note: If you’ve accidentally deleted sensitive files, emptying the Recycle Bin immediately is important to prevent others from recovering them. For truly secure deletion that makes recovery nearly impossible, advanced tools are needed, but for everyday use, the Recycle Bin is your friend.
8. Understand File Paths
A file path is like an address for a file on your computer. For example: C:UsersMikeBentleyDocumentsImportantNotes.docx. Understanding this helps you:
- Navigate: You can type a full path into the Address Bar to jump directly to a file or folder.
- Copy/Move: When you need to specify where to copy or move a file, you’ll often be asked for a path.
- Troubleshoot: If a program can’t find a file, you’ll often need to know its exact path.
You can easily copy the path of a file or folder: select it, go to the “Home” tab on the Ribbon, and click “Copy path.”
9. Use Folders for Structure
This might seem obvious, but good folder organization is the foundation of file management. Don’t just dump everything onto your Desktop or into the Documents folder.
- Logical Grouping: Create folders for major categories (e.g., “Work,” “Personal,” “Photos,” “Projects”).
- Subfolders: Break down these categories further (e.g., “Work > Client A,” “Work > Reports,” “Photos > 2023 > Vacation”).
- Consistent Naming: Use clear, descriptive names for your files and folders. Including dates (YYYY-MM-DD format at the beginning) can make chronological sorting easy.
10. Leverage OneDrive Integration
If you use Microsoft OneDrive for cloud storage, you’ll see it integrated directly into File Explorer. This makes managing your cloud files seamless.
- Syncing: Files you save in your OneDrive folder on your PC are automatically backed up to the cloud and accessible from other devices.
- Cloud vs. Local: OneDrive often uses “Files On-Demand,” meaning files aren’t always downloaded to your PC until you open them, saving disk space. You’ll see cloud icons indicating file status.
For more on OneDrive’s features, check out the official Microsoft guide: OneDrive vs. OneDrive for Business.
Comparing File Management Methods

While File Explorer is the default, other tools can also help manage files. Here’s a quick look:
| Method | Pros | Cons | Best For |
|---|---|---|---|
| File Explorer (Windows 10) | Built-in, versatile, powerful search, customization options, integrates with OneDrive. | Can feel overwhelming with many options, requires learning shortcuts for maximum efficiency. | Everyday file management, organizing local and cloud files, quick searches. |
| Command Prompt / PowerShell | Extremely powerful for advanced users, scripting, batch operations, automation. | steep learning curve, requires precise syntax, not visual. | System administrators, developers, advanced automation tasks. |
| Third-Party File Managers (e.g., FreeCommander, XYplorer) | Often offer dual-pane views, advanced renaming tools, more customization, built-in FTP. | Requires installation, might have a cost, can introduce potential compatibility issues. | Power users who need specialized features beyond File Explorer. |
For most Windows 10 users, mastering File Explorer itself is the most practical and secure approach. It’s readily available and updated by Microsoft.
Common File Explorer Tasks Explained Step-by-Step
Let’s break down some frequent tasks, step-by-step.
How to Copy and Paste Files
- Open File Explorer and navigate to the file(s) or folder(s) you want to copy.
- Select the item(s) using your mouse or keyboard shortcuts (see tip #4).
- On the “Home” tab of the Ribbon, click the “Copy” button, or press Ctrl + C.
- Navigate to the destination folder where you want to paste the items.
- On the “Home” tab, click the green “Paste” button, or press Ctrl + V.
Tip: To “move” a file instead of copying (which deletes it from the original location), use the “Cut” option (or Ctrl + X) instead of “Copy.”
How to Rename Files and Folders
- Open File Explorer and navigate to the file or folder you want to rename.
- Click on the item once to select it.
- On the “Home” tab of the Ribbon, click the “Rename” button, or simply press the F2 key on your keyboard.
- The current name will highlight. Type the new name and press Enter.
Important: If you have “File name extensions” turned on (which you should!), be careful not to delete or change the extension (e.g., “.docx”, “.jpg”, “.pdf”). Changing the extension can make the file unreadable or unusable.
How to Create a New Folder
- Open File Explorer and navigate to the location where you want to create the new folder (this could be your Documents, Desktop, or any other drive/folder).
- On the “Home” tab of the Ribbon, click the “New folder” button.
- A new folder will appear, titled “New folder,” with the name highlighted.
- Type the desired name for your folder and press Enter.
How to Delete Files and Folders
- Open File Explorer and find the file or folder you want to delete.
- Select the item.
- On the “Home” tab, click the “Delete” button, or press the browser Delete key or Ctrl + D.
- The item will move to the Recycle Bin. To permanently delete it and free up space, remember to empty the Recycle Bin later.
Security Best Practices with File Manager
File Manager is your gateway to your computer’s files, so a little caution goes a long way for security.
1. Be Wary of Executable Files (.exe)
Executable files are programs. While legitimate programs have `.exe` extensions, malicious software often disguises itself as something else but is actually an `.exe` file. Always ensure file extensions are visible (see tip #3) and avoid running `.exe` files from untrusted sources.
2. Scan Downloaded Files
When you download files from the internet, especially programs or zipped archives, it’s a good practice to right-click them in File Explorer and select “Scan with Microsoft Defender” (or your installed antivirus). This checks for malware before you open them.
3. Understand File Permissions
While this is more advanced, Windows has file permissions that control who can access or modify files. For most users, the default settings are fine. However, be aware that you might encounter “Access Denied” messages if you try to modify system files or files owned by another user account without proper administrator privileges.
4. Use BitLocker for Drive Encryption (If Available)
For an extra layer of security, especially on laptops, consider using BitLocker (available in Windows 10 Pro and Enterprise). This encrypts your entire hard drive, making your files unreadable if your device is lost or stolen. You can manage BitLocker options through the Control Panel.
5. Regularly Back Up Your Important Files
Even with the best organization, hardware failures, malware attacks, or accidental deletions can happen. Regularly back up your critical data to an external hard drive, a network-attached storage (NAS) device, or a cloud service like OneDrive or Google Drive. Windows has built-in backup tools accessible through the Control Panel’s “Backup and Restore (Windows 7)” option or Settings > Update & Security > Backup.
Frequently Asked Questions About File Manager
Q1: How do I make File Explorer open to “This PC” instead of “Quick Access”?
A: Open File Explorer, go to the “View” tab, then click “Options.” In the Folder Options window, under the “General” tab, change the “Open File Explorer to:” dropdown from “Quick Access” to “This PC.”
Q2: How can I see file sizes more easily?
A: In File Explorer, go to the “View” tab and select the “Details” view. This will show columns for Name, Date modified, Type, and Size. You can then click the “Size” column header to sort files by size, from largest to smallest or vice-versa.
Q3: I can’t find a file I saved yesterday. What should I do?
A: First, check your Recycle Bin to see if you accidentally deleted it. If not, use the search bar in File Explorer. Try searching for keywords you remember in the file name or contents. If you have a good idea of when you last accessed it, use the “Date modified” filter in the “Search Tools” tab to narrow down the results.
Q4: How do I unhide files in Windows 10 File Manager?
A: Open File Explorer, click the “View” tab, and in the “Show/hide” group, check the box next to “Hidden items.” Hidden files and folders will then become visible and appear slightly faded.
Q5: Is it safe to delete files from a USB drive using File Explorer?
A: Yes, as long as you are sure you no longer need the files. Delete them the same way you would on your computer. After deleting, it’s always a good practice to safely eject the USB drive by clicking the “Safely Remove Hardware and Eject Media” icon in the system tray before physically removing it.
Q6: Can I change the default save location for downloads?
A: Yes, but this is typically done through the settings of the application you’re using to download (like your web browser). For example, in Chrome, you can go to Settings > Downloads and change the default download location. File Explorer itself doesn’t dictate default download locations; applications do.
Conclusion
You’ve now learned some powerful yet simple tips to make File Manager (File Explorer) in Windows 10 work for you. From using keyboard shortcuts to mastering search and understanding security best practices, you’re well on your way to a more organized and efficient digital experience. Remember, the key is practice and finding the features that best suit your workflow.
By taking a little time to explore and implement these techniques, you’ll not only save time but also gain greater confidence in managing your digital assets. Keep your files organized, stay aware of security, and remember that you have the power to keep your Windows PC running smoothly. Happy organizing!


