Need to fix a broken Windows 10 PC? Learning to create a rescue disk is your simple, powerful solution. This essential guide walks you through making a bootable USB drive or DVD that helps you diagnose and repair common startup problems, get back into your system, and avoid costly repair shop visits. Let’s get your computer back on track!
Is your Windows 10 PC acting up? It’s incredibly frustrating when your computer won’t start properly. You might see scary error messages, or maybe it just freezes before you can even log in. This can feel like a serious problem, leaving you worried about losing your important files or needing an expensive fix. But don’t panic! Many common startup issues can be solved with a special tool called a rescue disk.
Think of it as a digital first-aid kit for your computer. In this guide, I’ll show you exactly how to create your own Windows 10 rescue disk, step-by-step. It’s easier than you think and will give you the power to troubleshoot and fix many PC problems right at home. Ready to become your own tech hero?
Why You Need a Windows 10 Rescue Disk
Imagine this: you turn on your computer, and instead of your familiar desktop, you’re greeted with a black screen or a cryptic error message. It’s a nightmare scenario for many, but it’s a problem that happens surprisingly often. This can happen due to a faulty Windows update, a corrupted system file, a problematic driver, or even a malware infection that messes with your startup process. When these things occur, your computer might not be able to load Windows correctly, leaving you stranded.
That’s where a rescue disk comes in handy. It’s a bootable media (either a USB drive or a DVD) containing a special version of Windows or a collection of diagnostic and repair tools. When your computer can’t boot from its internal hard drive, you can tell it to boot from the rescue disk instead. This allows you to access a working environment outside of your installed Windows, enabling you to run repair tools, scan for viruses, restore from a backup, or even access your files to save them before tackling a more significant fix.
Having a rescue disk is like having a spare key and a toolbox for your computer’s most critical problems. It’s an essential part of any Windows 10 user’s toolkit, especially if you want to:
- Troubleshoot startup failures.
- Recover lost or deleted files.
- Remove stubborn viruses and malware.
- Diagnose hardware issues.
- Perform system restores without booting into Windows.
- Avoid costly professional repair services.
Creating one is a proactive step that can save you a lot of stress and time down the road. Let’s get started on making your very own!
Understanding Rescue Disk Options
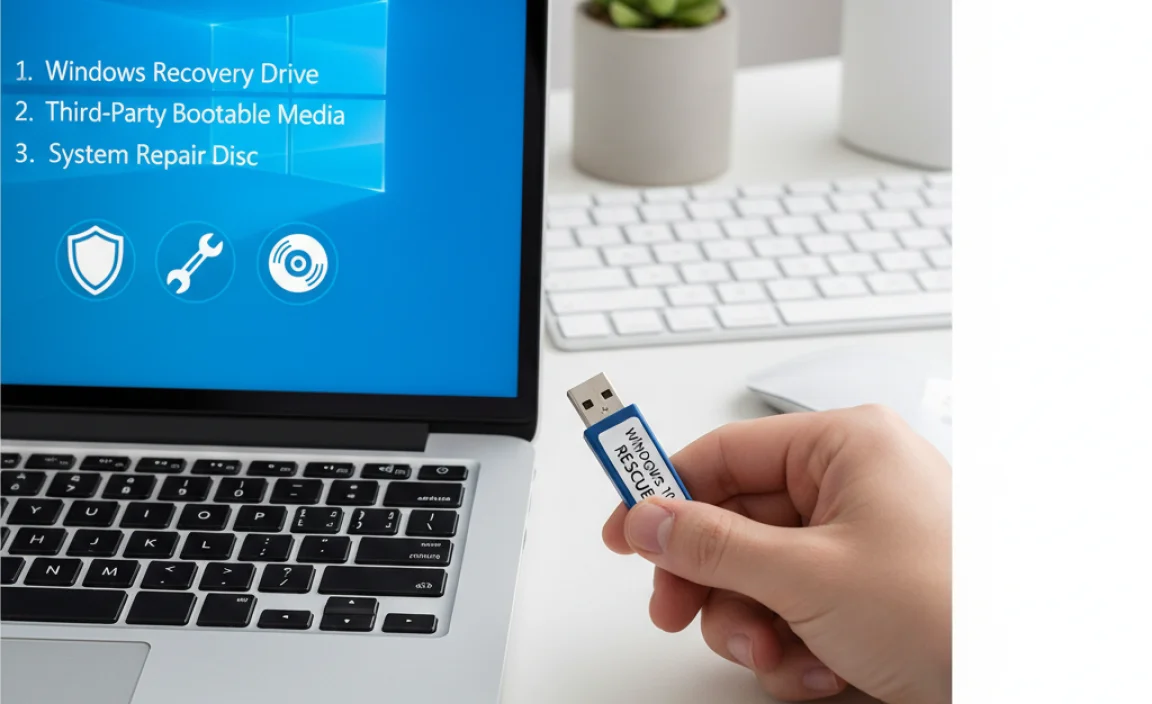
When we talk about a “rescue disk” for Windows 10, it can refer to a few different things. The most common and useful types are tools that allow you to boot your computer into a separate environment to perform repairs. Here are the primary methods:
Windows 10 Startup Repair Tools
Every modern version of Windows 10 comes with built-in recovery tools that are accessible through a bootable media. These tools include:
- Startup Repair: This is the most straightforward tool. It automatically scans your PC for problems that might prevent Windows from starting correctly and attempts to fix them.
- System Restore: If your computer was working fine recently, System Restore can revert your system files and settings back to an earlier point in time when everything was functioning correctly. This is a lifesaver for issues caused by recent software installations or driver updates.
- Command Prompt: For more advanced users, the Command Prompt provides access to powerful command-line tools to manually fix boot records, scan drives, and perform other complex repairs.
- System Image Recovery: If you’ve previously created a full system image backup, this option allows you to restore your entire hard drive from that image.
The most common way to access these is by creating a “Recovery Drive” or a “System Repair Disc.”
Third-Party Rescue Disks
While Windows’ built-in tools are excellent, some third-party applications offer even more comprehensive suites of diagnostic and repair tools. These often include:
- Advanced Antivirus Scanners: Bootable antivirus tools can often remove malware that has deeply embedded itself and prevents Windows from starting normally.
- Disk Partitioning Tools: For managing disk partitions, which can sometimes become corrupted and lead to boot issues.
- Data Recovery Software: Tools specifically designed to recover files from a failing or unbootable drive.
- Hardware Diagnostics: Tools to test your RAM, hard drive, and other components.
Some popular examples of third-party rescue disk solutions include Hiren’s BootCD PE, Gandalf’s Windows PE, and various antivirus companies’ bootable rescue media (like Kaspersky Rescue Disk or Bitdefender Rescue CD).
For this guide, we’ll focus on the most accessible and officially supported method: creating a Windows 10 Recovery Drive using Microsoft’s built-in tools. This is the best starting point for most users.
Creating a Windows 10 Recovery Drive: Step-by-Step

A Windows 10 Recovery Drive is a bootable USB flash drive that contains the necessary files to help you troubleshoot and fix problems on your PC, including the inability to start Windows. It’s a vital tool that acts as your personal IT support in a USB stick. You’ll need a USB flash drive with at least 16 GB of storage. Make sure you back up any important data on the USB drive, as it will be completely erased during this process.
Preparing Your USB Drive
- Get a USB Flash Drive: Ensure you have a USB drive with a minimum of 16GB of space. A faster USB 3.0 drive will make the creation process quicker.
- Backup Data (if any): If there’s any data on the USB drive you plan to use, copy it to a safe location. The recovery drive creation process will format the drive.
- Connect the USB Drive: Plug the USB flash drive into a working Windows 10 computer.
Using the Recovery Drive Creation Tool
Windows 10 has a built-in tool specifically for this purpose. Here’s how to use it:
- Open the Control Panel: Click the Start button, type “Control Panel,” and select it from the search results.
- Search for “Recovery”: In the Control Panel, either click on the “Recovery” link directly (if using Category view, you might need to click “System and Security” first, then “Recovery”) or use the search bar in the top right corner and type “Recovery.”
- Select “Create a recovery drive”: Click on “Create a recovery drive.”
- User Account Control: If prompted by User Account Control (UAC), click “Yes” to allow the tool to run.
- The Recovery Drive Wizard: The wizard will open. You’ll see a checkbox that says “Back up system files to the recovery drive.” For the most comprehensive rescue disk, it’s highly recommended to keep this box checked. This includes additional tools and drivers that can help your specific computer. If you uncheck it, you’ll create a minimal recovery drive with only basic Windows troubleshooting tools, which might be less effective for complex issues.
- Choose Your USB Drive: The wizard will scan for connected USB drives. Select the USB drive you want to use from the dropdown list. Double-check that you’ve selected the correct drive, as all data on it will be erased.
- Formatting the Drive: Click “Next.” The tool will then warn you again that everything on the drive will be deleted. Click “Create” to proceed.
- Creating the Recovery Drive: Windows will now format your USB drive and copy the necessary files. This process can take a while, so be patient. It typically ranges from 15 minutes to over an hour, depending on your PC speed and the USB drive.
- Completion: Once the process is finished, you’ll see a message saying “The recovery drive is ready.” You will likely see another option to “Delete recovery files from your PC” if you created a recovery partition on your computer originally. This is optional and can usually be done later.
- Finish: Click “Finish.” Safely eject your USB drive.
Congratulations! You’ve successfully created a Windows 10 Recovery Drive.
Alternative Method: Microsoft Media Creation Tool (for Installation Media)
While not strictly a “recovery drive” in the same sense, the Media Creation Tool can create bootable installation media (USB or DVD) for Windows 10. This media also includes access to the advanced startup options and repair tools, and it’s often larger and more feature-rich, especially if you need to reinstall Windows from scratch. This is a great option if you want to be prepared not only for repairs but also for a clean installation.
Steps to create installation media:
- Download the Media Creation Tool: Go to the official Microsoft Windows 10 download page and download the Media Creation Tool.
- Run the Tool: Launch the tool and accept the license terms.
- Choose “Create installation media (USB flash drive, DVD, or ISO file) for another PC”: Click “Next.”
- Select Language, Edition, and Architecture: You can usually leave “Use the recommended options for this PC” checked. If you need specific settings, uncheck it and make your selections. Click “Next.”
- Choose Media Type: Select “USB flash drive.” You’ll need a USB drive with at least 8 GB of space.
- Select Your USB Drive: Choose the USB drive you want to use and click “Next.” The tool will download Windows 10 and make the USB drive bootable. This can take some time.
- Finish: Once completed, click “Finish.”
This USB drive can boot your computer and offers access to troubleshooting and repair options, including the Command Prompt and Startup Repair.
How to Boot from Your Rescue Disk or Recovery Drive
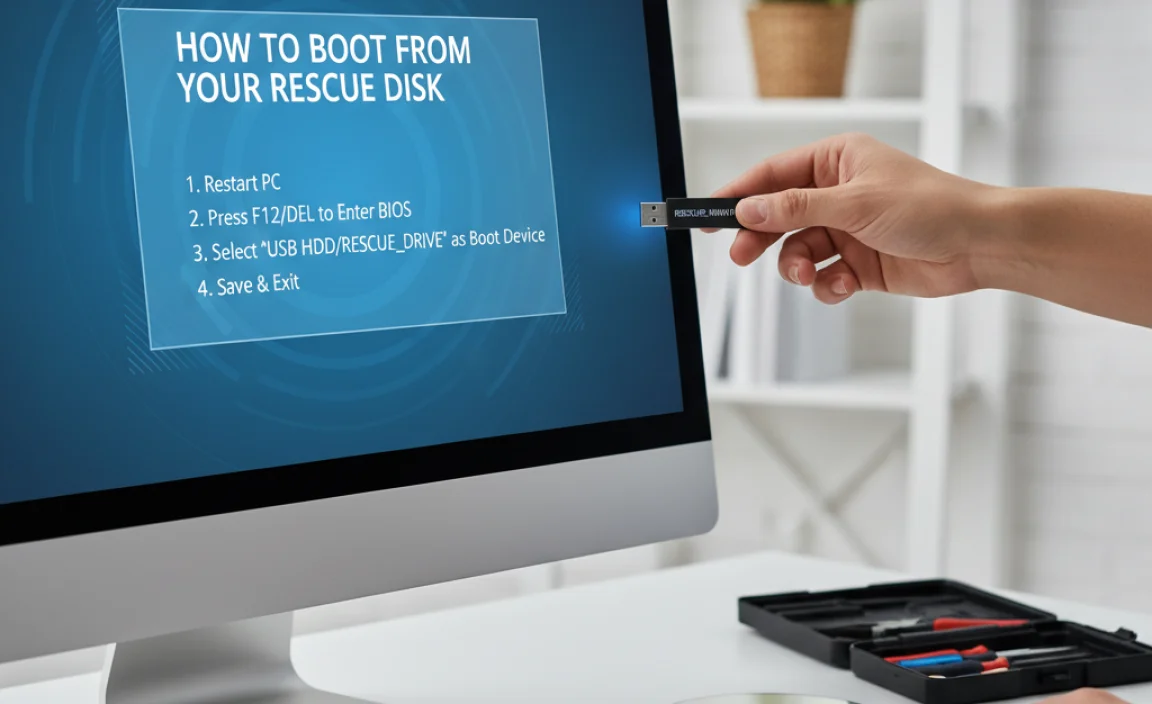
Now that you have your rescue disk ready, how do you actually use it when your PC won’t start? The key is to tell your computer to boot from the USB drive (or DVD) instead of your hard drive. This is done through your computer’s BIOS or UEFI settings. Don’t worry; it’s a standard procedure.
Accessing BIOS or UEFI Settings
When you turn on your computer, you need to press a specific key very quickly to enter the BIOS/UEFI setup. The key varies by manufacturer, but common keys include:
- F2
- DEL (Delete)
- F1, F10, F12
- ESC (Escape)
You’ll usually see a brief message on the screen right after you power on, saying something like “Press [Key] to enter Setup” or “Press [Key] for BIOS.” If you miss it, just restart your computer and try again.
Changing the Boot Order
Once you are in the BIOS or UEFI setup utility:
- Navigate the Menu: Use your arrow keys to move around the menus. The interface can look different depending on your computer’s manufacturer.
- Find Boot Options: Look for a section labeled “Boot,” “Boot Order,” “Boot Options,” or something similar.
- Set USB as First Boot Device: You need to change the boot priority so that your USB drive is listed before your hard drive. It might be called “USB HDD,” “Removable Devices,” or list the specific name of your USB drive manufacturer.
- Save and Exit: Once you’ve set the USB drive as the first boot device, navigate to the “Exit” section. Select “Save Changes and Exit” or a similar option. Confirm your choice (usually by pressing “Y” and then Enter).
Your computer will restart. If you’ve done it correctly, it should now boot from your USB rescue drive.
Beginning the Recovery Process
When your computer boots from the recovery drive:
- Language and Keyboard: You’ll be prompted to select your language, time/currency format, and keyboard layout. Choose the appropriate options and click “Next.”
- Troubleshoot Option: You will typically see a screen with two options: “Troubleshoot” and “Turn off your PC.” Click Troubleshoot**.
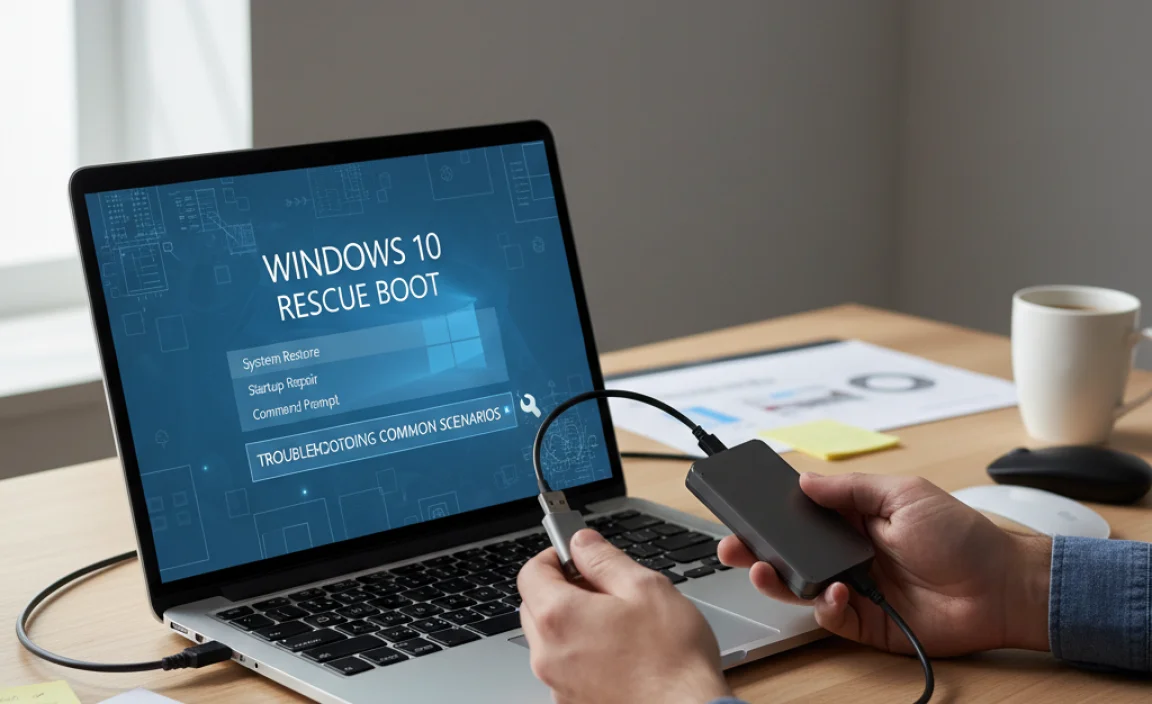
- Advanced Options: This is where you’ll find all the powerful tools. You’ll see several options:
- Startup Repair: This is your first line of defense. It will attempt to automatically fix common problems that prevent Windows from loading.
- System Restore: If you have restore points saved, you can use this to revert your system to a previous state.
- Command Prompt: For advanced users, allows direct command-line access.
- System Image Recovery: To restore your PC from a full system image backup.
- Reset this PC: This option (if available) can reinstall Windows while giving you the choice to keep or remove your files.
Choose the option that best suits the problem you’re experiencing. For most common startup issues, starting with “Startup Repair” is the best approach.
Troubleshooting Common Scenarios with Your Rescue Disk
Now that you know how to boot into the recovery environment, let’s look at how to use these tools to fix specific problems.
Scenario 1: Windows Won’t Start After an Update
This is a very common problem. A bad update can corrupt essential files needed for startup. Here’s what to do:
- Boot from your recovery drive.
- Select Troubleshoot.
- Choose Advanced options.
- Try Startup Repair first. Let it run its course.
- If Startup Repair doesn’t work, go back to Advanced Options and try System Restore. Select a restore point that was created before the problematic update was installed.
- If still no luck, you might consider using the Command Prompt to manually uninstall the problematic update (this is more advanced).
Scenario 2: You See a Boot Error Message
Messages like “BOOTMGR is missing” or “Operating System not found” usually indicate a problem with the boot configuration data (BCD) or the Master Boot Record (MBR). The recovery drive can help:
- Boot from your recovery drive.
- Select Troubleshoot > Advanced options.
- Choose Command Prompt.
- In the Command Prompt window, type the following commands, pressing Enter after each one:
bootrec /fixmbrbootrec /fixboot(This might give an “Access Denied” error; if so, try the next command.)bootrec /rebuildbcd
- If you are prompted to add an installation to the boot list during
/rebuildbcd, type Y and press Enter. - Once these commands are executed, type
exitand press Enter to close the Command Prompt. - Restart your computer (you might need to remove the USB drive and ensure your hard drive is the first boot device again).
If these commands don’t resolve the issue, the BCD store might be corrupted in a way that requires more advanced command-line work, or the hard drive itself might have issues.
Scenario 3: Malware Prevents Startup
Some aggressive malware can corrupt system files or interfere with the boot process. While a standard Windows recovery drive doesn’t include a full antivirus scanner, it gives you access to tools that can help:
- Boot from a Third-Party Rescue Disk: For serious malware infections that prevent startup, a dedicated bootable antivirus rescue disk is often more effective. Download one from a reputable source (like Kaspersky, Bitdefender, Avast) and create it on a working computer, following their instructions.
- Boot from Your Windows Recovery Drive: If you don’t have a third-party disk, you can still try to remove malware using the Command Prompt. However, this requires knowing specific malware file names, which is difficult for beginners. Alternatively, you can use the recovery drive to back up your important files to an external drive, then perform a clean Windows installation (which wipes everything clean and thus removes malware).
Scenario 4: Hardware Issue Suspected
If your computer won’t start and you suspect a hardware problem (like a failing hard drive or RAM), the recovery drive can help you confirm this.
- Access Command Prompt: Boot from the recovery drive, select Troubleshoot > Advanced options > Command Prompt.
- Check Disk: Type
chkdsk C: /f /r(replacing C: with the drive letter where Windows is installed, usually C:). This command will scan your hard drive for errors and attempt to fix them. It can take a very long time. If the scan finds many errors or fails, your hard drive might be failing. - Access/Backup Files: If your hard drive is still accessible, use the Command Prompt or boot from a rescue disk that provides file explorer functionality to copy your important data to an external drive. This is crucial if you suspect a drive failure.
Tips for Keeping Your Rescue Disk Up-to-Date
Your rescue disk isn’t a one-and-done tool. Technology evolves, and so do Windows updates. While the recovery partition on your computer usually gets updated with Windows updates, a standalone recovery drive might not. Here are some tips:
- Recreate Annually: It’s a good practice to recreate your USB recovery drive at least once a year, or after major Windows version upgrades. This ensures it contains the latest troubleshooting files and drivers.
- Keep it Safe: Store your USB rescue drive in a safe, easily accessible place. Label it clearly so you know what it is.
- Don’t Format It (Unless Needed): Avoid using the recovery drive for regular file storage or formatting it unless you intend to recreate the recovery drive or put other bootable tools on it.
- Consider a Second Drive: For maximum peace of mind, consider having both a Windows recovery drive and a bootable rescue disk from a reputable third-party Antivirus company.
- Test it Periodically: If your computer is running smoothly, boot from the recovery drive every 6 months or so just to ensure it’s working and you remember the process.
Comparison of Recovery Options
Here’s a quick look at the primary ways to recover your Windows 10 system, from simple to more involved.
| Method | Type | Pros | Cons | Best For |
|---|---|---|---|---|
| Windows Recovery Drive (USB) | Bootable Media | Contains essential Windows repair tools, easy to create, official Microsoft support. | Can be larger than expected, requires a USB drive, might not have specialized tools. | Common startup errors, system file corruption, driver conflicts. |
| Windows 10 Installation Media (USB/DVD) | Bootable Media | Provides full access to repair tools, allows for clean installation if needed, always up-to-date with the latest Windows version. | Requires 8GB+ USB or DVD, a little more complex to create than a recovery drive, might not have all specific hardware drivers out-of-the-box for every computer. | Severe boot failures, need for clean installation, when recovery partition is damaged. |
| System Restore | Built-in Windows Feature | Reverts system to an earlier working state without deleting personal files, easy to use. | Requires restore points to be created beforehand, doesn’t fix hardware issues, not always effective against deep malware. | Recent software/driver issues, system instability after changes. |
| Third-Party Bootable Rescue Disk (e.g., Hiren’s, Antivirus) | Bootable Media | Often includes a much wider range of specialized tools (antivirus, partition managers, diagnostic tools), can be more powerful for specific issues. | Requires downloading and creating from a working PC, can be complex to navigate for beginners, may not be free. | Stubborn malware, advanced diagnostics, disk management issues, data recovery. |
FAQ About Windows 10 Rescue Disks
What is the minimum size for a Windows 10 rescue disk USB?
For a standard Windows 10 Recovery Drive, a USB flash drive with at least 16GB of storage is recommended. If you’re creating installation media using the Media Creation Tool, 8GB is typically sufficient.
My computer won’t boot at all. Can a rescue disk still help?
Yes, that’s exactly what a rescue disk is for! If your computer won’t start up normally, you can boot from your USB rescue disk to access repair tools that run outside of your installed Windows, allowing you to fix startup problems or back up your data.
Do I need internet to create a rescue disk?
Yes, you need an internet connection on a working PC to download the necessary tools and files from Microsoft or third-party providers to create the rescue disk. Once created, you typically don’t need internet to use the rescue disk for basic repairs, but some advanced tools might require it.
How many times can I use a rescue disk?
Your rescue disk can be used multiple times, but it’s a static copy of the tools at the time of creation. For the best results, it’s a good idea to recreate it periodically (e.g., annually) to ensure it has the latest troubleshooting capabilities.
Can I use my rescue disk on another computer?
Yes, a Windows 10 Recovery Drive or Installation Media created with the Media Creation Tool can generally be used to boot and repair any Windows 10 (or 11) computer. However, be aware that some recovery drives might have specific drivers for the PC they were created on, which could potentially affect how certain hardware components are recognized during advanced troubleshooting.
What if Startup Repair doesn’t fix my problem?
If Startup Repair fails, don’t worry! Your rescue disk offers other powerful options. Try System Restore if you have restore points. If that doesn’t work, you can use the Command Prompt to manually troubleshoot boot records and system files, or consider using the option to Reset this PC (which reinstalls Windows).
Conclusion: Take Control of Your PC Problems
Dealing with a Windows 10 computer that won’t boot can be incredibly stressful, but having a bootable rescue disk, like the Recovery Drive we created, puts you in the driver’s seat. It’s your personal toolkit for tackling a wide range of startup issues, from corrupted system files to problematic updates. By following the steps in this guide, you’ve learned how to create this essential tool and how to use it to diagnose and repair your PC, potentially saving you time, money, and a lot of frustration.
Remember, technology can be unpredictable, but preparing for the unexpected is key. This rescue disk is your safety net. It empowers you to take control, understand your computer’s issues, and confidently apply fixes. So, keep your rescue disk in a safe place, recreate it periodically, and know that you’re well-equipped to handle many common Windows problems. You’ve got this!