
Quick Summary: Need a boot disk for Windows 10? This guide shows you exactly how to download and create a bootable USB or DVD for free from Microsoft. It’s your essential tool for repairing, troubleshooting, or reinstalling Windows 10, ensuring your PC stays running smoothly and securely.
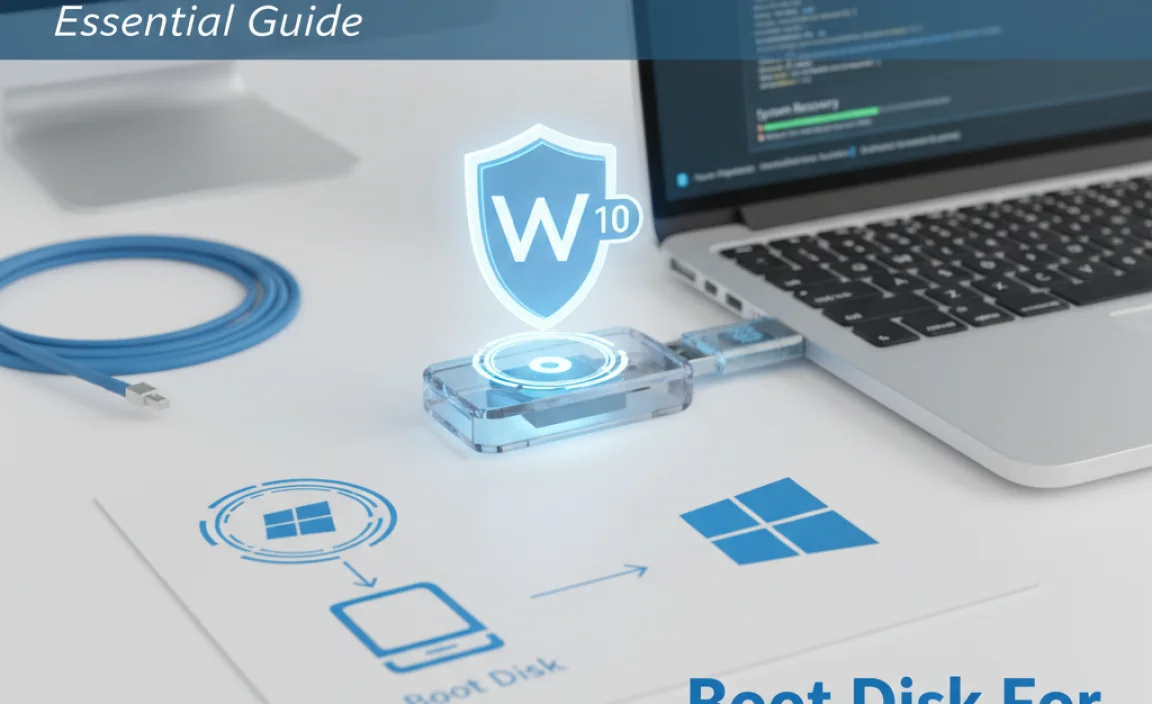
Boot Disk for Windows 10 Download: Your Essential Guide to Fixing and Reinstalling
Is your Windows 10 PC acting up? Maybe it’s slow, crashing unexpectedly, or won’t start at all. It can be really frustrating when your computer isn’t working right, especially when you rely on it every day. You might worry about losing your files or needing an expensive repair. But don’t worry! There’s a powerful tool that can help: a Windows 10 boot disk. Think of it as a lifesaver for your computer. This guide will walk you through exactly how to get one, step-by-step, so you can get your PC back on track. We’ll cover everything you need to know to download it and use it for repairs, troubleshooting, or even a fresh start.
What is a Windows 10 Boot Disk and Why Do You Need One?
A “boot disk” – also known as a recovery drive, repair disk, or installation media – is a special USB drive or DVD that contains essential Windows 10 files. These files allow your computer to start up and access repair tools even if your main Windows installation is corrupted or won’t boot normally. It’s like having a rescue kit for your computer, ready to go when you need it most.
You might need a boot disk for several reasons:
- Troubleshooting Startup Problems: If Windows 10 won’t boot up properly, a boot disk can help you access advanced startup options to diagnose and fix the issue.
- System Repair: It provides access to tools like Startup Repair, System Restore, Command Prompt, and more, which can resolve a wide range of software glitches and errors.
- Reinstalling Windows 10: If your system is severely damaged or you want a fresh start, a boot disk can be used to install a clean copy of Windows 10.
- Driver Issues: Sometimes, problematic drivers can prevent Windows from starting. A boot disk can help you access options to address these.
- Malware Removal: In some cases, bootable tools can be used to scan for and remove stubborn malware that traditional methods can’t reach.
Creating your own boot disk is a proactive step that can save you time, money, and a lot of stress when computer problems arise. It empowers you to take control of your PC’s health.
Downloading the Official Windows 10 Media Creation Tool
The best and safest way to create a boot disk for Windows 10 is by using Microsoft’s official “Media Creation Tool.” This free tool allows you to download the latest version of Windows 10 directly from Microsoft and create a bootable USB flash drive or an ISO file, which you can then burn to a DVD.
Here’s how to get it:
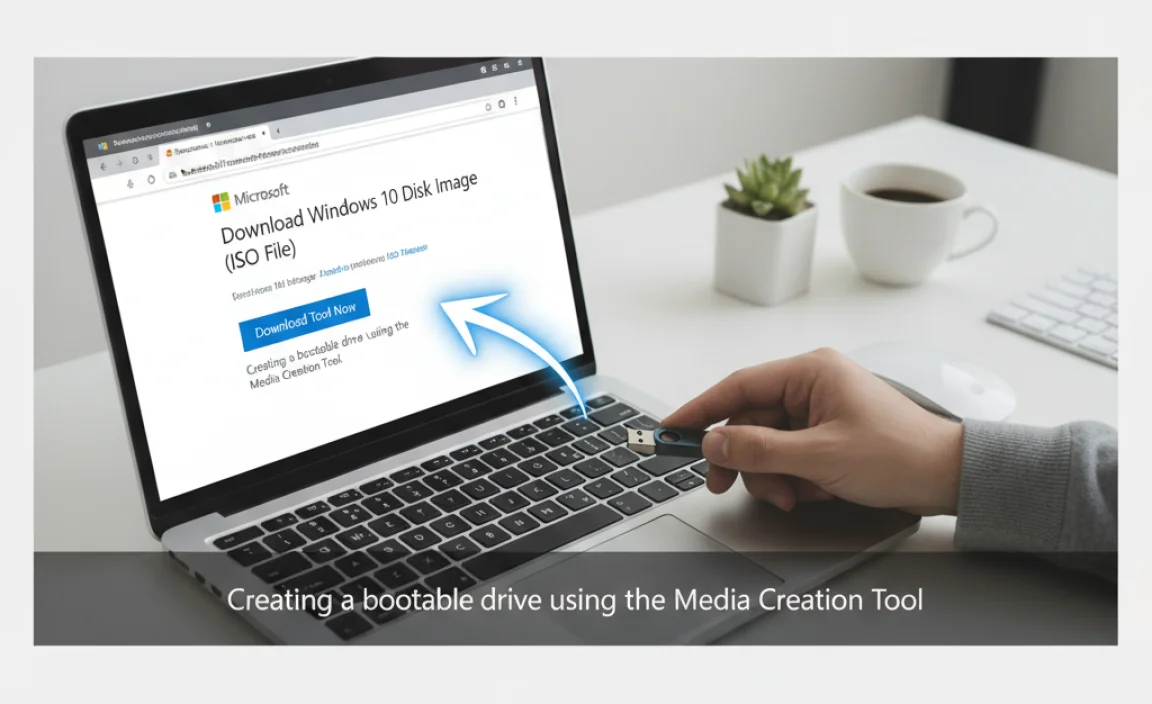
Step 1: Visit the Official Microsoft Download Page
Open your web browser and go to the official Microsoft Windows 10 download page. You can search for “Download Windows 10” on your preferred search engine, and make sure you are on a Microsoft domain (like microsoft.com).
A direct link to the download page is usually found here: Microsoft Windows 10 Download
Step 2: Download the Media Creation Tool
On the download page, look for a button that says “Download tool now.” Click this button to download the Media Creation Tool executable file (e.g., MediaCreationToolYYYYMM.exe, where YYYYMM represents the year and month of the release).
Step 3: Run the Tool
Once the download is complete, locate the file in your Downloads folder and double-click it to run it. You might need administrator privileges, so click “Yes” or “Run” if prompted by User Account Control (UAC).
Step 4: Accept License Terms
The tool will take a few moments to prepare. After that, you’ll see the license terms. Read through them carefully, and then click “Accept” to proceed.
Step 5: Choose “Create installation media (USB flash drive, DVD, or ISO file) for another PC”
On the “What do you want to do?” screen, select the option “Create installation media (USB flash drive, DVD, or ISO file) for another PC.” Click “Next.”
Step 6: Select Language, Edition, and Architecture
The tool will usually recommend options based on the PC you are currently using. If you need to create installation media for a different PC or a specific version, uncheck the box that says “Use the recommended options for this PC.”
- Language: Choose the language you want for Windows 10.
- Edition: Select “Windows 10.” This includes both Home and Pro editions, and your product key will determine which one is activated on installation.
- Architecture: Choose either 64-bit (x64) or 32-bit (x86). Most modern PCs use 64-bit. If you’re unsure, selecting “Both” will download both, but it will take longer and require more space. For most users, 64-bit is the way to go.
Click “Next” when you’re done.
Creating Your Bootable USB Drive (Recommended)
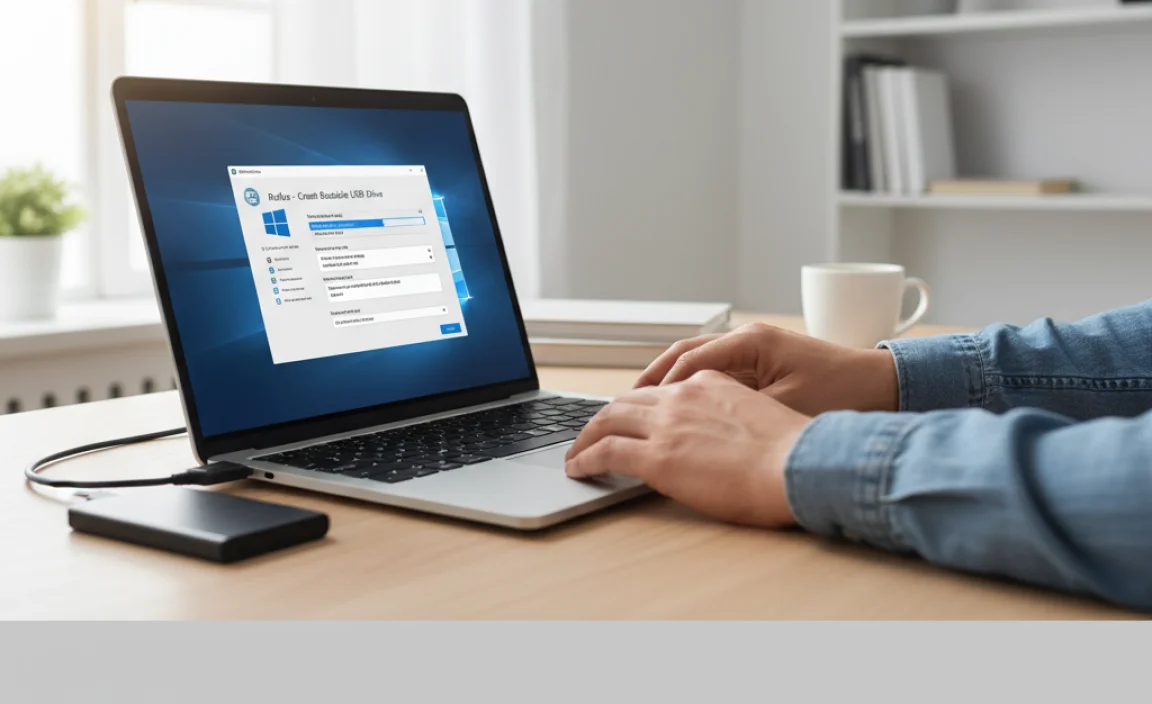
Using a USB flash drive is generally the easiest and fastest method for creating a boot disk. It’s also more durable than a DVD.
Requirements:
- A USB flash drive with at least 8GB of storage space.
- Ensure the USB drive doesn’t contain any important files, as it will be completely erased during the process.
Steps to Create a Bootable USB:
Continue from Step 6 where you selected your language, edition, and architecture.
Step 7: Choose “USB flash drive”
On the “Choose which media to use” screen, select “USB flash drive.” Click “Next.”
Step 8: Select Your USB Drive
The Media Creation Tool will scan for connected USB drives. Select the correct USB flash drive from the list. If you don’t see it, make sure it’s plugged in and click “Refresh drive list.” Click “Next.”
Step 9: Download and Creation Process
The tool will now download the Windows 10 files and create the bootable USB drive. This process can take a while, depending on your internet speed and the performance of your USB drive. You’ll see a progress indicator. Do not close the tool or remove the USB drive during this process.
Step 10: Completion
Once the process is finished, the tool will notify you that the USB flash drive is ready. Click “Finish.” Your bootable Windows 10 USB drive is now created!
Creating a Bootable DVD (Alternative Method)

If you prefer to use a DVD or don’t have a suitable USB drive, you can download an ISO file and burn it to a DVD.
Requirements:
- A blank DVD-R disc.
- A DVD burner drive on your computer.
- Burning software (Windows has a built-in one, or you can use third-party tools).
Steps to Create an ISO File:
Follow Steps 1 through 6 as described in the “Downloading the Official Windows 10 Media Creation Tool” section.
Step 7: Choose “ISO file”
On the “Choose which media to use” screen, select “ISO file.” Click “Next.”
Step 8: Save the ISO File
Choose a location on your computer where you want to save the ISO file (e.g., your Desktop or Downloads folder). Give it a name if you wish. Click “Save.”
Step 9: Download the ISO
The Media Creation Tool will download the Windows 10 ISO file. This can take a significant amount of time, depending on your internet connection. Wait for the download to complete.
Once the download is finished, you’ll see a confirmation screen. Click “Finish.”
Step 10: Burn the ISO File to a DVD
Now you need to burn the ISO file to a blank DVD. Windows has a built-in disc image burner:
- Locate the downloaded ISO file.
- Right-click on the ISO file.
- Select “Burn disc image.”
- In the Windows Disc Image Burner window, insert your blank DVD into the drive.
- Ensure the correct DVD burner drive is selected.
- Check the box that says “Verify data after burning” for added assurance (this takes longer but confirms the disc was written correctly).
- Click “Burn.”
Wait for the burning process to complete. Once done, your bootable Windows 10 DVD is ready. Eject the disc and store it safely.
Using Your Windows 10 Boot Disk to Repair or Reinstall
Once you have your bootable USB drive or DVD, you can use it to boot your computer and access repair options or start a new installation. This process typically involves changing your computer’s boot order in the BIOS/UEFI settings.
Accessing BIOS/UEFI Settings
The exact key to press varies by manufacturer, but common keys include Delete, F2, F10, F12, or Esc. You usually need to press this key repeatedly immediately after turning on your computer, before the Windows logo appears.
Changing the Boot Order
- Insert your bootable USB drive or DVD into the computer.
- Restart or turn on the computer.
- Press the key to enter BIOS/UEFI setup (e.g., Delete, F2).
- In the BIOS/UEFI menu, navigate to the “Boot,” “Boot Order,” or “Boot Priority” section.
- Change the boot order so that your USB drive or DVD drive is listed first.
- Save your changes and exit the BIOS/UEFI setup. The computer will restart.
“Press any key to boot from…” Prompt
If you’ve set the boot order correctly, you should see a message like “Press any key to boot from USB…” or “Press any key to boot from CD or DVD…”. Quickly press any key on your keyboard to boot from your media.
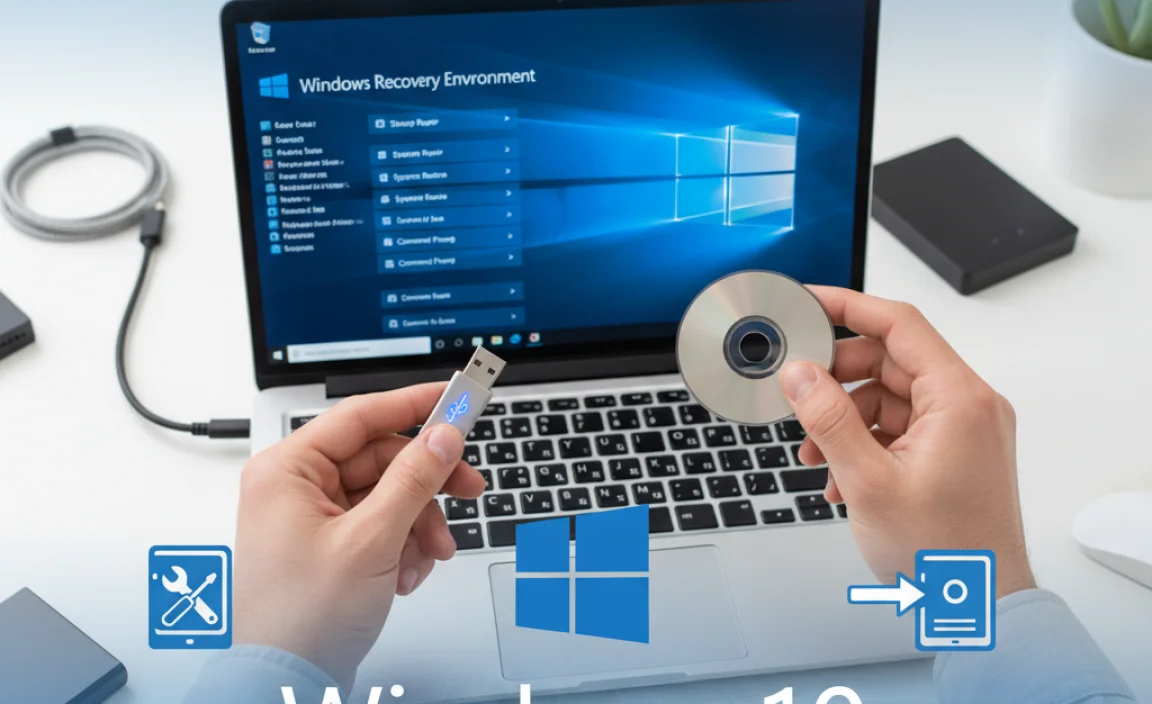
Windows Setup/Recovery Environment
If successful, Windows will begin loading files from your boot disk. Eventually, you will see the Windows Setup screen or the Windows Recovery Environment.
Option 1: Repair Your Computer
On the first setup screen (language, time, keyboard), click “Next.” On the next screen, instead of clicking “Install now,” look for an option that says “Repair your computer” (usually in the bottom-left corner). Click it.
This will take you to the Windows Recovery Environment, where you can choose from several troubleshoot options:
- Startup Repair: Automatically attempts to fix common startup problems.
- System Restore: Reverts your system to a previous point in time when it was working correctly.
- Command Prompt: Allows you to run advanced commands, useful for troubleshooting or manual repairs.
- System Image Recovery: Recovers Windows using a specific system image backup.
- Startup Settings: Lets you restart your PC in different modes, like Safe Mode, which can help diagnose issues.
Follow the on-screen prompts for the repair option you choose.
Option 2: Install Windows 10
If you need to perform a clean installation of Windows 10:
- On the first Windows Setup screen (language, time, keyboard), click “Install now.”
- Enter your product key if prompted, or click “I don’t have a product key” if you plan to activate later (Windows will typically activate automatically if it was previously activated on that hardware).
- Select the edition of Windows 10 you want to install (e.g., Windows 10 Home or Windows 10 Pro).
- Accept the license terms.
- Choose the installation type:
- Upgrade: Installs Windows 10 and keeps files, settings, and applications (only available if you booted from Windows, not from a recovery/installation media when Windows is running).
- Custom: Install Windows only (advanced): This option allows for a clean install. You’ll need to select the drive where you want to install Windows. You can delete existing partitions and format the drive if you want a completely fresh start. Be very careful with this option, as it will erase all data on the selected drive/partition.
- Follow the remaining on-screen instructions to complete the installation.
Essential Considerations and Tips
Here are some important things to keep in mind when dealing with boot disks and Windows 10:
Keep Your Boot Media Up-to-Date
Windows 10 is updated regularly. The Media Creation Tool always downloads the latest version. It’s a good idea to create a new boot disk every year or so to ensure you have the most recent updates and security patches incorporated.
Backup Your Data First!
Before attempting any major repairs or reinstallation, always try to back up your important files. If your PC won’t boot, you might need to connect your hard drive to another computer or use specialized recovery tools. A boot disk can help access files in some scenarios, but a dedicated backup is the safest bet.
Understanding BIOS vs. UEFI
Most modern computers use UEFI (Unified Extensible Firmware Interface) instead of traditional BIOS. The process of changing boot order is similar in both, but the interface might look different. If you’re unsure, consult your computer manufacturer’s documentation.
Troubleshooting Boot Issues
If your computer doesn’t boot from the USB or DVD, try these common fixes:
- Ensure the USB drive or DVD is properly inserted.
- Try a different USB port or a different USB drive/DVD.
- Double-check that you’ve correctly set the boot order in BIOS/UEFI.
- Make sure your BIOS/UEFI is set to boot from the correct media type (USB or CD/DVD).
- Disable “Secure Boot” temporarily in BIOS/UEFI if you’re having trouble booting from some media (remember to re-enable it later if desired for security).
Driver Rollback and System Files
If you suspect a recent driver update caused problems, the “Roll Back Driver” option in Device Manager (accessible through Advanced startup options) can be very helpful. For system file corruption, you can use the `sfc /scannow` command in the Command Prompt from the recovery environment.
Frequently Asked Questions About Windows 10 Boot Disks
Q1: How much does a Windows 10 boot disk cost?
Creating a bootable USB drive or DVD using Microsoft’s Media Creation Tool and a blank disc/USB drive is completely free. The tool itself is provided by Microsoft at no charge.
Q2: Can I use the same boot disk for Windows 10 Home and Pro?
Yes. The Windows 10 installation media created by the Media Creation Tool contains both the Home and Pro editions. The edition that gets installed and activated depends on the product key you use or whether your hardware is associated with a digital license for a specific edition.
Q3: My computer’s CD/DVD drive is broken. Can I still create a boot disk?
Absolutely! The USB flash drive method is more common and often easier. As long as you have a USB port, you can create a bootable USB drive.
Q4: What if I don’t have a product key?
If your computer originally came with Windows 10 or you previously upgraded to Windows 10 and it activated digitally, you can usually reinstall Windows 10 without a product key. During installation, select “I don’t have a product key.” Windows will automatically activate once it connects to the internet if it detects a digital license linked to your hardware.
Q5: How do I know if I need to use the boot disk to repair or reinstall Windows 10?
If Windows 10 is experiencing significant problems like frequent blue screens, unexpected shutdowns, failure to start, or severe performance issues that basic troubleshooting (like restarting or checking for updates) doesn’t fix, using the boot disk for repair or a clean install is a good next step.
Q6: Can I use this boot disk to upgrade from Windows 7 or 8 to Windows 10?
While the Media Creation Tool is primarily for creating installation/repair media, it can also be used for an in-place upgrade if run from a running Windows 7 or 8 system. However, the official free upgrade offer from Windows 7/8 to Windows 10 has technically ended. You might still be able to upgrade, but you would likely need a valid Windows 10 license. Using the bootable media is more commonly for repair or clean installs.
Conclusion
Having a Windows 10 boot disk is an invaluable tool for any user. By following this guide, you can confidently download the official Microsoft Media Creation Tool and create your own bootable USB drive or DVD. Whether you need to fix startup errors, restore your system, or perform a fresh installation, this bootable media puts the power to resolve many common PC issues back in your hands.
Don’t let computer problems hold you back. With your boot disk ready, you’re prepared to tackle challenges with greater ease and confidence. Remember to keep your boot media updated and always prioritize backing up your important data. You’ve got this!