
Have you ever wondered how to change the drive for Windows 10 updates? It might sound tricky, but it’s actually quite simple! Many people don’t know they can choose where their updates go. Maybe your computer is full, or perhaps you prefer using a faster drive. Whatever the reason, learning this can help improve your computer’s performance.
Imagine your computer as a busy highway. Updates are the cars zooming by. If the road is too crowded, traffic slows down. But what if you could switch to a clearer road? That’s what changing the drive can do. It can also save space on your main drive. Plus, it makes managing updates much easier!
In this article, we will break down how to change the drive for Windows 10 updates. You’ll see just how easy it is. By the end, you’ll feel like a tech whiz!
How To Change Drive For Windows 10 Updates Easily
Understanding Windows 10 Update Storage
Explanation of default update storage settings in Windows 10. Importance of storage management for system performance.
Windows 10 has a default spot where it stores updates. This location can fill up quickly, like my snack drawer after movie night! Managing this storage is key for keeping your computer running smoothly. If your device is full, updates might slow down or even stop. Think of it as cleaning out your desk. A tidy desk helps you find things easily, just like enough storage helps your computer perform well!
| Update Settings | Impact on Performance |
|---|---|
| Default Storage Location | Can slow down updates if full |
| Cleaning Storage | Improves system speed |
So, keep your update storage organized! It’s like giving your computer a spring cleaning. Remember, a happy computer makes for a happy user.
Checking Current Update Drive Settings
Stepbystep guide to find current update settings. Tools to monitor disk space usage.
To check which drive Windows 10 is using for updates, follow these simple steps:
- Open Settings by clicking the start menu.
- Select Update & Security.
- Click on Windows Update on the left side.
- Now, choose Advanced Options.
- Lastly, click on Delivery Optimization to see the drive settings.
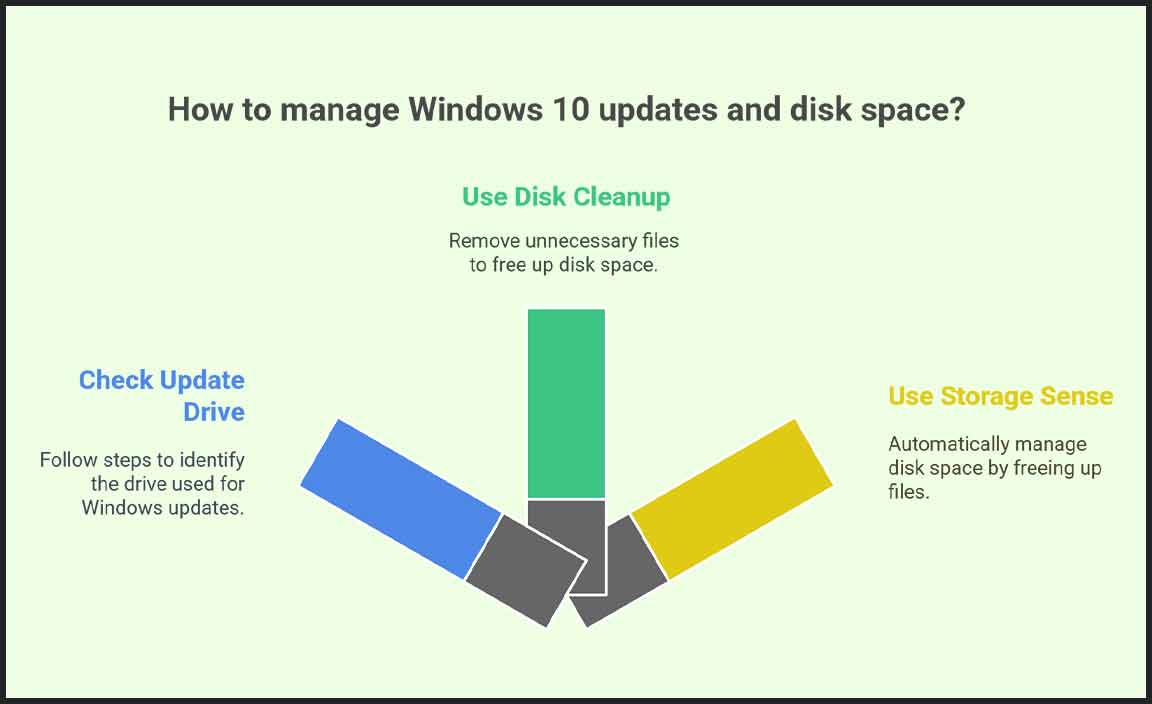
Next, to keep track of disk space, use tools like Disk Cleanup or Storage Sense. These nifty helpers can free up space faster than a kid chasing an ice cream truck!
| Tool Name | Function |
|---|---|
| Disk Cleanup | Removes unnecessary files. |
| Storage Sense | Automatically frees up space. |
Preparing a New Drive for Updates
Requirements for the new drive (formatting, storage capacity). Recommendations for SSD vs HDD for updates.
Before diving into updates, your new drive must be ready. First, formatting is a must. This makes sure your drive can talk to Windows smoothly, like best buddies. Next, check the storage capacity. You want enough space for those updates—around 20GB should do the trick, unless you’re into massive games!
Now, what’s better: SSD or HDD? SSDs are fast like a cheetah, while HDDs might feel like a tortoise. If you want speed, go for an SSD. If you want a larger space without spending much, an HDD is okay. Here’s a quick table for you:
| Drive Type | Speed | Cost |
|---|---|---|
| SSD | Fast | Higher |
| HDD | Slow | Lower |
Choosing the right drive can make updates faster and easier. Think of it like picking the best pizza toppings for a party!
Changing the Update Drive via Settings
Detailed walkthrough of the steps in Windows settings. Screenshots or visuals to assist user comprehension.
If you want to change where Windows 10 keeps its updates, it’s a piece of cake! First, open the Settings menu. Click on “Update & Security.” Next, select “Windows Update,” and then click on “Advanced Options.” Find “Delivery Optimization” and click on it. Here, you can choose to change your drive for updates. Remember, updating is like feeding your computer—it needs the right stuff to keep running smoothly. And voilà! You’re all set! 🥳
| Step | Action |
|---|---|
| 1 | Open Settings |
| 2 | Click on Update & Security |
| 3 | Go to Windows Update |
| 4 | Select Advanced Options |
| 5 | Choose Delivery Optimization |
Alternative Methods to Change Update Drive
Using Command Prompt to change the drive. Thirdparty tools that can assist with drive management.
There are easy ways to change your update drive. One method is to use the Command Prompt. This tool helps you set a new drive quickly. Another option is using third-party tools. These tools often provide a simple way to manage your drives without complicated steps.
- Command Prompt: Type commands to change your drive.
- Third-party tools: Software that can help update drive settings.
Common Issues and Troubleshooting
Potential problems when changing update drives. Solutions to address update errors or failed updates.
Changing the drive for Windows 10 updates can lead to a few hiccups. You might face problems like updates not installing, or your system throwing a tantrum about the new drive. If updates fail, try checking your connections or ensuring there’s enough space. It’s like making sure your pizza delivery driver knows your address!
| Problem | Solution |
|---|---|
| Updates not installing | Check drive space and connections. |
| Update errors | Run the Windows Update Troubleshooter. |
Remember, even devices need a little “time out” sometimes. Troubleshooting can save you from a major tech headache!
Best Practices for Managing Update Drives
Tips for optimizing storage and performance. Periodic maintenance for ensuring smooth updates.
Managing where your updates go can help your computer run better. Keep your storage organized by deleting files you don’t need. You can also move some games or pictures to free up space. Regularly check for updates too. This keeps everything working smoothly. It’s like keeping your room clean—less mess means better focus! Try these tips:
- Delete old files and programs.
- Move large files to another drive.
- Check for updates at least once a month.
How often should I check for updates?
You should check for updates at least once a month. This keeps your system safe and running smoothly. Regular checks can catch problems early.
Conclusion
In summary, changing the drive for Windows 10 updates is simple. You need to go to Settings, then Update & Security, and choose your desired drive. Remember to keep enough space for updates. We encourage you to follow these steps and check out more online guides for help. Taking control of your updates will keep your system running smoothly!
FAQs
Sure! Here Are Five Related Questions About Changing The Drive For Windows Updates:
Changing the drive for Windows updates means picking a different place on your computer where updates go. To do this, you need to go to your settings. We can find the “Update & Security” section there. Then you can choose a new drive for the updates. It’s like choosing a new box to keep your toys in!
Sure! Please give me the question you’d like me to answer, and I’ll help you with it.
How Can I Change The Default Download Location For Windows Updates To A Different Drive?
To change where Windows downloads updates, you will need to adjust some settings. First, open “Settings” by clicking the Start button. Then, go to “Update & Security” and click on “Windows Update.” Look for “Advanced options” and select “Delivery Optimization.” Finally, choose “Advanced options” again, and you can set a different drive if needed. If it doesn’t let you choose a new drive, you might need to move your files or free up space.
Is It Possible To Redirect Windows Updates To An External Hard Drive?
You can’t directly send Windows updates to an external hard drive. Windows only installs updates to the main system drive. However, you can use the external hard drive for backups or extra storage. If your computer has low space, you should free up space or add more storage instead.
What Are The Steps To Configure Windows To Store Update Files On A Different Partition?
To change where Windows saves update files, first, open “Settings” by clicking the Start button. Then, click on “Update & Security.” Next, choose “Windows Update” and look for “Advanced Options.” Here, you can find an option to change the storage location. Just pick your different partition and save your choice. Now, Windows will use that place for its update files!
Will Changing The Drive For Windows Updates Impact System Performance Or Update Integrity?
Changing the drive for Windows updates can affect how fast your computer works. If the new drive is slower, updates might take longer. However, it won’t change if the updates are good or not. We should pick a fast drive for better performance.
Are There Any Risks Involved In Changing The Storage Location For Windows Updates?
Yes, there are some risks when you change where Windows updates are stored. You might not get updates as quickly. This can make your computer less safe or slow. If the new spot has problems, the updates might not work. It’s usually best to keep the default storage location.
Resource:
-
How Windows manages updates: https://learn.microsoft.com/en-us/windows/deployment/update/windows-update-overview
-
Using Disk Cleanup for better storage management: https://support.microsoft.com/en-us/windows/disk-cleanup-in-windows-10-19c14408-3c3a-3b6a-212f-e59e4089a71f
-
Understanding SSD vs HDD performance: https://www.crucial.com/articles/about-ssd/ssd-vs-hdd
-
Storage Sense feature explained: https://www.howtogeek.com/361691/what-is-storage-sense-in-windows-10-and-how-do-you-turn-it-on-and-use-it/