Looking for free CD burning software for Windows 10? This guide highlights the best, user-friendly options available. Easily burn discs for music, data, or backups without spending a dime. Get simple, step-by-step instructions to manage your CDs and DVDs like a pro!
Free CD Burning Programs for Windows 10: Your Essential Guide
Hey everyone, Mike Bentley here! Ever find yourself needing to burn a CD or DVD on your Windows 10 computer, only to discover that the built-in tools are a bit… well, basic? You’re not alone! Many users find that Windows 10’s native options for copying files to discs can be limiting, especially when you need more control or specific features.
It can be frustrating when you just want to share photos, back up important files, or create a music mix, but the process feels complicated. Don’t worry, though! In this guide, I’m going to walk you through some fantastic free CD burning programs that make the job easy, safe, and stress-free. We’ll explore powerful tools that are perfect for beginners and give you the confidence to handle your disc burning needs.
Why You Might Need Free CD Burning Software
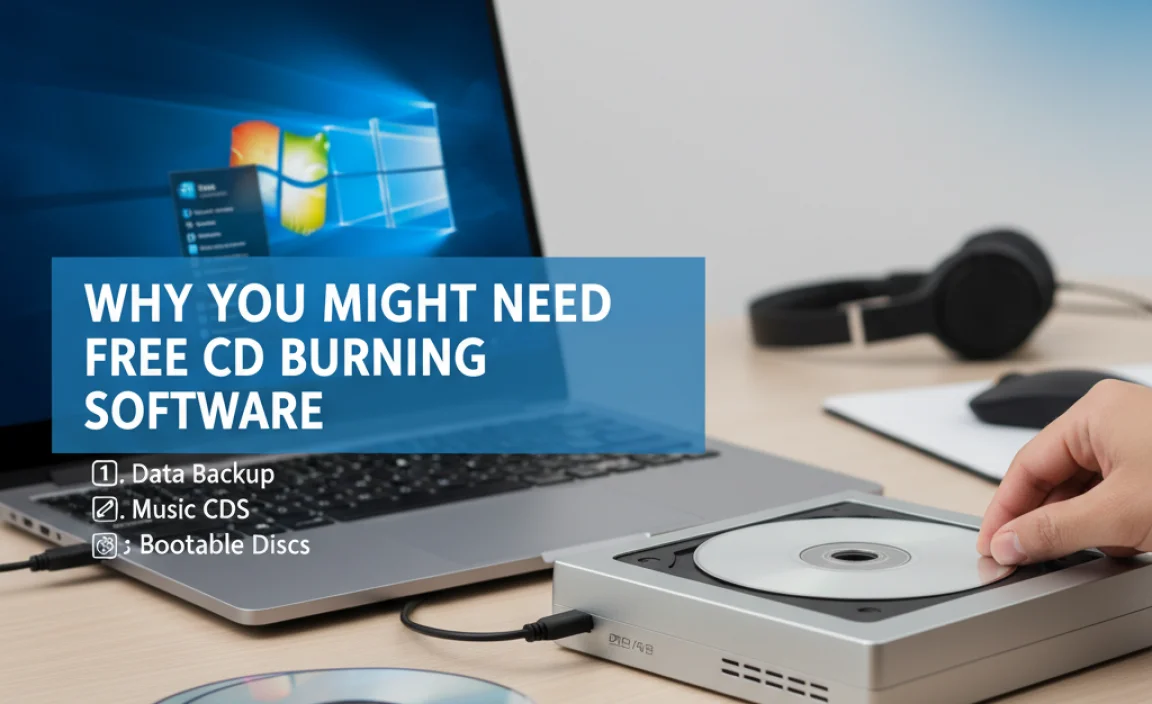
While physical discs like CDs and DVDs might seem like a thing of the past with cloud storage and USB drives aplenty, they still have their place. Sometimes, you need a tangible copy of something important, like a backup of family photos or important documents. Or perhaps you’re creating a music playlist for an older car stereo or a gift for a friend who prefers physical media. Whatever the reason, Windows 10’s built-in capabilities for burning discs can leave a lot to be desired.
You might run into limitations with file sizes, disc formats, or the speed at which data is written. Sometimes, the built-in Windows features just don’t offer the level of customization or reliability that users crave. That’s where free, third-party CD burning software comes in. These programs are often designed with user-friendliness in mind and pack a punch with features that the standard Windows tools lack. They can help you create different types of discs with ease, manage your burning projects, and ensure your data is written correctly and reliably.
What to Look for in a Free CD Burning Program
Before we dive into specific recommendations, let’s talk about what makes a good free CD burning program. You don’t need to be a tech wizard to use these, but knowing a few key features will help you choose the best fit for your needs.
- Ease of Use: This is paramount for a beginner-friendly guide. The interface should be intuitive, with clear buttons and simple steps to follow. Drag-and-drop functionality is a huge plus!
- Disc Type Support: Ensure the program supports the types of discs you’ll be burning – CD-R, CD-RW, DVD-R, DVD-RW, DVD+R, DVD+RW, and even dual-layer discs if you need them.
- Data and Audio Burning: Can it burn standard data files? Can it create audio CDs from your music files without hassle?
- Disc Copying: Some programs allow you to clone discs directly, which is handy for making exact duplicates.
- ISO Support: The ability to create or burn ISO image files is essential for many software installations and game backups.
- Verification: A good program will offer a verification step after burning to ensure the data was written correctly. This saves you from using a coaster!
- Lightweight: You don’t want a program that slows down your computer or is packed with unnecessary features.
- No Spyware/Adware: This is crucial. Free software can sometimes come bundled with unwanted extras. Always download from official sources!
Top Free CD Burning Programs for Windows 10
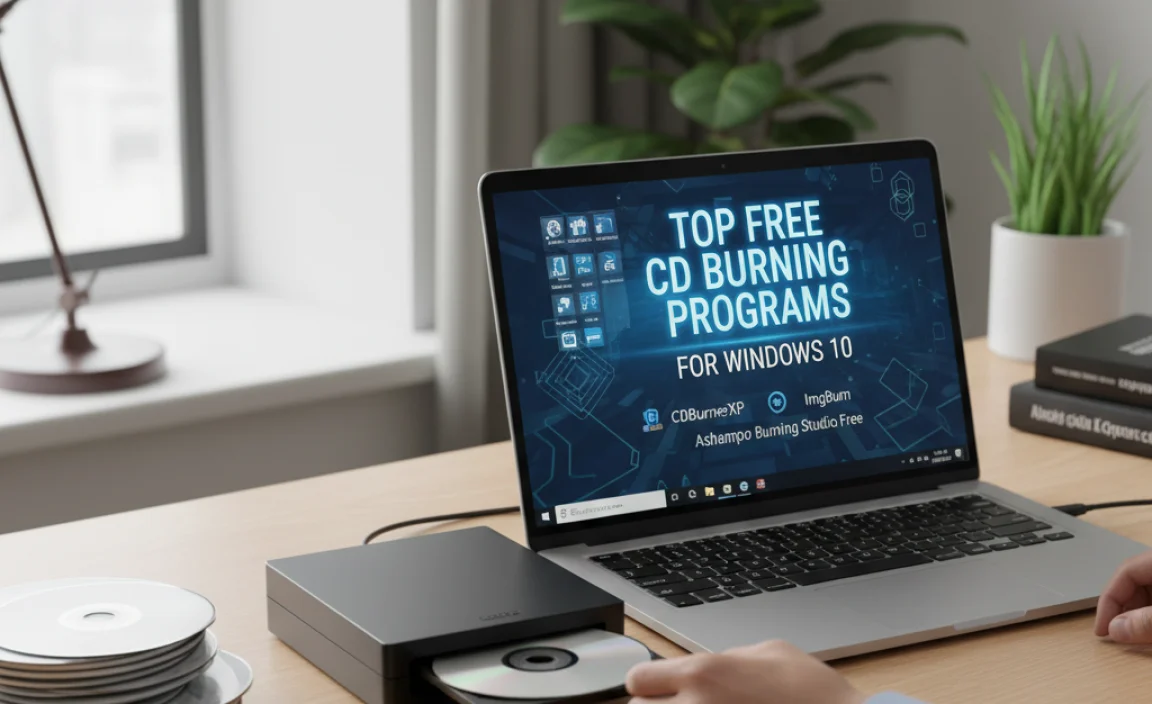
Now, let’s get to the good stuff! Here are some of the best free CD burning programs that are perfect for Windows 10 users who want reliable and easy-to-use options.
1. CDBurnerXP
CDBurnerXP is a long-standing favorite in the free burning software world. Despite its name, it works perfectly on Windows 10 and even Windows 11. It’s packed with features that are surprisingly robust for a free program.
Key Features:
- Burn data CDs/DVDs, including Blu-ray and HD-DVDs.
- Create and burn video DVDs.
- Burn audio compilations from various formats (WAV, MP3, FLAC, etc.).
- Copy discs and disc images (ISO).
- Disc-to-disc copying.
- Easy-to-use interface with drag-and-drop support.
- Supports a wide range of disc formats.
- Includes a helpful feature to print labels for your CDs and DVDs.
How to Use CDBurnerXP (Basic Data Disc):
- Download and Install: Visit the official CDBurnerXP website and download the latest version. Be careful during installation to decline any bundled software offers.
- Launch Program: Open CDBurnerXP. You’ll be presented with a start screen. Select “Data Disc.”
- Select Files: A file browser window will open. Navigate to the files and folders you want to burn. You can drag and drop them directly into the main window of CDBurnerXP.
- Insert Disc: Put a blank CD or DVD into your computer’s disc drive.
- Burn: Once your files are added, click the “Burn Disc” button (it looks like a disc with an arrow).
- Choose Settings: A dialog box will appear. You can usually leave the default settings for speed, but if you want to be sure, select “Verify data after writing.” Click “Burn Disc.”
- Wait: The program will then burn your disc. This can take several minutes depending on the amount of data and the speed of your burner.
Why it’s great for beginners: The interface is straightforward, and the steps for creating a basic data disc are very clear. The verification option adds confidence.
2. BurnAware Free
BurnAware Free is another excellent option that offers a clean interface and essential burning functions without overwhelming you. It’s designed to be simple and effective.
Key Features:
- Burn data, audio, and video CDs, DVDs, and Blu-rays.
- Create MP3 and UDF discs.
- Copy discs and erase rewritable discs.
- Burn ISO images.
- User-friendly interface.
- Supports all CD/DVD formats.
How to Use BurnAware Free (Basic Data Disc):
- Download and Install: Get BurnAware Free from its official website. Pay attention during installation to avoid any unwanted extra software.
- Launch Program: Open BurnAware Free. You’ll see various options like “Data Disc,” “Audio Disc,” “Disc Image,” etc. Select “Data Disc.”
- Add Files: Click the “Add Files” or “Add Folder” button to select the content you want to burn, or drag and drop them into the program window.
- Insert Blank Disc: Place a blank CD or DVD into your drive.
- Burn: Click the “Burn” button (usually at the bottom).
- Review Settings: A pop-up window will show your burning options. You can choose the burning speed. It’s a good idea to keep “Verify data” enabled if available. Click “Start.”
- Completion: The program will proceed with burning your disc.
Why it’s great for beginners: BurnAware Free’s layout is very clean and organized, making it easy to find the function you need. The process is almost identical to CDBurnerXP, which is a good sign of intuitive design.
3. InfraRecorder
InfraRecorder is a completely free, open-source burning solution for Windows. It doesn’t include any adware or spyware, making it a very safe choice. While its interface might look a little more dated than others, its functionality is solid.
Key Features:
- Burn data and audio projects.
- Burn discs from ISO images.
- Create and burn disc images.
- Two-pass recording to reduce errors.
- Erase rewritable discs.
- Supports CD-R/RW and DVD-R/RW.
- Includes a basic disc-naming feature.
How to Use InfraRecorder (Basic Data Disc):
- Download and Install: Download InfraRecorder from its official or a reputable freeware site. It’s a straightforward installation.
- Launch Program: Open InfraRecorder.
- Select Project Type: In the left-hand pane, choose “Data disc.”
- Add Files: A file explorer will open. Browse to your files and folders and drag them into the main “Contents of disc” area on the right.
- Insert Blank Disc: Place a blank CD or DVD in your drive.
- Initiate Burn: Click the “Burn disc” button (often found at the top or in the toolbar).
- Burning Options: A “Disc burning options” window will appear. You can adjust the burning speed. For reliability, ensure “Finalize disc” is checked. Click “OK.”
- Burning Process: InfraRecorder will start burning your disc.
Why it’s great for beginners: Being open-source means it’s free of bundled junk and generally very reliable. The drag-and-drop interface is simple to grasp.
4. ImgBurn
ImgBurn is a highly powerful and versatile burning program, often considered a favorite among advanced users due to its extensive features. However, it can still be used effectively by beginners if they stick to the basic functions.
Key Features:
- Burn files and folders to discs.
- Create disc image files (ISO).
- Write image files to discs.
- Verify discs.
- Supports CD, DVD, and Blu-ray.
- Advanced features for experienced users (like layer break settings).
Note on Installation: ImgBurn’s installer has historically included bundled software offers. It’s crucial to carefully read each step and select “Custom Installation” to uncheck any optional programs you don’t want.
How to Use ImgBurn (Basic Data Disc):
- Download and Install: Download ImgBurn from a trusted source. During installation, choose Custom Installation and deselect any bundled software.
- Launch Program: Open ImgBurn. You’ll see several options. For a simple data disc, choose “Create files from disc.” (Wait, that’s not right for creating a data disc! Let’s rephrase for burning data.) For creating a data disc FROM files, choose “Create image file from files/folders.” Ah, slight correction here for clarity! For creating a data disc with files you have, you’ll actually use “Write files/folders to disc.”
- Select “Write files/folders to disc”: This is the option to add your own files and folders to a blank disc.
- Add Files: A file explorer will appear. Drag and drop your files and folders into the main window, or use the “Add” button.
- Insert Blank Disc: Place a blank CD or DVD into your drive.
- Configure Burn Settings: ImgBurn is very detailed. For a beginner, you can usually leave most settings on the default. On the right side, you’ll see “Write speed.” You might want to reduce this slightly from the maximum for better reliability. Ensure “Verify” is checked.
- Start Burning: Click the ImgBurn icon that looks like a disc with a green arrow pointing to it.
- Confirmation: Confirm any prompts to start the writing process.
Why it’s great for beginners (with caution): While ImgBurn can be complex, its core function of burning a data disc is accessible. The verification step is very robust. Just be mindful during installation. Its power makes it a good long-term option as your needs grow.
Comparison of Free CD Burning Programs
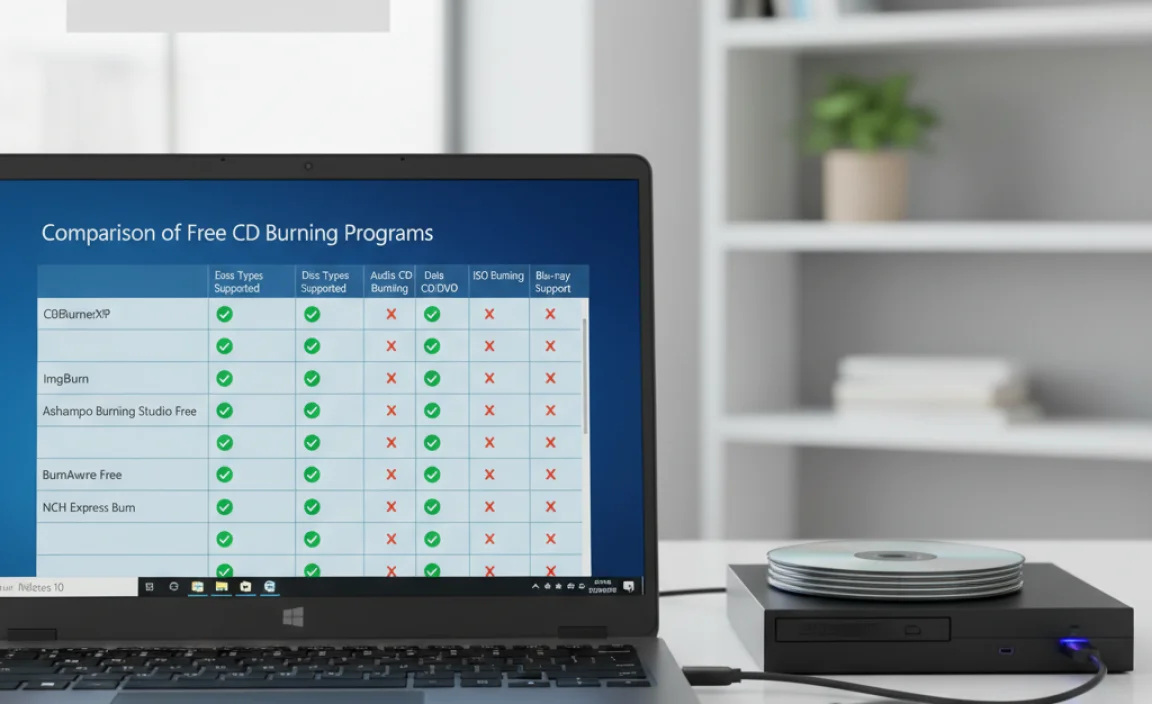
To help you quickly decide, here’s a table comparing the key aspects of these free CD burning programs:
| Feature | CDBurnerXP | BurnAware Free | InfraRecorder | ImgBurn |
|---|---|---|---|---|
| Ease of Use | Very Good | Excellent | Good | Good (can be complex) |
| Data Burning | Yes | Yes | Yes | Yes |
| Audio Burning | Yes | Yes | Yes | Yes |
| ISO Burn/Create | Yes | Yes | Yes | Yes |
| Disc Copying | Yes | Yes | Basic | Yes |
| Label Printing | Yes | No | No | No |
| Verification Built-in | Yes | Yes (optional) | Yes (reduces errors) | Yes |
| Bundled Software Risk | Low (watch installer) | Low (watch installer) | None | High (watch installer carefully) |
| Open Source | No | No | Yes | No |
Essential Tips for Problem-Free CD/DVD Burning
Even with the best software, a few tips can ensure your burning projects are successful every time.
- Use Quality Media: Not all blank discs are created equal. Invest in reputable brands (e.g., Verbatim, Taiyo Yuden). Cheap discs are more prone to errors.
- Burn at Slower Speeds: While your burner and disc might support very high speeds, burning at a slightly slower speed (e.g., 8x or 16x for DVDs) often results in more reliable burns. Manufacturers usually recommend a speed range; try to stay within that.
- Don’t Use the Computer During Burning: Performing other intensive tasks on your PC while burning can cause interruptions and lead to coasters. Let your computer focus on the burning process.
- Verify Your Discs: Always use the verification feature in your burning software. It reads back the data after burning and compares it to the original, ensuring your disc is readable. It takes a little longer but is worth it.
- Keep Your Firmware Updated: Occasionally, your CD/DVD drive’s firmware can be updated by the manufacturer. Check your drive manufacturer’s website for potential updates, as this can improve compatibility and performance.
- Handle Discs with Care: Keep discs clean and avoid scratches. Store them in jewel cases or sleeves to protect them.
- Understand Disc Types:
- CD-R/DVD-R: “Recordable.” Once written, they cannot be erased or rewritten.
- CD-RW/DVD-RW: “Rewritable.” These can be erased and written on multiple times, but they are generally slower and less reliable for permanent storage than -R discs.
Troubleshooting Common Burning Issues
Sometimes, even with the best software and tips, you might encounter problems. Here are a few common ones:
- “Buffer Underrun” Error: This happens when the burner doesn’t receive data fast enough to write continuously. It’s often solved by burning at a slower speed or closing other applications.
- Disc Not Recognized: Ensure you’ve finalized the disc (if it’s a -R disc type). Try burning another disc with the same software at a slower speed. The disc media might be faulty.
- Data Corruption/Failed Verification: This is often due to the disc media quality, burning at too high a speed, or an issue with the CD/DVD drive itself. Try different media or a slower speed.
- Software Crashes: Ensure you have the latest version of the burning software and that your Windows 10 is up-to-date.
For more in-depth troubleshooting on your CD/DVD drive itself, you might find helpful resources on Microsoft’s Support site by searching for your specific error code or drive model.
Frequently Asked Questions (FAQ)
Q1: Do I really need a separate program to burn CDs on Windows 10?
A1: Windows 10 has basic burning tools, but free programs offer more features, flexibility, and often better reliability for creating data, music, or video discs.
Q2: Are these free CD burning programs safe to download?
A2: Yes, provided you download them from their official websites or reputable freeware sources. Always be cautious during installation and uncheck any bundled software offers.
Q3: Can I burn Blu-ray discs with these free programs?
A3: Some of them, like CDBurnerXP and ImgBurn, support Blu-ray burning, but you’ll need Blu-ray discs and a Blu-ray burner drive.
Q4: What’s the difference between CD-R and CD-RW?
A4: CD-R discs can be written to only once, while CD-RW discs can be erased and rewritten multiple times. CD-R is generally better for long-term, reliable storage.
Q5: How can I burn an ISO file to a disc?
A5: Most of these programs have a specific option for burning disc images (like ISO files). Look for “Burn Image to Disc” or “Disc Image” when launching the software.
Q6: Is it still worth burning CDs or DVDs in 2024?
A6: Absolutely! While not as common, discs are still useful for backups, sharing large files offline, or ensuring compatibility with older hardware. They provide a tangible, offline copy of your data.
Conclusion
So there you have it – a comprehensive look at some of the best free CD burning programs available for your Windows 10 computer. You don’t need to spend money on software to get the job done effectively. Tools like CDBurnerXP, BurnAware Free, InfraRecorder, and even the powerful ImgBurn offer robust features that are easy enough for beginners to use, making disc burning a breeze.
Remember to always download from official sources, pay attention during installation, and follow the tips for slower speeds and disc verification. These steps will help ensure you create reliable discs, whether you’re backing up precious memories, sharing music, or archiving important data. You’ve got the knowledge now to tackle your disc burning needs with confidence. Keep your PC running smoothly and your data safe!”