A context menu editor for Windows 10 helps you customize the right-click menu, removing clutter and adding useful shortcuts. This guide shows you how to use one to make your Windows experience smoother and more efficient, with easy-to-follow steps for beginners.
Ever right-click on a file or folder in Windows 10 and see a menu that feels a bit… much? You’re not alone! That context menu, the one that pops up when you right-click, can quickly become cluttered with options you rarely use. This can slow you down and make it harder to find the command you actually need.
But don’t worry, there’s a straightforward way to tidy it all up and make your Windows 10 experience much smoother and more efficient. We’ll dive into how you can take control of this handy feature, proving that managing your PC doesn’t need to be complicated. Get ready to discover some genius tweaks!
Why Your Context Menu Needs Some Love
The context menu is a powerful tool. It gives you quick access to common actions related to whatever you’ve clicked on. Think about it: you right-click to open a file, send it somewhere, rename it, or access properties. It’s designed to save you time.
However, as you install more software, many programs add their own options to this menu. While sometimes helpful, this can lead to a long, messy list that’s overwhelming. You might have options for software you no longer use, or multiple similar choices that confuse you. This clutter can hinder your workflow, making you hunt for the right command instead of clicking it instantly.
Over time, a messy context menu isn’t just annoying; it can break your flow and make your PC feel less intuitive. It’s like having too many tools scattered across your workbench when you’re trying to build something quickly. You know the tool you need is there, but finding it takes extra effort.
That’s where a context menu editor comes in. It’s a tool designed to help you clean up this digital clutter, allowing you to add, remove, or organize the items so that the most useful ones are always right at your fingertips. We’ll explore how to do this the easy way, so you can get back to using your computer efficiently and with a smile.
Understanding the Windows Context Menu
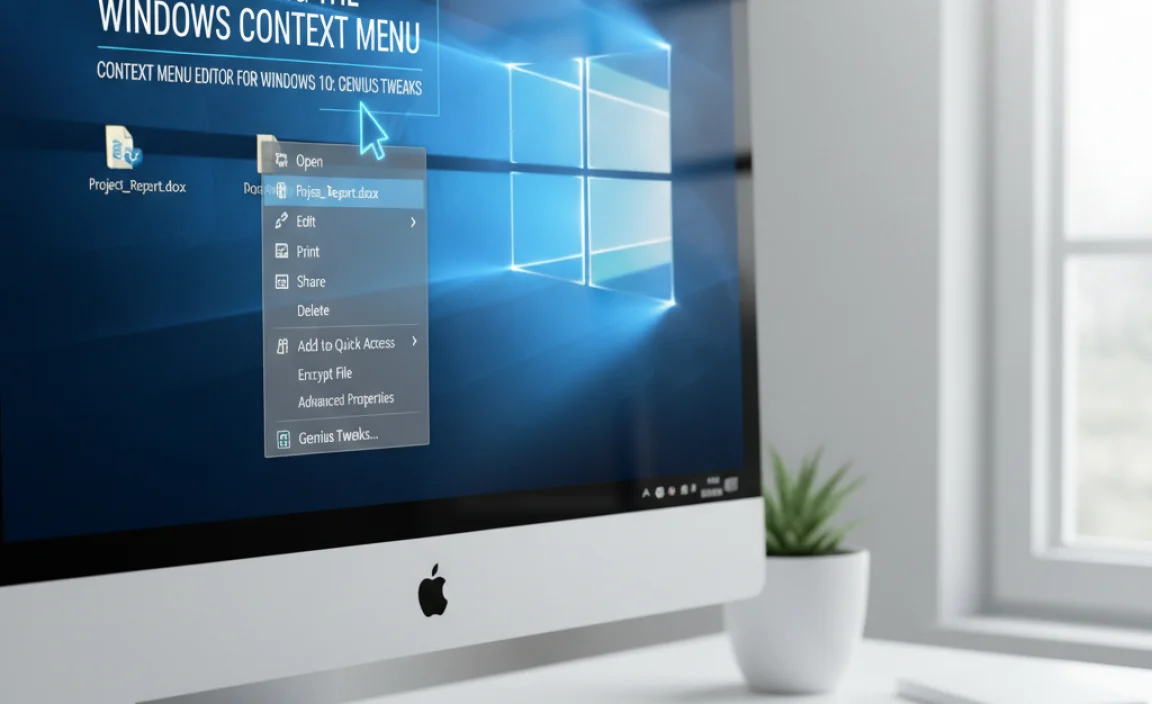
Before we start editing, it’s helpful to know what we’re dealing with. When you right-click on something in Windows 10 (like a file, folder, or even empty space on your desktop), a menu appears. This is the context menu. It’s called “context” because its contents change based on what you right-clicked on. For example, right-clicking a Word document will show different options than right-clicking on a picture file or a folder.
These options are controlled by Windows and the software installed on your computer. Each program that wants to add a shortcut to this menu registers itself with Windows. This is usually done through entries in the Windows Registry, a complex database where Windows stores settings and options for the operating system and installed applications. While this system is flexible, it’s also why menus can get so crowded.
Some common default options include:
- Open
- Edit
- Send to
- Cut, Copy, Paste
- Delete
- Rename
- Properties
When you install new software, especially utilities or creative applications, they might add options like “Open with [Program Name]”, “Scan with [Antivirus]”, “Convert to [Format]”, or “Upload to [Cloud Service]”. While these can be convenient, they contribute to the growing list. Our goal is to make this menu work for you, not against you.
Why Use a Context Menu Editor?

A context menu editor offers a user-friendly way to manage these menu items without directly diving into the Windows Registry. Editing the Registry manually can be risky for beginners; a single mistake can cause system instability. Editors provide a safer, more visual approach.
Here are the main benefits:
- Reduce Clutter: Remove entries from programs you don’t use to make the menu focused.
- Add Useful Shortcuts: Pin frequently used actions or programs to the context menu for faster access.
- Organize Your Menu: Some editors allow you to group or reorder items for better readability.
- Improve Efficiency: A cleaner, customized menu saves you time and reduces frustration.
- Safer Than Manual Registry Editing: Most editors provide safeguards and an intuitive interface, reducing the risk of errors.
Essentially, a context menu editor puts you in the driver’s seat, allowing you to tailor your Windows 10 experience to your specific needs and preferences. It’s about making your computer work the way you want it to.
Choosing the Right Context Menu Editor (Windows 10 Focused)

When looking for a context menu editor for Windows 10, it’s important to choose a reputable and user-friendly option. While there are many tools available, some are better suited for beginners than others. We want to keep it simple, safe, and effective.
Here are a few popular and well-regarded options:
1. FileMenu Tools
This is a robust and popular choice that offers a lot of customization. It’s not just for editing; it lets you add new commands, create submenus, and even integrate with other tools.
- Pros: Very powerful, lots of features, easy to add custom commands with specific actions.
- Cons: Can look a bit overwhelming at first due to the sheer number of options. Free version has limitations.
2. Easy Context Menu (ECM)
As the name suggests, this tool is designed for ease of use. It offers a straightforward interface to add and remove common context menu items and allows you to enable/disable specific Windows functions. It’s great for adding toggles like “Take Ownership” or “Command Prompt Here” easily.
- Pros: Very user-friendly, portable (no installation usually required), good for adding system-level commands.
- Cons: Fewer advanced customization options compared to FileMenu Tools.
3. NirLauncher Suite (Includes NirCmd)
NirLauncher is a collection of many small utility programs. Within it, NirCmd is a command-line utility that can be used to perform many operations, including adding items to the context menu. This is for users who are a bit more comfortable with command-line operations or want to build highly specific custom entries.
- Pros: Extremely powerful and flexible if you know how to use command-line arguments. A vast array of tools in the suite.
- Cons: Not beginner-friendly if you aren’t comfortable with command prompts or scripting.
4. Built-in Windows Tools (for the brave!)
For users who want to go without third-party software, understanding the Windows Registry is the way to go. However, as I mentioned, this is not recommended for beginners due to the risk of system errors. If you’re curious, you can find guides on Microsoft’s support pages or reputable tech sites that explain how to navigate it.
Note: Always download software from official websites or trusted sources to avoid malware. For this guide, we’ll focus on a more beginner-friendly approach, leaning towards tools like Easy Context Menu or the editing capabilities within FileMenu Tools.
Genius Tweaks: Step-by-Step Guide Using a Popular Editor

Let’s make your Windows 10 context menu work for you! We’ll walk through a hypothetical example using a tool that’s similar to Easy Context Menu or the readily accessible parts of FileMenu Tools. The core concepts are the same across many editors.
Step 1: Download and Prepare Your Editor
First, you’ll need to download your chosen context menu editor. For this demonstration, let’s assume we’re using a tool that allows us to add or remove items by checking boxes or entering simple commands. Make sure you download it from the official website to ensure it’s safe and the latest version.
Once downloaded, follow the instructions. Some editors are portable and can be run directly, while others require installation. We’ll assume you’ve got it up and running.
Tip for Safety: Before making any significant changes, good practice is to create a System Restore point. Search for “Create a restore point” in the Windows search bar. Click “System Protection” and then “Create…” This allows you to roll back your system if anything goes wrong.
Step 2: Accessing the Editor Interface
Launch the context menu editor. You’ll typically see a window divided into sections, often categorized by the type of item you’re editing (e.g., File, Folder, Desktop, Drive) and the specific commands available.
Imagine a screen with:
- Main Categories: File, Folder, Desktop, Drive, My Computer, Network, etc.
- List of Available Commands: A collection of common but often hidden Windows functions or program integrations.
- Enable/Disable Checkboxes: Next to each command, allowing you to toggle its visibility in the context menu.
Step 3: Removing Unwanted Entries (Decluttering)
This is where you start making your menu smarter. Go through the list of available commands for each category (Files, Folders, etc.). If you see options related to software you rarely or never use, simply uncheck them.
For example:
Under the “File” Category:
- You might see multiple “Open with…” options for various photo editors or media players. If you only use one or two, uncheck the others.
- Software installers often add “Uninstall with [Program]” or “More Options for [Program]”. If you’re happy to uninstall via Control Panel or Settings, uncheck these.
- Cloud storage services can add “Upload to Dropbox,” “Sync with OneDrive,” etc. If you don’t use these features from the context menu, remove them.
Under the “Folder” Category:
- Look for duplicate “Open Command Prompt” or “Open PowerShell” entries if multiple apps have added them.
- Any options for obscure file conversion tools you never use can be unchecked.
Tip: Be cautious. If you’re unsure about an option, it’s generally safer to leave it. You can always uncheck it later after testing if it proves unnecessary.
Step 4: Adding Useful Shortcuts (Power Tweaks)
This is the “genius” part! You can bring useful commands that are normally hidden or require multiple clicks directly to your right-click menu.
Here are some popular and incredibly useful additions:
Commonly Added Items:
- Copy as Path: This is a lifesaver! It copies the full file or folder path to your clipboard, which is incredibly useful for pasting into commands, scripts, or configuration files.
- Take Ownership: For advanced users, this adds a quick way to gain administrative rights over a file or folder that Windows might be blocking. (Use with caution!)
- Open Command Prompt/PowerShell Here: While Windows 10 has this built-in in some places, having it consistently accessible for all folders is fantastic for quick command-line tasks.
- Edit with Notepad/Text Editor: For quick edits of configuration files or simple text documents.
- Run as Administrator: Sometimes this is already there, but ensuring it’s easily accessible for executables can be a big time-saver for troubleshooting.
How to Add Them:
In your editor, you’ll find sections for adding custom entries. You might select a predefined command from a list or create your own.
Example: Adding “Copy as Path”
- Navigate to the “File” or “Folder” section in your editor.
- Look for an option like “Add Command” or a list of predefined powerful tools.
- Find and select “Copy as Path”.
- Click “Add” or “Enable.”
Example: Adding a Custom Application Shortcut
This is where you can put your favorite apps right into the context menu.
- Find the “Add Custom Command” or similar option.
- Command Name: Type what you want to see in the menu (e.g., “Open in VS Code”).
- Command Path: Browse to and select the executable file of the program (e.g., `C:UsersYourNameAppDataLocalProgramsMicrosoft VS CodeCode.exe`).
- Arguments (Optional): You might leave this blank, or add `%1` if you want the selected file/folder to be passed as an argument to the program.
- Position: Choose where you want it to appear (e.g., Top, Bottom, Specific position).
- Icon (Optional): Some editors let you add the program’s icon.
- Add/Save.
You can create custom submenus too, grouping related commands for even greater organization!
Step 5: Applying Your Changes and Testing
Once you’ve made all your desired additions and removals, look for an “Apply,” “Save,” or “Update” button in your context menu editor. Click it.
The editor will then update the necessary Windows settings (often by modifying the Registry in the background). You usually don’t need to restart your computer, but some changes might take effect immediately, while others might require you to close and reopen File Explorer, or even log out and back in.
Now, test it out! Right-click on various items (files, folders, desktop background) to see your customized context menu in action. Check if removed items are gone and if your new shortcuts work as expected.
If something isn’t right, don’t panic. Go back to your editor, revert the changes, or try again. If you’re really stuck, your System Restore point is your safety net.
Advanced Tweaks and Considerations for Windows 10/11
While the core principles of context menu editing remain similar between Windows 10 and Windows 11, there are subtle differences and advanced techniques you might explore.
The Windows 11 Context Menu Difference
Windows 11 introduced a redesigned, simplified context menu. By default, many of the “classic” context menu items (like Cut, Copy, Delete) are hidden behind a “Show more options” entry. This is partly to declutter the primary menu and make it more touch-friendly.
Context menu editors designed specifically for Windows 10 may behave differently on Windows 11. Some editors have been updated to work with the new structure, while older ones might focus more on restoring the classic menu behavior or adding to the new structure.
If you’re on Windows 11, look for editors that explicitly mention support for Windows 11’s new context menu system or those that allow you to disable the new menu and revert to the classic one if that’s your preference.
Creating Sub-Menus
For a truly organized context menu, consider creating your own sub-menus. For instance, you could have a “My Tools” or “Quick Actions” entry that, when clicked, opens another small menu with your most frequently used custom commands. This keeps the primary context menu clean while still providing fast access to your chosen tools.
Most advanced context menu editors provide an option to create new menu entries that act as containers for other entries. You define the name of the sub-menu, and then you can add other commands or custom application shortcuts to reside within it.
Security Implications (What to Watch Out For)
While context menu editors are primarily for convenience, it’s important to be mindful of security:
- Beware of Malicious Entries: If you download scripts or configuration files from untrusted sources to add to your context menu, they could potentially contain malicious code. Always verify the source.
- “Run as Administrator” Privileges: Adding shortcuts that launch programs requiring administrator privileges means you’ll be prompted for UAC (User Account Control) confirmation. This is a security feature; be judicious about what you add that bypasses standard user permissions.
- Third-Party Software: Only download editors from reputable websites. Some malicious “registry cleaners” or “optimizers” might masquerade as context menu editors, putting your system at risk. Stick to well-known, trusted utilities.
For instance, Microsoft provides guidance on managing File Explorer options, which indirectly relates to context menu behavior: Customize the right-click context menu in Windows 10 and 11 (This link leads to a Microsoft support article on customizing File Explorer, which can include context menu aspects).
Driver Updates and Context Menus
Sometimes, hardware manufacturers (like NVIDIA, AMD for graphics cards, or Intel for chipsets) include their own context menu entries. These are often linked to their driver control panels or specific hardware features. While usually harmless, they can add to clutter. If you find your context menu flooded with graphics driver options, for example, and you rarely access them directly from there, using a context menu editor to remove them can be beneficial.
Remember, driver updates are crucial for PC performance and security. If you’re struggling with drivers, be sure to get them from the manufacturer’s official website or through Windows Update.
Troubleshooting Common Issues
Issue: Changes didn’t appear.
- Fix: Try restarting File Explorer. You can do this by opening Task Manager (Ctrl+Shift+Esc), finding “Windows Explorer,” right-clicking it, and selecting “Restart.” For some changes, a full logoff/logon or even a PC restart might be necessary.
Issue: A removed item keeps reappearing.
- Fix: Some applications actively re-register their context menu entries. You might need to use a more advanced editor or periodically re-apply your changes. Some editors have an option to lock certain entries.
Issue: Editor is causing errors or crashing.
- Fix: This is where your System Restore point is invaluable. Revert to the restore point created before you used the editor. Then, try a different editor or research if the one you used has known compatibility issues with your specific Windows 10 version.
Issue: Context menu is extremely slow.
- Fix: This is often caused by having too many items, especially those that require a program to launch or perform a quick check. Aggressively prune unnecessary entries. Also, make sure your antivirus is up-to-date and not interfering excessively.
Practical Examples of Context Menu Editor Usage
Let’s look at three scenarios where a context menu editor is a perfect solution:
Scenario 1: The Power User’s Quick Access
John is a web developer who frequently works with code files and uses tools like VS Code and Git. His context menu is typically bogged down with options from Adobe Reader, old game launchers, and trial software.
John’s Tweaks:
- Removes all entries for software he doesn’t use.
- Adds “Open in VS Code” to the file context menu.
- Adds “Git Bash Here” and “Open Command Prompt Here” to the folder context menu.
- Adds a “Create New Text File” option to the desktop context menu.
Result: John’s right-click menus are now lean and packed with tools he actually uses daily, saving him seconds that add up to minutes throughout his workday.
Scenario 2: The Photographer’s Workflow Enhancer
Sarah is a hobbyist photographer who uses Adobe Photoshop and Lightroom. She often needs to convert RAW files to JPEGs or batch rename photos.
Sarah’s Tweaks:
- Removes duplicate “Open With” entries from media players she doesn’t use.
- Adds “Open in Photoshop” for image files to directly edit them.
- She investigated if her photo editing suite offered a command-line tool for batch conversion and added a custom shortcut for it.
Result: Sarah can now right-click on a photo and immediately open it in her preferred editor or initiate a batch process, streamlining her workflow.
Scenario 3: The Home User’s Cleanup
David is not a tech expert and just wants his computer to be easy to use. His context menu has accumulated options from various utilities and free software over the years.
David’s Tweaks:
- Uses Easy Context Menu to easily uncheck all unwanted program entries, focusing on core Windows functions.
- Adds “Copy as Path” to help him when he needs to provide file locations to tech support.
- Ensures “Send To > Compressed (zipped) folder” is easily accessible.
Result: David’s context menu is now cleaner, less confusing, and has one or two genuinely useful additions without needing to understand advanced technical details.
Frequently Asked Questions About Context Menu Editors
Q1: Is it safe to use a context menu editor?
Yes, generally it is safe, especially if you download editors from reputable official websites and stick to making simple changes or removing entries you don’t recognize. Always create a System Restore point before you start, just in case.
Q2: Can I add any program to my context menu?
Most editors allow you to add shortcuts to any .exe file. Some advanced editors let you pass arguments (like `%1` for the selected file) to the program, making them more functional.
Q3: Will this affect my computer’s performance?
A cleaner context menu can actually improve performance slightly by reducing the time Windows takes to draw the menu. Having too many items, or items that trigger complex actions, can slow it down. So, decluttering is good!
Q4: What’s the difference between editing the Registry and using an editor program?
Editing the Registry directly means you’re manually changing Windows’ core settings. It’s powerful but risky (easy to make mistakes that break things). An editor program provides a user-friendly interface to make those same changes safely, with less risk of errors.
Q5: Do these editors work for Windows 11?
Many do, but Windows 11 has a different default context menu. Look for editors that specifically state Windows 11 compatibility or offer options to revert to the classic context menu if that’s your preference.
Q6: What if I accidentally remove something important?
Don’t worry! You can usually re-add items using the editor. If you can’t remember what you removed or if something is acting strange, using the System Restore point you created is the quickest way to get back to a working state.
Conclusion: Take Control of Your Context Menu!
You’ve now learned how to transform your Windows 10 context menu from a cluttered mess into a streamlined, efficient tool. By using a context menu editor, you can easily remove unwanted options and add shortcuts that truly benefit your daily computing. This simple tweak can make a noticeable difference in how smoothly you navigate your PC, saving you time and reducing frustration.
Remember, managing your PC doesn’t have to be intimidating. With the right tools and a little bit of guidance, you can customize your Windows experience to perfectly suit your needs. Feel confident in making these kinds of adjustments – it’s your computer, and you deserve to have it working exactly how you want it. Keep exploring, keep tweaking, and enjoy a more productive, stress-free Windows environment!